Preface
Pre-history of Xataface
Xataface was first released in 2005. I had just been hired as a web services developer in the Faculty of Applied Sciences at Simon Fraser University, and I was inheriting resposibility for the maintenance and development of a relatively large content management system that had been built in-house, originally in PERL, and later ported to PHP.
This system, named "Group Content Management System", or GCMS for short, was used to manage information about all of the research groups in the faculty. It included profiles for faculty members, grad students, labs, research groups, publications and projects. It included administrative back-ends for administrators to update all of these profiles, and it served as a platform to publish web sites for faculty members and research groups.
The MySQL database, on which it was built, included dozens of tables, and a fairly complex set of relationships. The PHP code for the application suffered from too many hands in the kitchen, with no central API to manage business rules. Each form included custom PHP code and SQL commands to handle layout and validation. It was not "a pleasure" to work on.
At my previous job, in the Faculty of Education, I had built many similar systems, so I had reached the point where I was a little bored of the tedium involved in creating CRUD applications, as they were known.
|
Note
|
CRUD stands for "Create Read Update Delete", and it refers to a class of applications where the primary functions involve creating, reading, updating, and deleting records in a database. |
In the Faculty of Education we had used FileMaker extensively for our in-house databases. It made the creation and maintenance of complex databases remarkably simple, and it provided an instant administrative user interface that was friendly for the clerical staff to maintain the database content themselves. I always felt limited by FileMaker though.
As long as you’re playing inside FileMaker’s box, it was great. But if we wanted to integrate these databases into our web site, things got tricky. At the time, you needed FileMaker server, and the web connector, which both carried expensive licenses. We did have these products in the Faculty, and we did use the web connector to publish a few databases on the web, but it wasn’t performant and you couldn’t just use SQL to query the database.
We used FX.php for interacting with the FileMaker database, which provided quite a nice abstraction layer, but we couldn’t benefit from FileMaker’s UI creation tools at all. We were building our UIs from scratch, essentially, writing our own UI, validation, and queries. In fact, I created a predecessor to Xataface that was built on FX.php, which generated the UI automatically using some config files, much the way that we do in Xataface. This worked, pretty well, but, the reliance on Filemaker made our solutions less portable and slower than I would have liked. At this point, we weren’t benefiting from FileMaker’s UI development strengths at all since I was building the UI entirely in PHP, so I figured, why not try to do the same thing with a free, fast, ubiquitous database like MySQL.
And so, Xataface was born
|
Note
|
Originally Xataface was called "Dataface", but a Texas computer company named "Dataface" took exception to our name, and sent me a cease and desist letter. So I changed the name to Xataface |
The Vision
Most applications that I was building for the faculty had two parts:
-
The "public" front-end, which was usually integrated into a public website. This might be the faculty profiles section of the website where faculty members' publications are displayed. These pages would be generated using PHP, and pulling data directly from the database.
-
The administrative back-end. This is the interface that allows the clerical staff to update the faculty profiles in the database. Some applications will have a single user managing all of the content in the database, while others will allow multiple users to update different content.
The public front-end would usually be created using HTML, CSS, and standard PHP, to fetch data from the database and display it. Quite often, the website would already have a template, so it would just be a matter of fetching data from the database and rendering it inside the site’s template. For this portion of the application development, I was happy with the state of existing tools - i.e. vanilla PHP and MySQL to get the job done. Each project was sufficiently different as to not benefit from a standardized framework.
For the administrative back-end, however, the work was tedious. You needed to write forms to add new, edit, view, and delete records from each table. The user interface needed to be friendly for non-technical users, since it would be used by regular folks - secretaries, faculty members, receptionists, etc.. You couldn’t just set up a database administration app like PHPMyAdmin.
It seemed to me that, for this type of application, the database schema already included all of the information needed to generate the user interface. You could look at a table and see exactly what the form would need to look like for editing records on it. VARCHAR fields should use a text field, TEXT fields should use a textarea, DATE fields should use a date or calendar widget etc… If we needed to provide additional configuration, such as explicitly choosing a different widget, or adding validation rules, the developer could create config files using a logical naming convention.
The first goal with Xataface was to see how much of the administrative back-end requirements could be achieved using only the database schema. No configuration files, or custom PHP.
Of course, the first goal cannot be achieved 100%, so, the second goal of Xataface was, to the extent that the first goal cannot be achieved, how much of the administrative back-end requirements could be achieved using only the database schema, and some simple, human-friendly configuration settings.
Unfortunately, the second goal cannot usually be achieved 100%, so, the third goal of Xataface was, to the extent that the second goal cannot be achieved, make sure that the administrative back-end requirements can be fulfilled using as little custom PHP as possible.
The third goal can, in general, always be achieved.
After each application I develop using Xataface, I do a post-mortem to identify:
-
Features that were implemented PHP which can be achieved using configuration directives. I.e. moving features from the 3rd goal, into the 2nd goal. For example, initially, validation had to be handled using a PHP function, but eventually I added configuration directives for validation such as
validators:requiredandvalidators:lettersonly. -
Features that were implemented using configuration directives which can be achieved using heuristics using only the database schema. I.e. moving features from the 2nd goal, into the 1st goal. For example, initially fields marked
NON NULLin the database can default to use thevalidators:requiredoption, so that the user is forced to provide input. -
Features that were implemented in PHP which could possibly be packaged as a reusable module. I.e. reducing the complexity of PHP required to achieve the third goal.
The ultimate goal is to move everything into the first goal, but this will likely never fully occur as there will always be some features that can’t be automatically derived from the database schema - though with the advent of machine learning, I suppose anything is possible.
|
Note
|
NO CODE GENERATION I decided early on, that I didn’t want to use code generation. Most other CRUD frameworks I had experienced used code generation to generate a basic app which would then be customized by the developer. Code-generation sounds great at first, but it quickly becomes unmaintainable. The first app requirements are almost never the final requirements. If you generate PHP code for an app based on the database schema, and then you need to add a column or two, you’ll need to regenerate the code - which will cause you to lose any modifications you made in the mean time. Xataface, instead uses conventions and configuration. If you add a field to the database, you don’t need to regenerate anything. Xataface will automatically include that field in the app from then on. |
The Evolution of Xataface
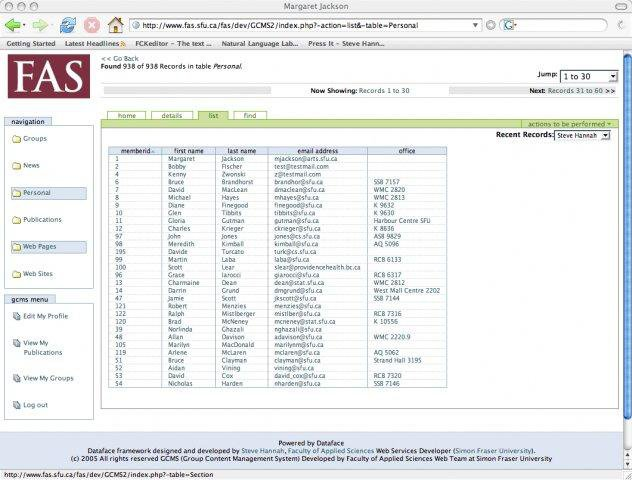
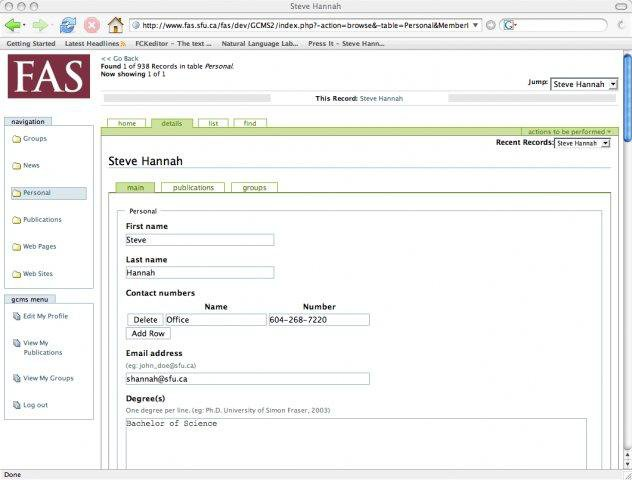
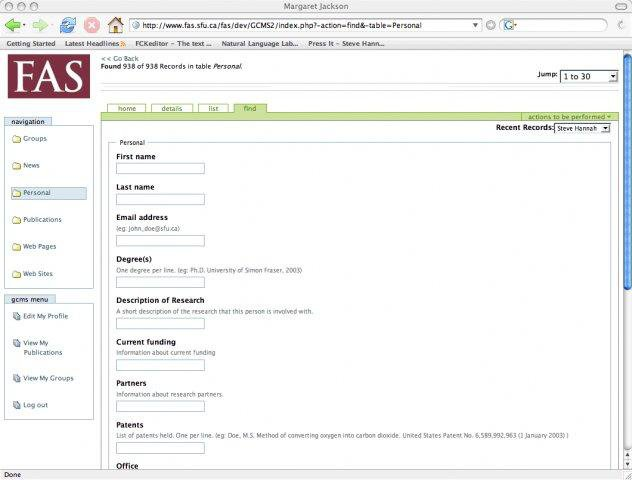
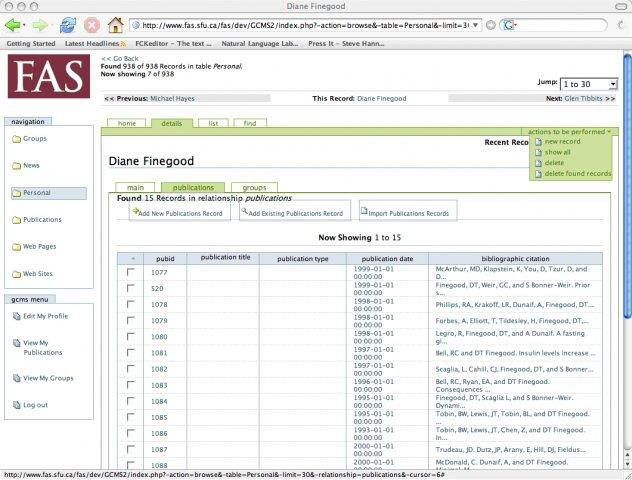
The first project that Xataface was applied to was the Group content management system (GCMS) of the Faculty of Applied Sciences. This was the system that was used to manage the websites for faculty members, research groups, and publications. The database was already built, and there was an existing administrative back-end that was, in my opinion, hard to work with. I replaced this administrative back-end entirely using Xataface. The application itself (not counting the code inside Xataface), contained almost no PHP code, and handful of configuration files. The underlying database was left untouched. The result was an application that was orders of magnitude easier to maintain, and, at the same time yielded a better user experience.
After unrolling this "rewrite" of GCMS, I decided to release Xataface (then Dataface) to the world as an open source project. I created a project on SourceForge, set up a website for it, wrote a "Getting Started" tutorial, and then returned to my day job, developing web applications or the faculty.
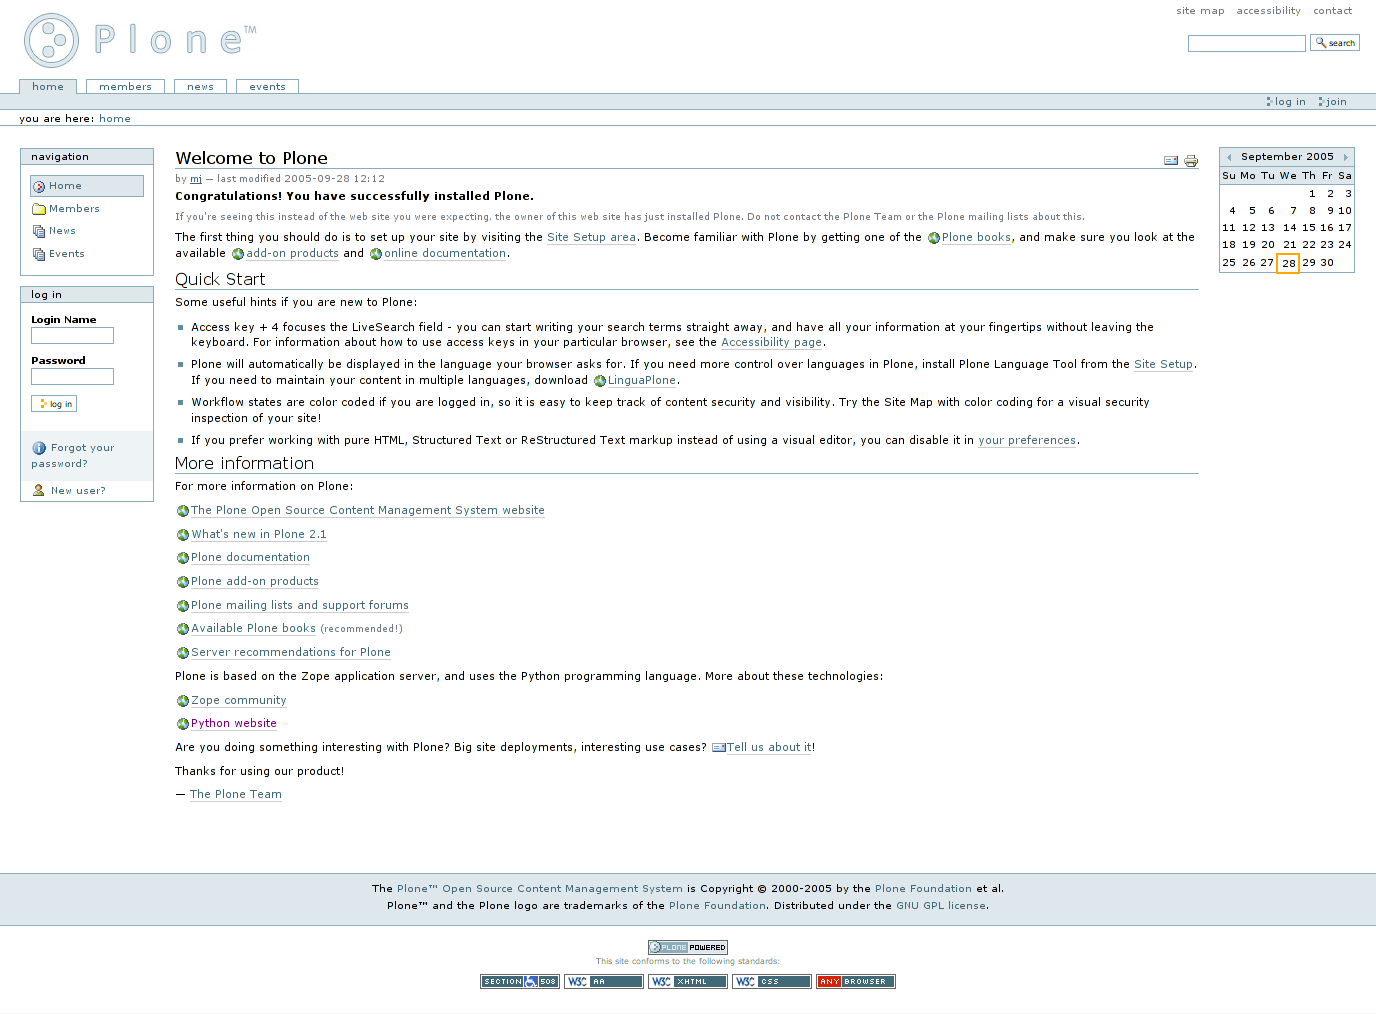
Influence of Plone on Xataface
At the time that I was developing the first version of Dataface, we were using the Plone content management system for the faculty’s website. If you’re familiar with Plone (circa 2005) you’ll recognize the tabs, lists, and navigation menus from the GCMS screenshots. That’s because I used the plone stylesheet as a basis for Xataface’s styles. I really liked the way Plone looked, and the stylesheet had many of the UI elements that I needed for Xataface. I needed tabs - Plone had nice looking tabs. I needed tabular lists. Plone has nice looking sortable lists. I needed navigation menus. Etc… Some of these elements have persisted to present day. Xataface 2.0 included a new default theme, "g2", that introduced a totally new stylesheet, but developers could still "opt out" of the "g2" theme and use the original plone theme. Xataface 3.0 finally eliminates the original theme (nearly) entirely, but if you dig you can likely still find some elements of that original Plone theme.
|
Note
|
From Wikipedia: Plone is a free and open source content management system built on top of the Zope application server. Plone is positioned as an "Enterprise CMS" and is commonly used for intranets and as part of the web presence of large organizations. High-profile public sector users include the U.S. Federal Bureau of Investigation, Brazilian Government, United Nations, City of Bern (Switzerland), New South Wales Government (Australia), and European Environment Agency.[2] Plone’s proponents cite its security track record[3] and its accessibility[4] as reasons to choose Plone. |
Aside from the stylesheet, Plone also inspired some other aspects of Xataface’s design. In particular, Xataface’s use of actions (e.g. the actions.ini file) to inject menus, buttons, and functionality into the UI are directly pulled from Plone.
Influence of FileMaker on Xataface
I’ve already discussed the fact that FileMaker was a key inspiration for Xataface. I liked the way that FileMaker allowed mere mortals to both create and manage relatively complex databases. It was impressive that an office assistant, with no programming skills whatsoever, could build a fully-functional database application with a nice user interface in a few hours. To do the same thing with PHP and MySQL would take a software developer weeks, and it likely still would have been missing features that the FileMaker app provides out of the box.
The Xataface "Details", "Find", and "List" tabs were an answer to FileMaker’s "Details", "List" and "Find" modes.
The one mode that Xataface didn’t provide an answer for is the "Layout" mode, which is the mode of FileMaker that allows users to design their own forms using a drag and drop palette of widgets and a canvas. Xataface, instead, just used HTML for its views.
One day, I’d like to add such a tool to Xataface, but, frankly, it’s difficult to do well, and time is almost always better spent extending Xataface’s other features.
Outgrowing the Mould
At the beginning, Xataface was just intended to be an open source alternative to FileMaker. It didn’t take long, however to start growing in its own direction. Today it has become a full-featured platform on which arbitrary data-driven web applications can be built.
Early on, I added support for modules, custom actions, and pluggable authentication. These foundational elements enabled grown into application types not originally envisioned.
Xataface was being downloaded thousands of times per week from SourceForge, and developers were contacting about a diverse range of applications that they were building. Over the next few years, I used Xataface as the foundation for many side projects including:
-
An auction application, WebAuction, which has hosted hundreds of online auctions for non-profit organizations ranging from the United Way, to the SFU Plant Sale.
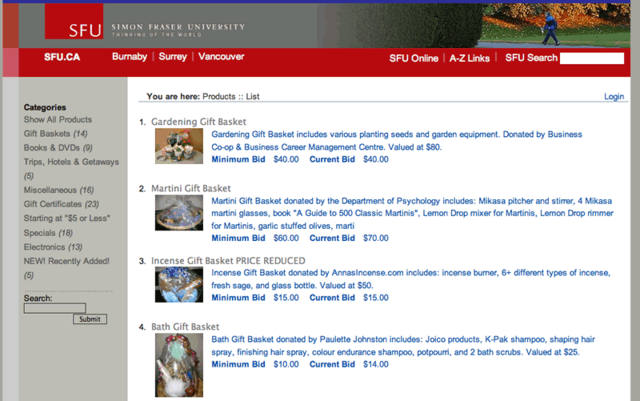 Figure 6. WebAuction used to host the annual SFU platsale was written with Xataface.
 -
A church library application, LibrarianDB, for managing the books in a church library.
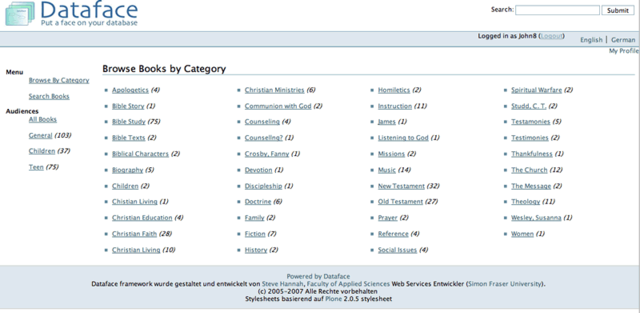 Figure 7. LibrarianDB, developed with Xataface, was developed to help manage books in a church library
 -
A general content management system for a website ("Little Content Management System" or LCMS).
-
A registration system for people to apply for sessional instructor, and TA positions in the faculty.
-
Survey Builder, an application for creating and hosting surveys online.
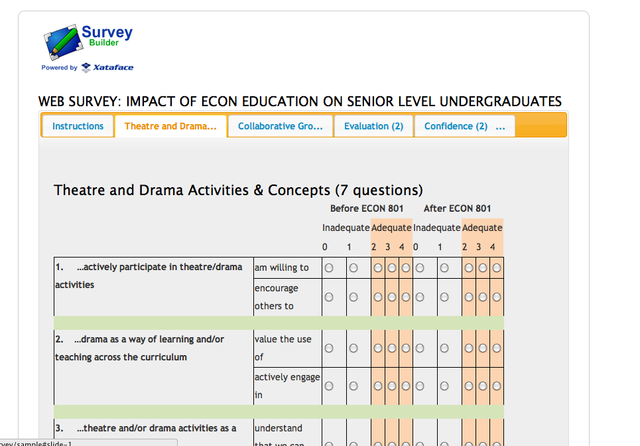 Figure 8. A survey built and hosted by SurveyBuilder.
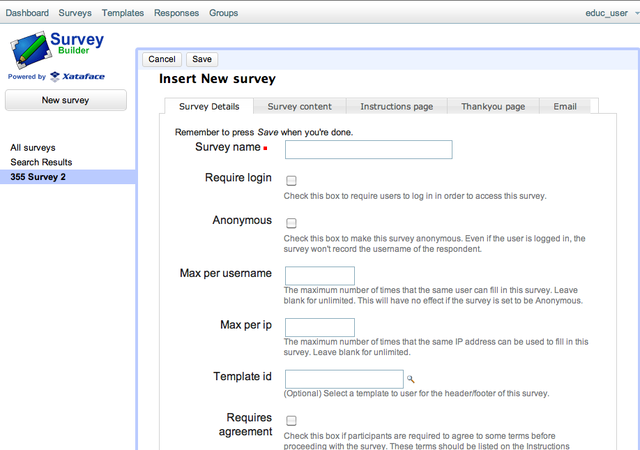 Figure 9. Administrative back-end for SurveyBuilder. This uses the g2 theme.
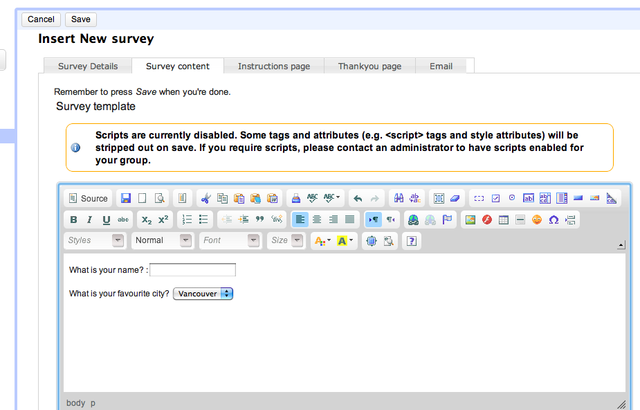 Figure 10. Editing the survey content for SurveyBuilder in the Xataface back-end. This used the CKeditor module for WYSIWYG HTML editing.
Over the years, Xataface has added countless features that improve the developer and user experience alike. I have enjoyed building it, and I sincerely hope that you enjoy using it to build your own creations.
Getting Started
This section provides the tools to get you bootstrapped in Xataface. In general, you can read the sections of this book in any order, but I recommend you at least start with this section as it will give you the vocabulary and experience to understand the content in all other sections.
Introduction
Xataface is a simple framework for building data-driven web applications in PHP and MySQL. This section introduces some of the concepts and applications of Dataface. To fully understand what Xataface is, we must first define a few key terms:
Framework - A set of software routines that provide a foundation structure for an application. Frameworks take the tedium out of writing an application from scratch. (From Answers.com)
Data-driven design - Designing an application around the data that it will store.
Xataface is a Framework in the sense that it is a set of classes and libraries that take the tedium out of writing web applications. It provides a simple web interface to a MySQL database enabling users to update, delete, and find data in the underlying database. The interface is targeted at secretaries and end-users as opposed to database administrators.
Xataface enables data-driven design because it allows developers to develop web sites by first designing the database that will be used to store the data on the website, and then design the pages used to display the data. The developer can focus on the data because he or she does not have to worry about having to build forms to update the data. If the requirements of the application change, the developer can simply add a field to the database table and all associated web forms will be updated automatically (because they are all dynamically generated using the database schema).
Requirements
-
PHP >= 4.3 (for Xataface 1.1.x and lower); PHP >= 5 for Xataface 1.2 and higher
-
MySQL >= 3.2.3 (Some features require 4.1 or higher).
License
-
GPLv2
Development Procedures
Identify the data that will need to be stored for a web site.
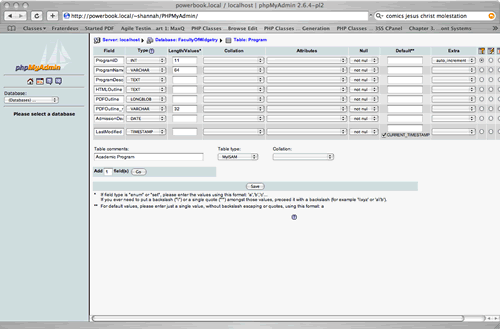
Design the database using your favorite database administration program (e.g., PHPMyAdmin)
Tell Xataface some DB connection info, and voila! You have an application:
Why Use Xataface?
Some simple examples similar to those that are frequently encountered by web developers, and how dataface can be used to acheive a solution.
As a web services developer would frequently getting requests to build websites that were manageable by the site owner. Most of these requests also specify certain types of content that must be stored on the website, and much of this content needs to be n-ary (i.e., there will be multiple instances of each type of content). Let me give you an example.
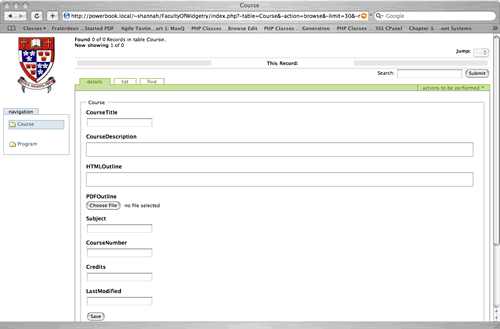
Example 1: Website for Faculty of Widgetry
The Faculty of Widgetry needs a website to publish information about its undergraduate programs. It is important for them to be able to publish admission requirements, and program overviews for each program. It is also important to have course outlines and timetables for each course. The Faculty of Widgetry has 12 undergraduate programs and over 100 courses offered.
Solution 1: Static HTML
To build this web site using only static HTML pages using Dreamweaver or some other HTML editor would require at least 112 pages to be created (one for each course and program). However, once we recognize that there are only 2 types of pages required (one for courses and one for programs), we can reduce the task down to creating 2 templates and filling in the main content for each program and course individually. Most HTML editors have some templating ability so you can make changes to the template and have the changes propogated to all pages that use that template with the click of a button.
This works great, but courses are added frequently, and outlines are changed. Do you really want to receive requests to update all of these pages every time there are changes to make? (If your answer is 'yes', then you probably won’t be interested in reading the rest of this tutorial). Whether the Dean of the faculty knows it or not, it is very important for the program assistants to be able to update these web pages on their own. To acheive these goals you can:
-
Install Dreamweaver on the Program Assistants' computers, teach them how to use it, and allow them to perform updates.
-
Install Contribute, which is a scaled down version of Dreamweaver to make it easier for the Program Assistants to edit the content.
-
Use another solution that is equivalent to one of the above 2 solutions.
Installing Dreamweaver for each Program Assistant is a little overkill, and since it has the ability to do much more than just update content. In addition, Dreamweaver is really a developer’s tool - not a secretary’s tool, so it can be difficult to learn at first. The best reason NOT to install Dreamweaver on the Program Assistant’s computer, however, is that it enables him/her to muck things up by accident (believe me, I has happened to me more times than I care to count).
Admittedly, Contribute is a viable option as it controls access to only certain portions of web pages to be edited, and it is targetted at secretaries (not developers) so it is easier to use. In fact, given the requirements for this web site (as stated above), this is a perfectly good solution. However you better hope that none of the following requirements are added:
-
Each program web page should contain an up-to-date list of all of the courses required for the program, along with a link to the course outline for that course.
-
Course outlines should be available in PDF format as well as HTML format.
-
An index page showing all of the courses available should be added. This page must allow courses to be organized by program, course subject, or course number.
-
Any other requirement that would have information formatted in more than one way.
If any of these requirements are likely to be added (EVER) then you would be well-advised to look into solutions that use a database back-end.
Solution 2: Use a Content Management System (CMS)
There are hundreds of content management systems available that will allow you to store and update content through the web (TTW). Some of them even have an assortment of add-ons that will allow you to store more specific types of information. Some good CMS’s include Plone, Drupal, and Xoops. Suppose we want to develop the Faculty of Widgetry website using one of these CMS’s. Any good CMS will allow you to create and edit HTML documents easily (without having to write any custom products). However, it is often the case that our documents require the content to be structured. For example, each program has some common data associated with it: Program Name, Admission Deadline, Program Description, Outline, Courses, etc… If we want to properly separate data from presentation, we would need to build a special content-type to store our programs. Most CMS’s allow you to develop custom content-types using the underlying programming language and an API (Application Programming Interface). Some API’s are easier to use than others and some are documented better than others. The common element is that each has its own proprietary interface for writing these add-ons.
If you are using a CMS and you are proficient in the creation of add-on content-types, then you will be able to build the Faculty of Widgetry website without great difficulty. However there are a number of reasons why you may choose NOT to use a CMS:
-
Steep learning curve: Depending on the CMS it can be very time consuming and difficult to learn how to use and modify the CMS to suit you purposes.
-
It is over-kill: Most CMS’s are filled with features and modules that you will never need. In fact it can even be a pain to turn them off if you don’t want them.
-
You can get tied into the CMS: When you are using a CMS, you will start developing for the CMS. With all of your content in the CMS it may be difficult to migrate to a different solution later on. (The truth of this statement will vary for different CMS’s). Choose your CMS carefully.
Solution 3: Use an existing Application
OK, OK, let’s not get too carried away with trying to develop the website until we have checked the market to see if someone else has already done it better. Maybe there is already a PHP application that makes websites for Faculties easy. I mean, I can’t be the first person that needed to build a website for a Faculty. In fact if you do a search or go to Hotscripts.com, you will probably find a handful of applications or scripts that almost do what you need. If you’re lucky, maybe you can find an application that does exactly what you need (but frankly, I’ve never been that lucky). If you find one, maybe it’s worth taking it for a test drive. But beware. Using a system that almost does what you need but is difficult to modify to your needs can be worse than building it by scratch. Make sure that you are able to modify the application to suit your needs exactly.
Solution 4: Use PHP and MySQL
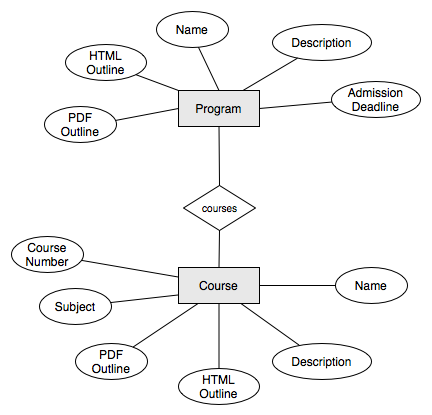
If all we want to do is separate the data from the presentation and allow the Program Assistants to update data on the website, why not just design a MySQL database with the appropriate tables and fields to store the required data. In our case we will need 2 tables:
Programs
    Fields:
        ProgramID : int
        ProgramName : varchar
        ProgramDescription: text
        AdmissionDeadline: date
        Outline_HTML : text
        Outline_PDF : blob
Courses
    Fields:
        CourseID : int
        CourseSubject : varchar
        CourseTitle : varchar
        CourseNumber : int
        ProgramID : int
        CourseDescription : text
        Outline_HTML : text
        Outline_PDF : blob
Now it’s easy to create a few web pages that extract data from the database and displays it as HTML. In fact if there is an existing page template that you can use for the header and footer, you can develop the entire Faculty website in under an hour (you just have to create 3 pages).
Question: How will the Program Assistants update the information in the database?
Answer: OK, let’s assume that you’re not going to teach them SQL and that a DB Admin tool will also be too difficult to learn. Then you have to create HTML forms to update records in the database.
Ouch! What was easy just became hard. Making HTML forms is a real pain, because you have to validate the input, deal with file uploads, and also make sure that everything is stored to the database OK without losing any information. Such a basic task, but it can be very difficult. This is when it is time to use Xataface.
Solution 5: Use Xataface
OK, this isn’t really its own solution. It is more like "Solution 4 Part II", because Xataface is intended to complement your custom application you built with solution 4, by providing an easy-to-use, configurable user interface that is targeted at secretaries and normal users (as opposed to database administrators). A Xataface application takes only seconds to set up and it will provide you with a full user interface for your users to edit information in the database.
Xataface Installation
Over the years I have developed several different installation mechanisms for Xataface. At the end of the day, installation only requires that you copy the xataface directory onto your web server. To update it, you simply replace that directory with the new version.
Creating an application with Xataface, however, involves more than just installing Xataface. You need to, at minimum create a config file with your database connection settings, and a 2-line PHP script (usually named "index.php") to serve as an entry point for your application.
And this all assumes that you already have a web server set up with PHP and MySQL, and that you’ve created a database for your application to use.
With version 3.0, Xataface now includes a command line (CLI) utilty to automate common tasks like creating new apps, generating delegate classes, enabling authentication, etc… This tutorial describes the installation and usage of this CLI script for creating and maintaining Xataface applications. If you would prefer to do things manually, you can skip to the "Manual Installation" section.
Prerequisites
Before you install Xataface, you should have a PHP and MySQL installed. I recommend XAMPP
Installation using the Xataface CLI
/bin/bash -c "$(curl -fsSL https://raw.githubusercontent.com/shannah/install-xataface/master/install.sh)"|
Note
|
This command will install Xataface at ~/xataface (i.e. inside your home directory).
|
The output of this script will look like:
$ /bin/bash -c "$(curl -fsSL https://raw.githubusercontent.com/shannah/install-xataface/master/install.sh)"
Cloning into 'xataface'...
remote: Enumerating objects: 180, done.
remote: Counting objects: 100% (180/180), done.
remote: Compressing objects: 100% (125/125), done.
remote: Total 12947 (delta 105), reused 110 (delta 50), pack-reused 12767
Receiving objects: 100% (12947/12947), 19.50 MiB | 11.95 MiB/s, done.
Resolving deltas: 100% (7814/7814), done.
Adding /Users/shannah/xataface/bin to your path in /Users/shannah/.bash_profile
This installs the xataface CLI script at ~/xataface/bin/xataface.
Creating your first Xataface app
Now that you have xataface installed, we can proceed to create our first app.
|
Important
|
Please ensure that you have both |
Open a command prompt and enter:
xataface create hello-worldThe output will be as follows:
$ xataface create hello-world
Create project at hello-world
Setting up scaffold at hello-world ...Done
Checking for PHPMyAdmin installation...Found.
Linking /Users/shannah/.xataface/phpmyadmin to hello-world/lib/phpmyadmin ...Done.
Copying xataface to hello-world/www/xataface ...Done.
Removing hello-world/www/xataface/site_skeleton ...Done.
Initializing database ...
Starting mysql server...Started Successfully
Bootstrapping database...Done
Stopping mysql server...Stopped
Done
At this point, you should have a new directory named "hello-world", which contains our application’s directory structure.
We can launch our app by "cd"ing into our new "hello-world" directory and running:
xataface startThis will fire up MySQL and Apache with document root at "www" and the database stored in "data"
The console output will be something like:
Starting apache on port 9090
No services added.
Starting MariaDB
PID FILE /Users/shannah/Vagrant/hello-world/bin/../data/Steves-MacBook-Pro-2.local.pid

Waiting for ready
kill -0 says wait some more...
.Waiting for ready
We are ready
 SUCCESS!
About to touch lock file /Users/shannah/Vagrant/hello-world/bin/../tmp/mysql
Exiting with return value 0
Did start mysql server
No services added.
Did start apache server
Now, point your web browser to "http://localhost:9090"
|
Tip
|
The default port for Apache to run on is 9090, but you can specify an alternate port via the Setting Apache’s port to 8079 in the conf.ini file.
|
You should see something like:
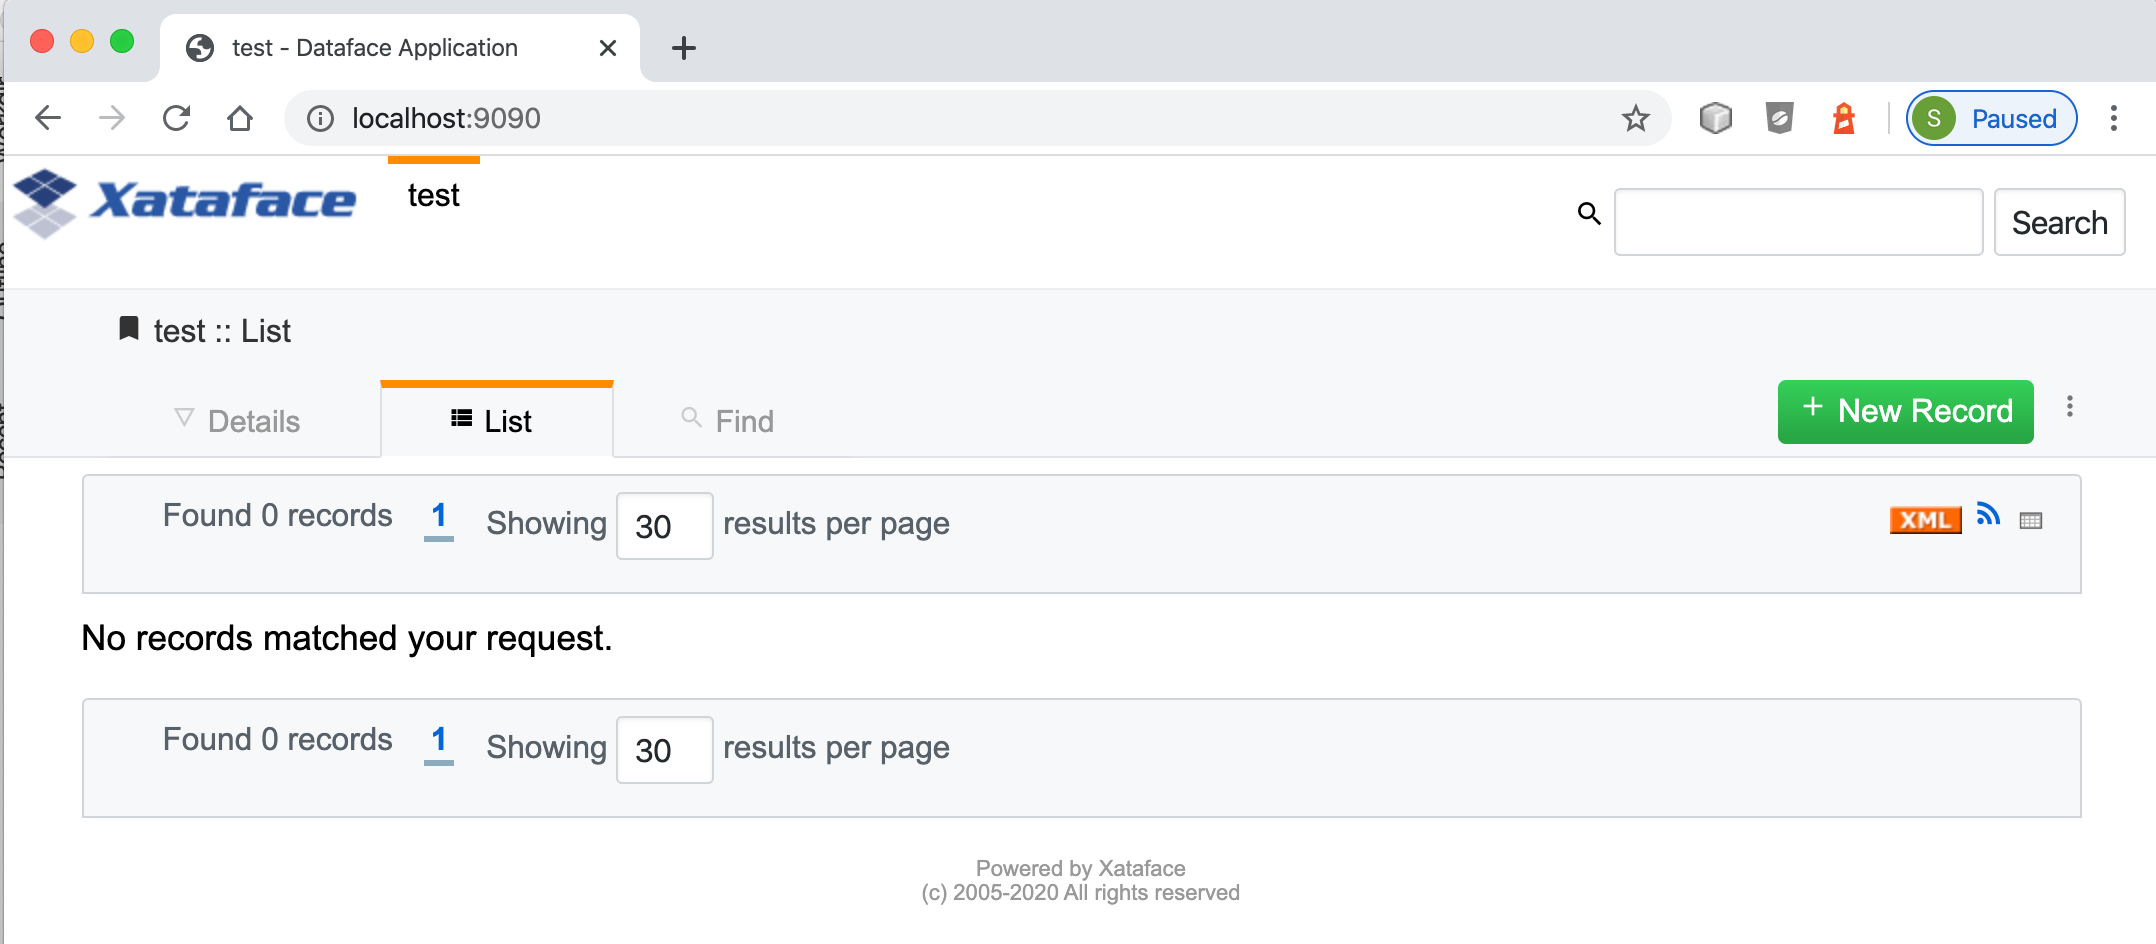
This database has only a single table named "test", which contains a single column named "test_field". You can add new record by clicking "New Record".
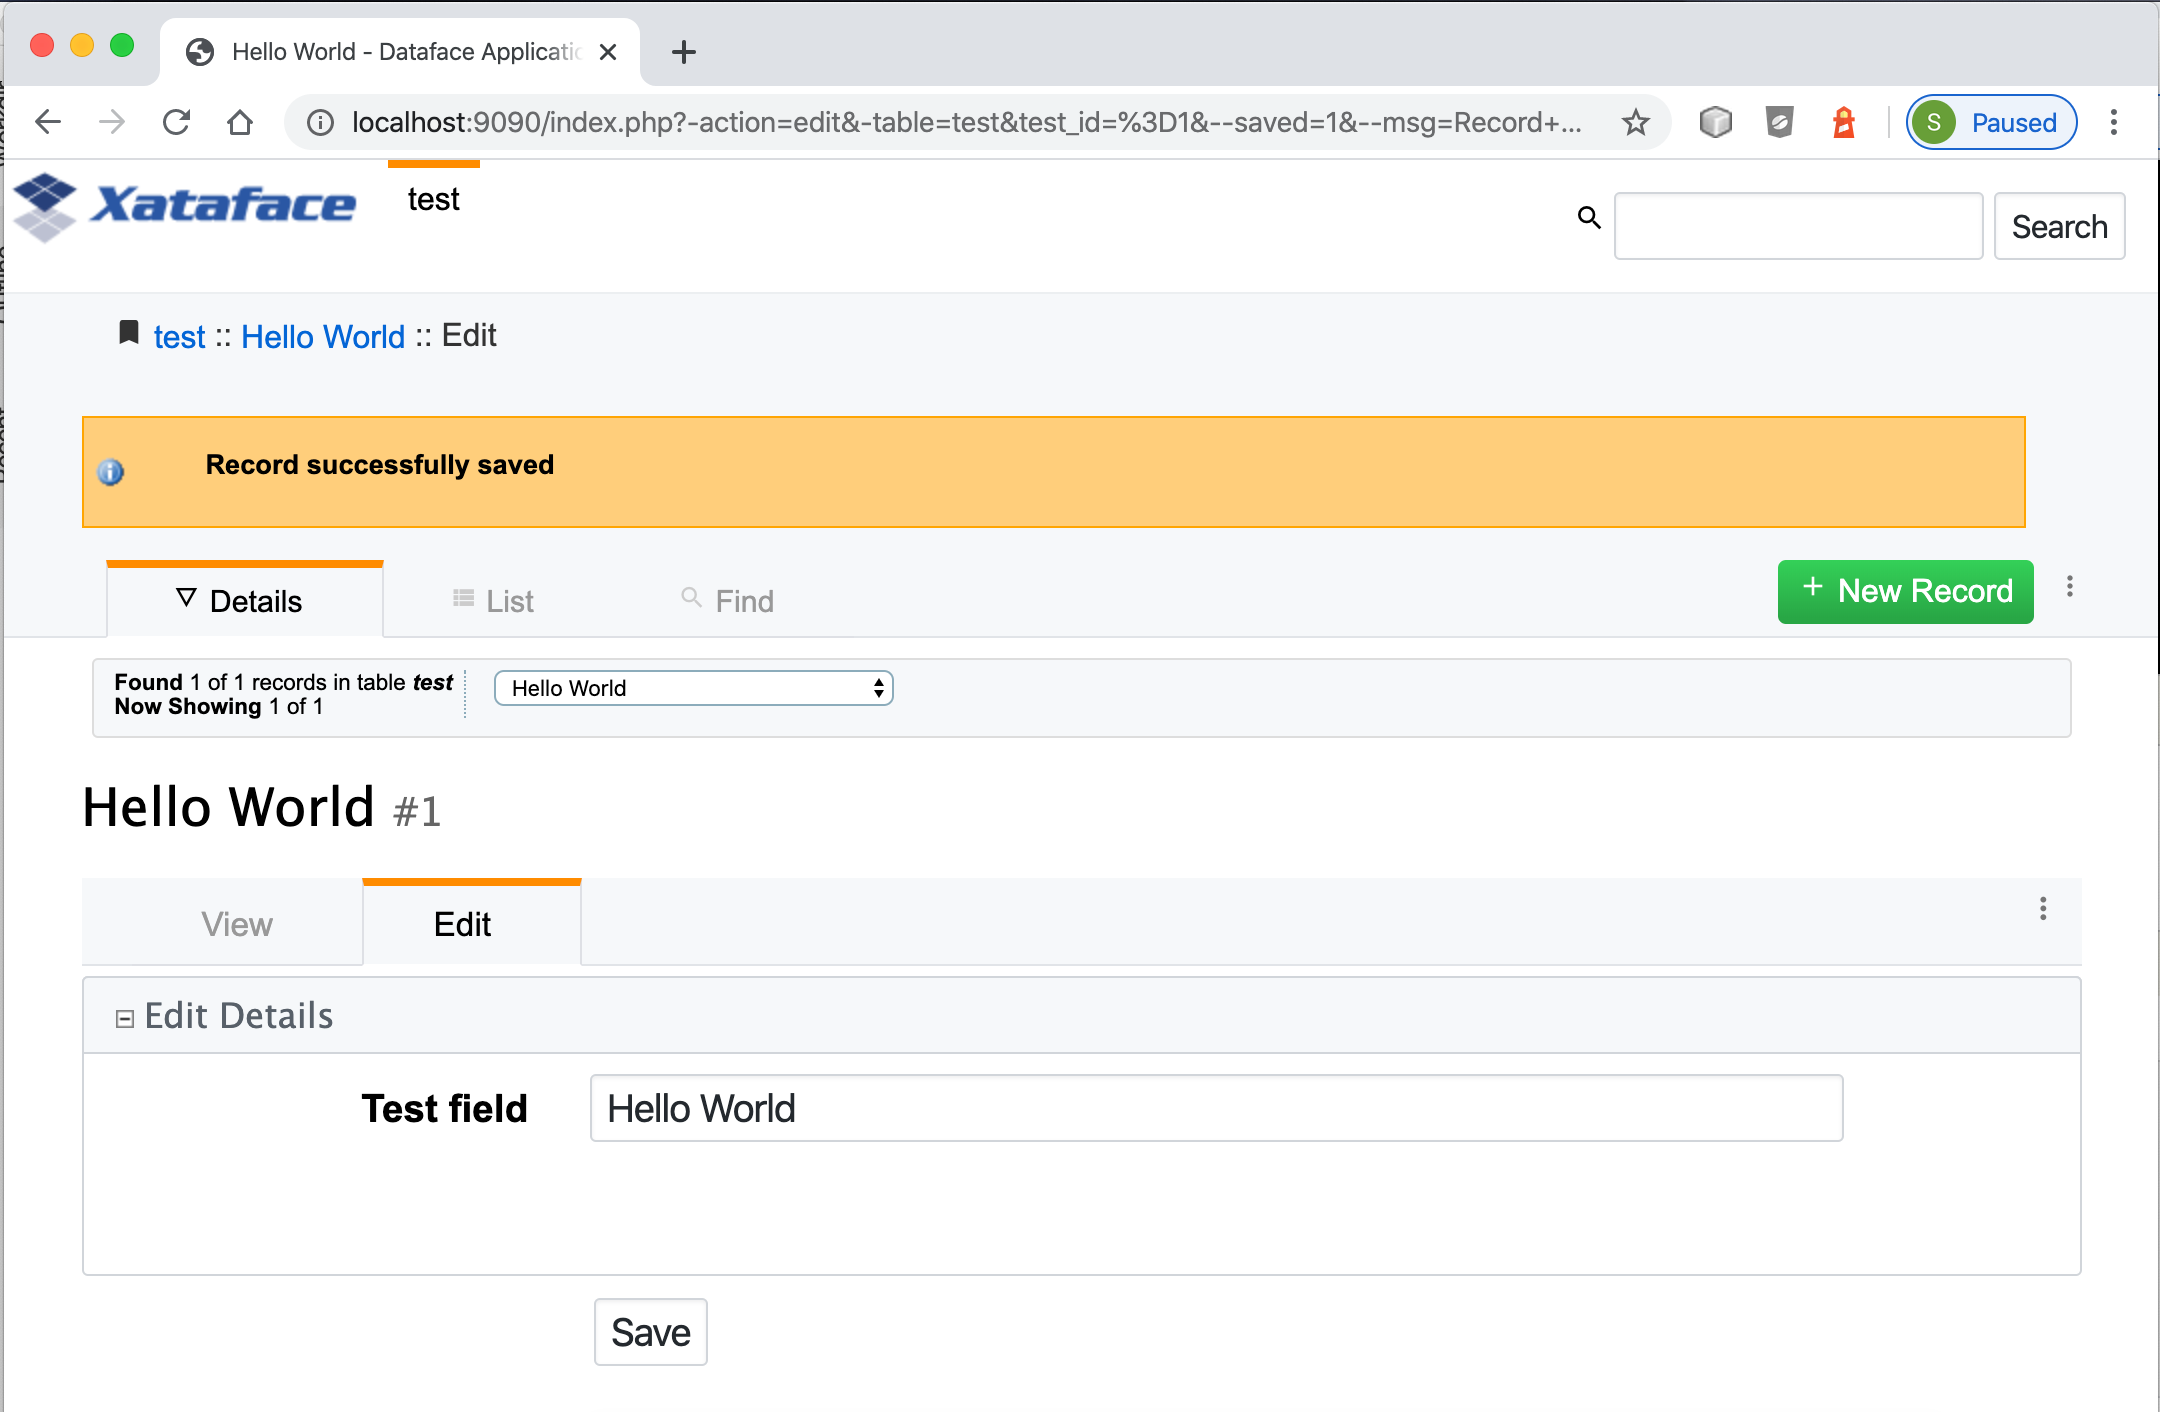
You’ll see a "new record" form:

Enter "Hello World" into the test field and press "Save".
You should see a message saying "Record successfully saved".
Creating A New Table
Xataface provides an installation of PHPMyAdmin to assist you in building a database for your application. You can access PHPMyAdmin at the URL: http://localhost:9090/phpmyadmin
Open a new browser tab with this URL, and you should see something like:
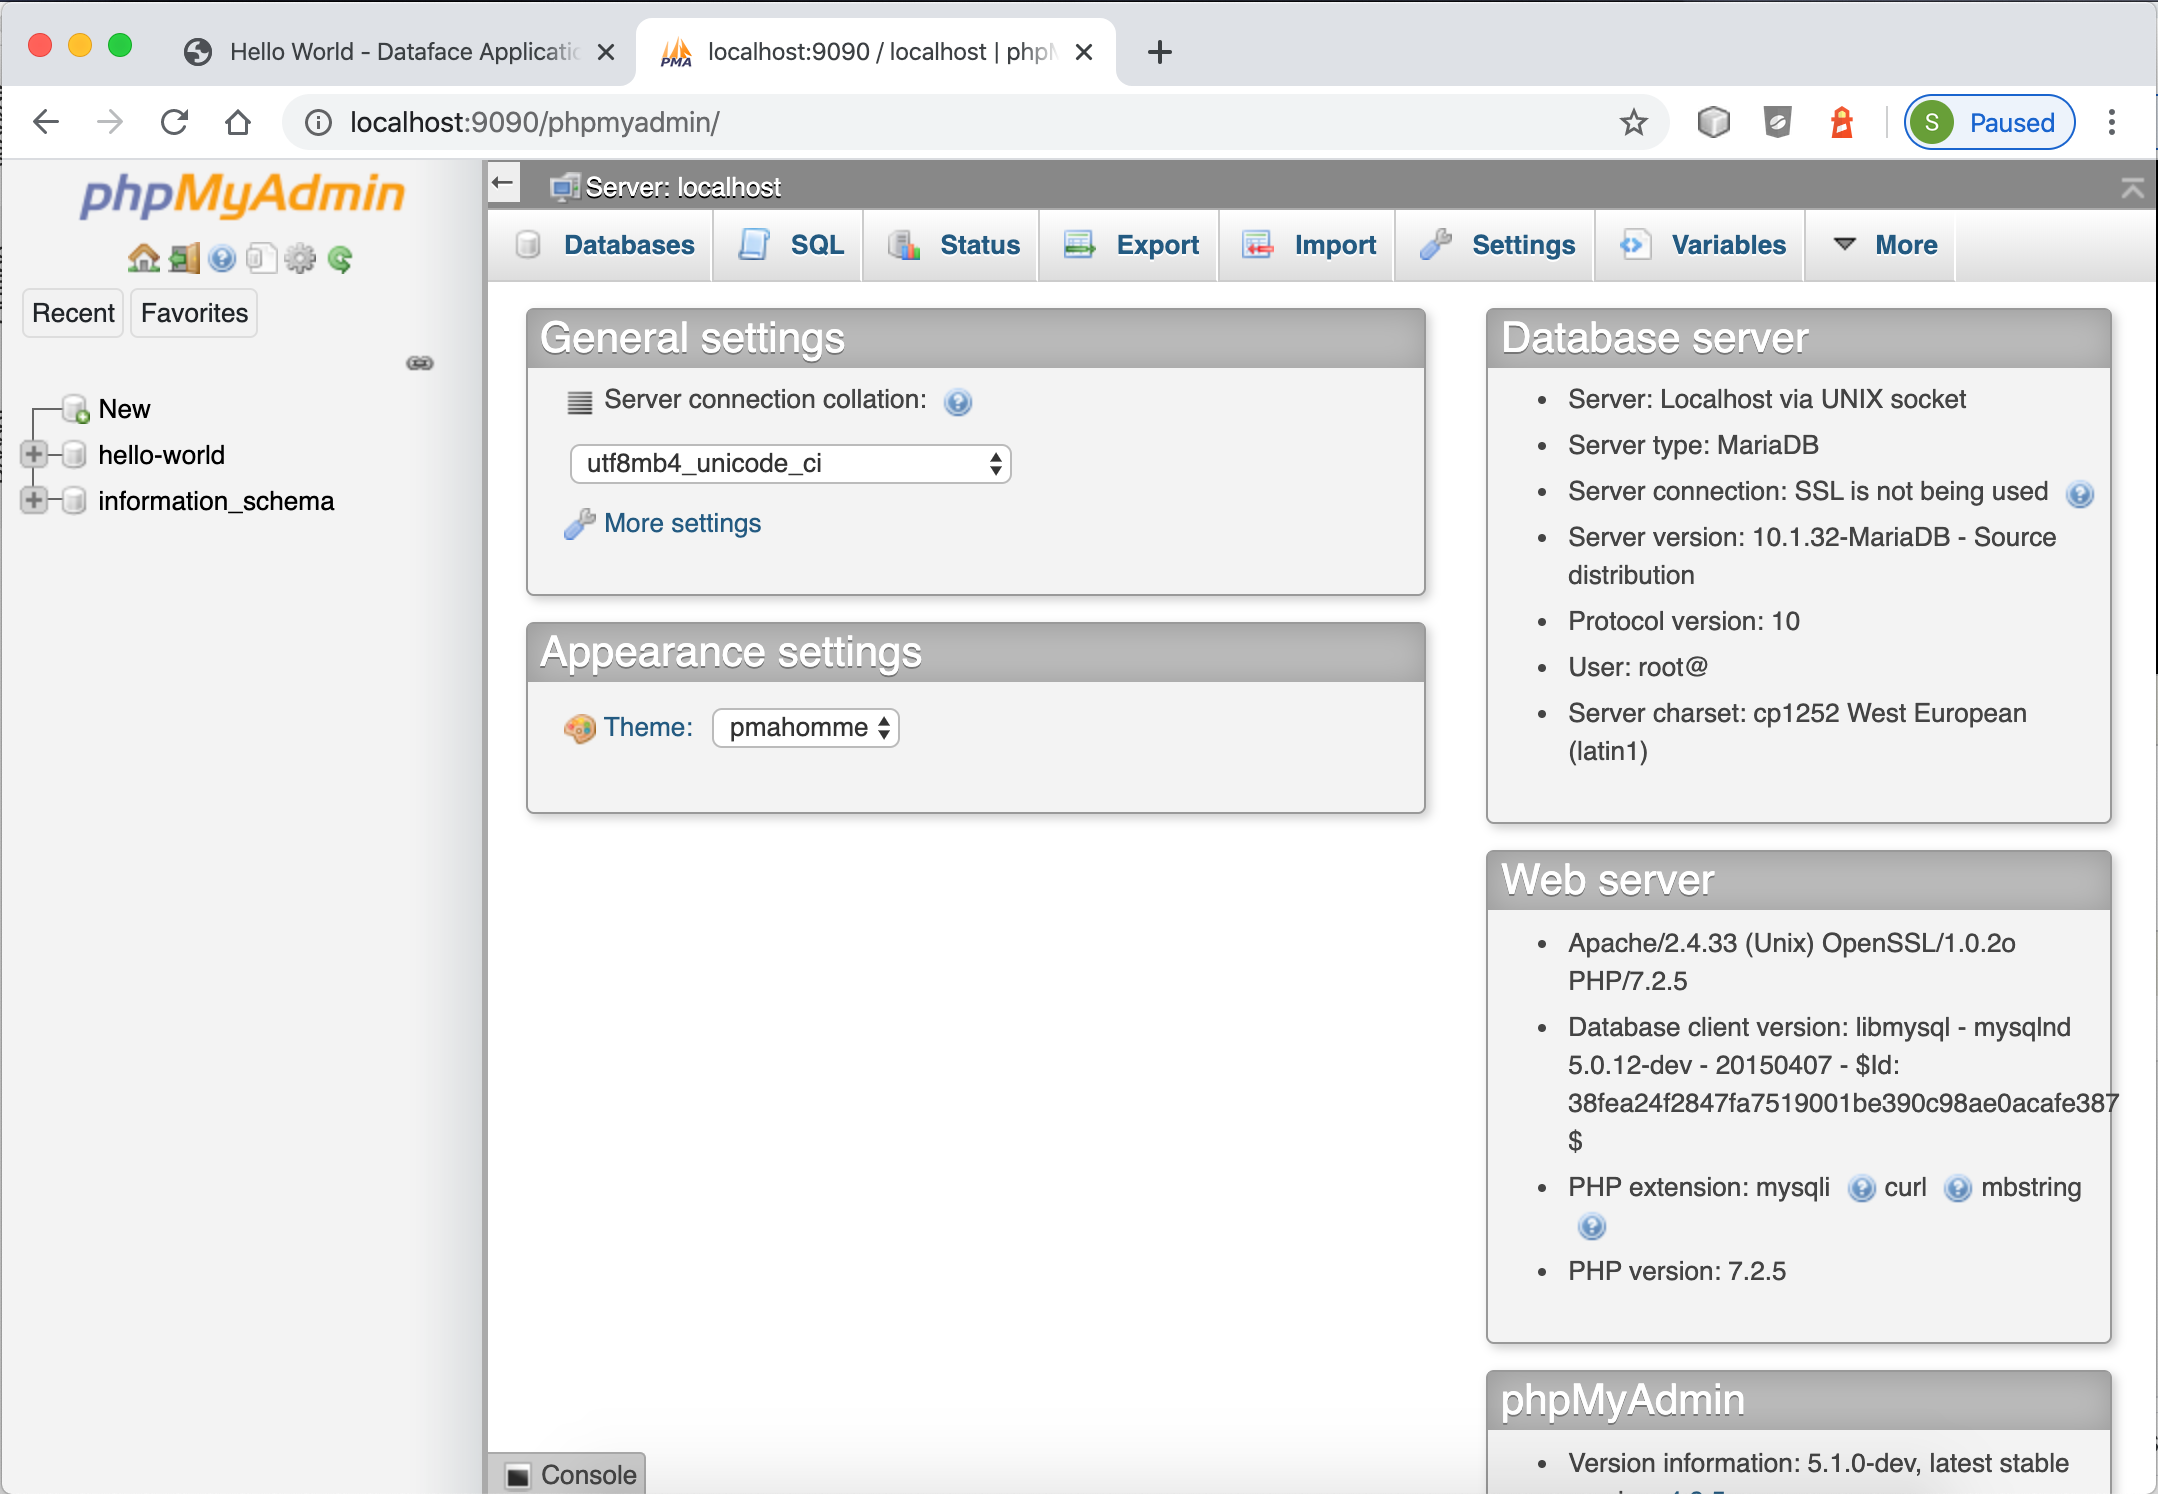
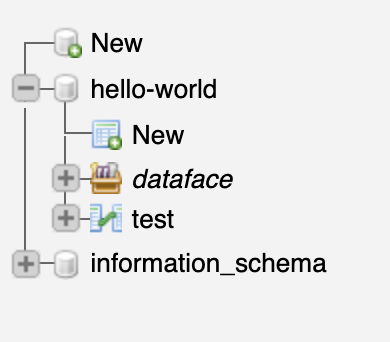
The database for this app is named "hello-world", and it is listed in the left-hand menu for PHPMyAdmin. Click on that node to expand, it, then select "New":
Let’s add a table called notes, by filling in the new table form as follows:
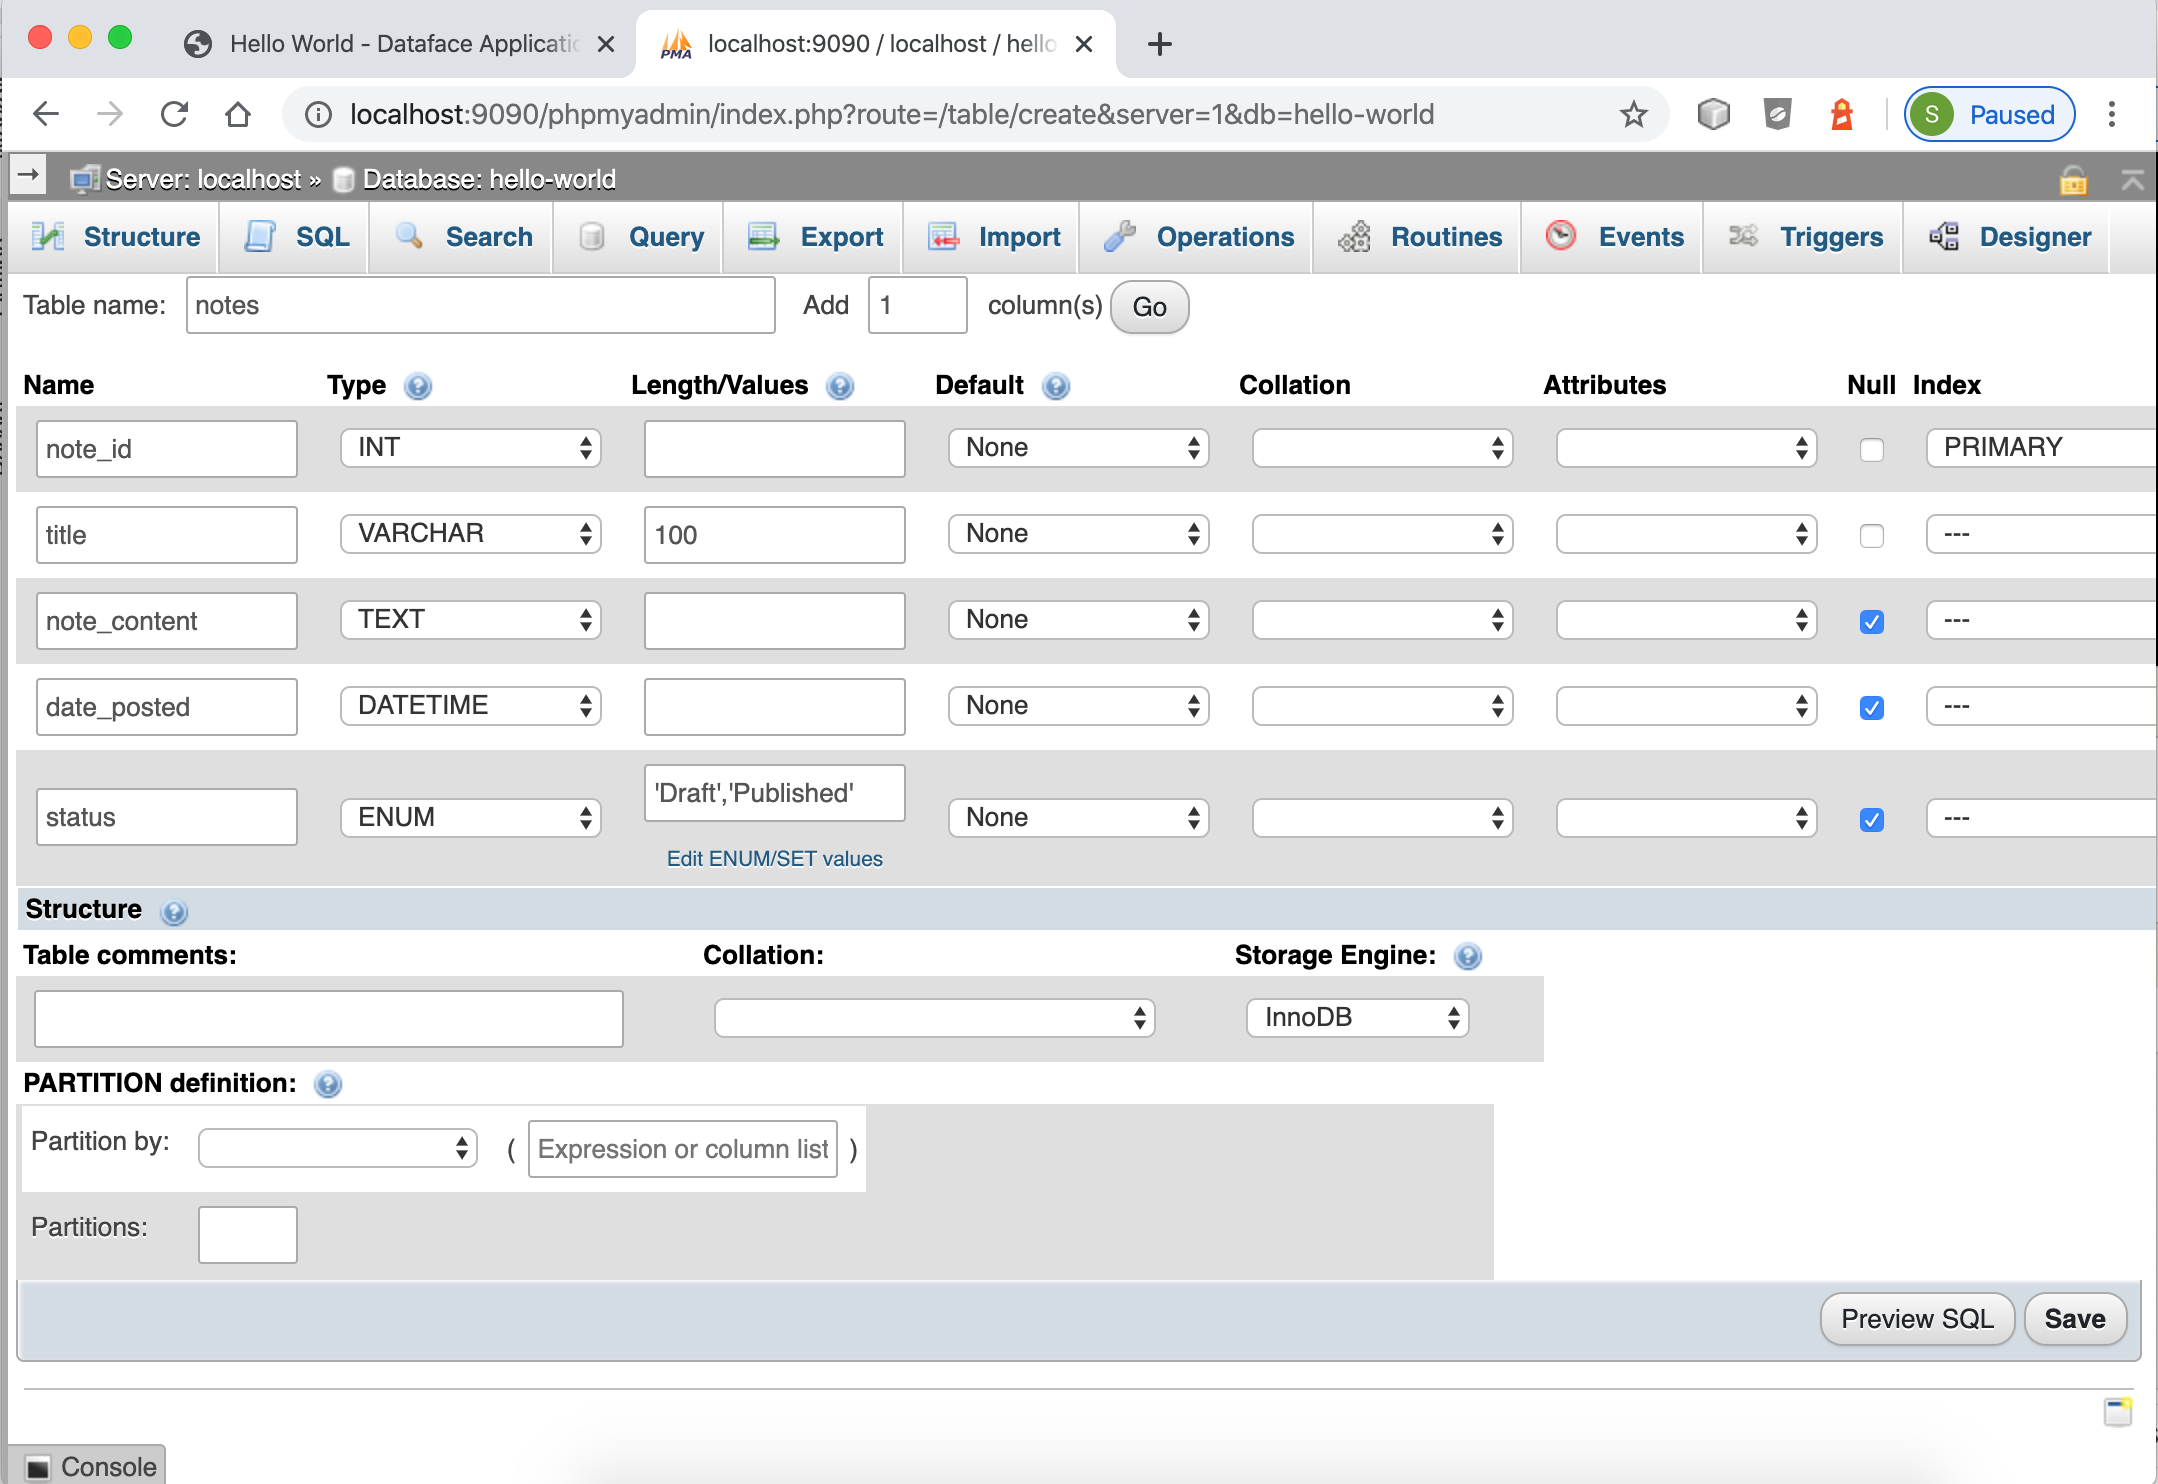
|
Important
|
Be sure to check the "A/I" box for the "note_id" field so that it will be an auto increment field. |
Press "Save" when done.
Now we want to tell Xataface to use this table in our application. Open the www/conf.ini.php file in our app. The contents will look like:
;<?php exit;
__include__=conf.db.ini.php

[_tables]
    test=test
The [_tables] section is used by Xataface to generate the top menu in your application. Let’s tell it to use our new "notes" table by adding the following:
;<?php exit;
__include__=conf.db.ini.php

[_tables]
    test=test
notes=Notes (1)-
The left "notes" indicates the table name. The right "Notes" indicates the label that should be used in our tables menu.
Save this file and reload the application in the web browser.
You should now see a "Notes" tab on the top.

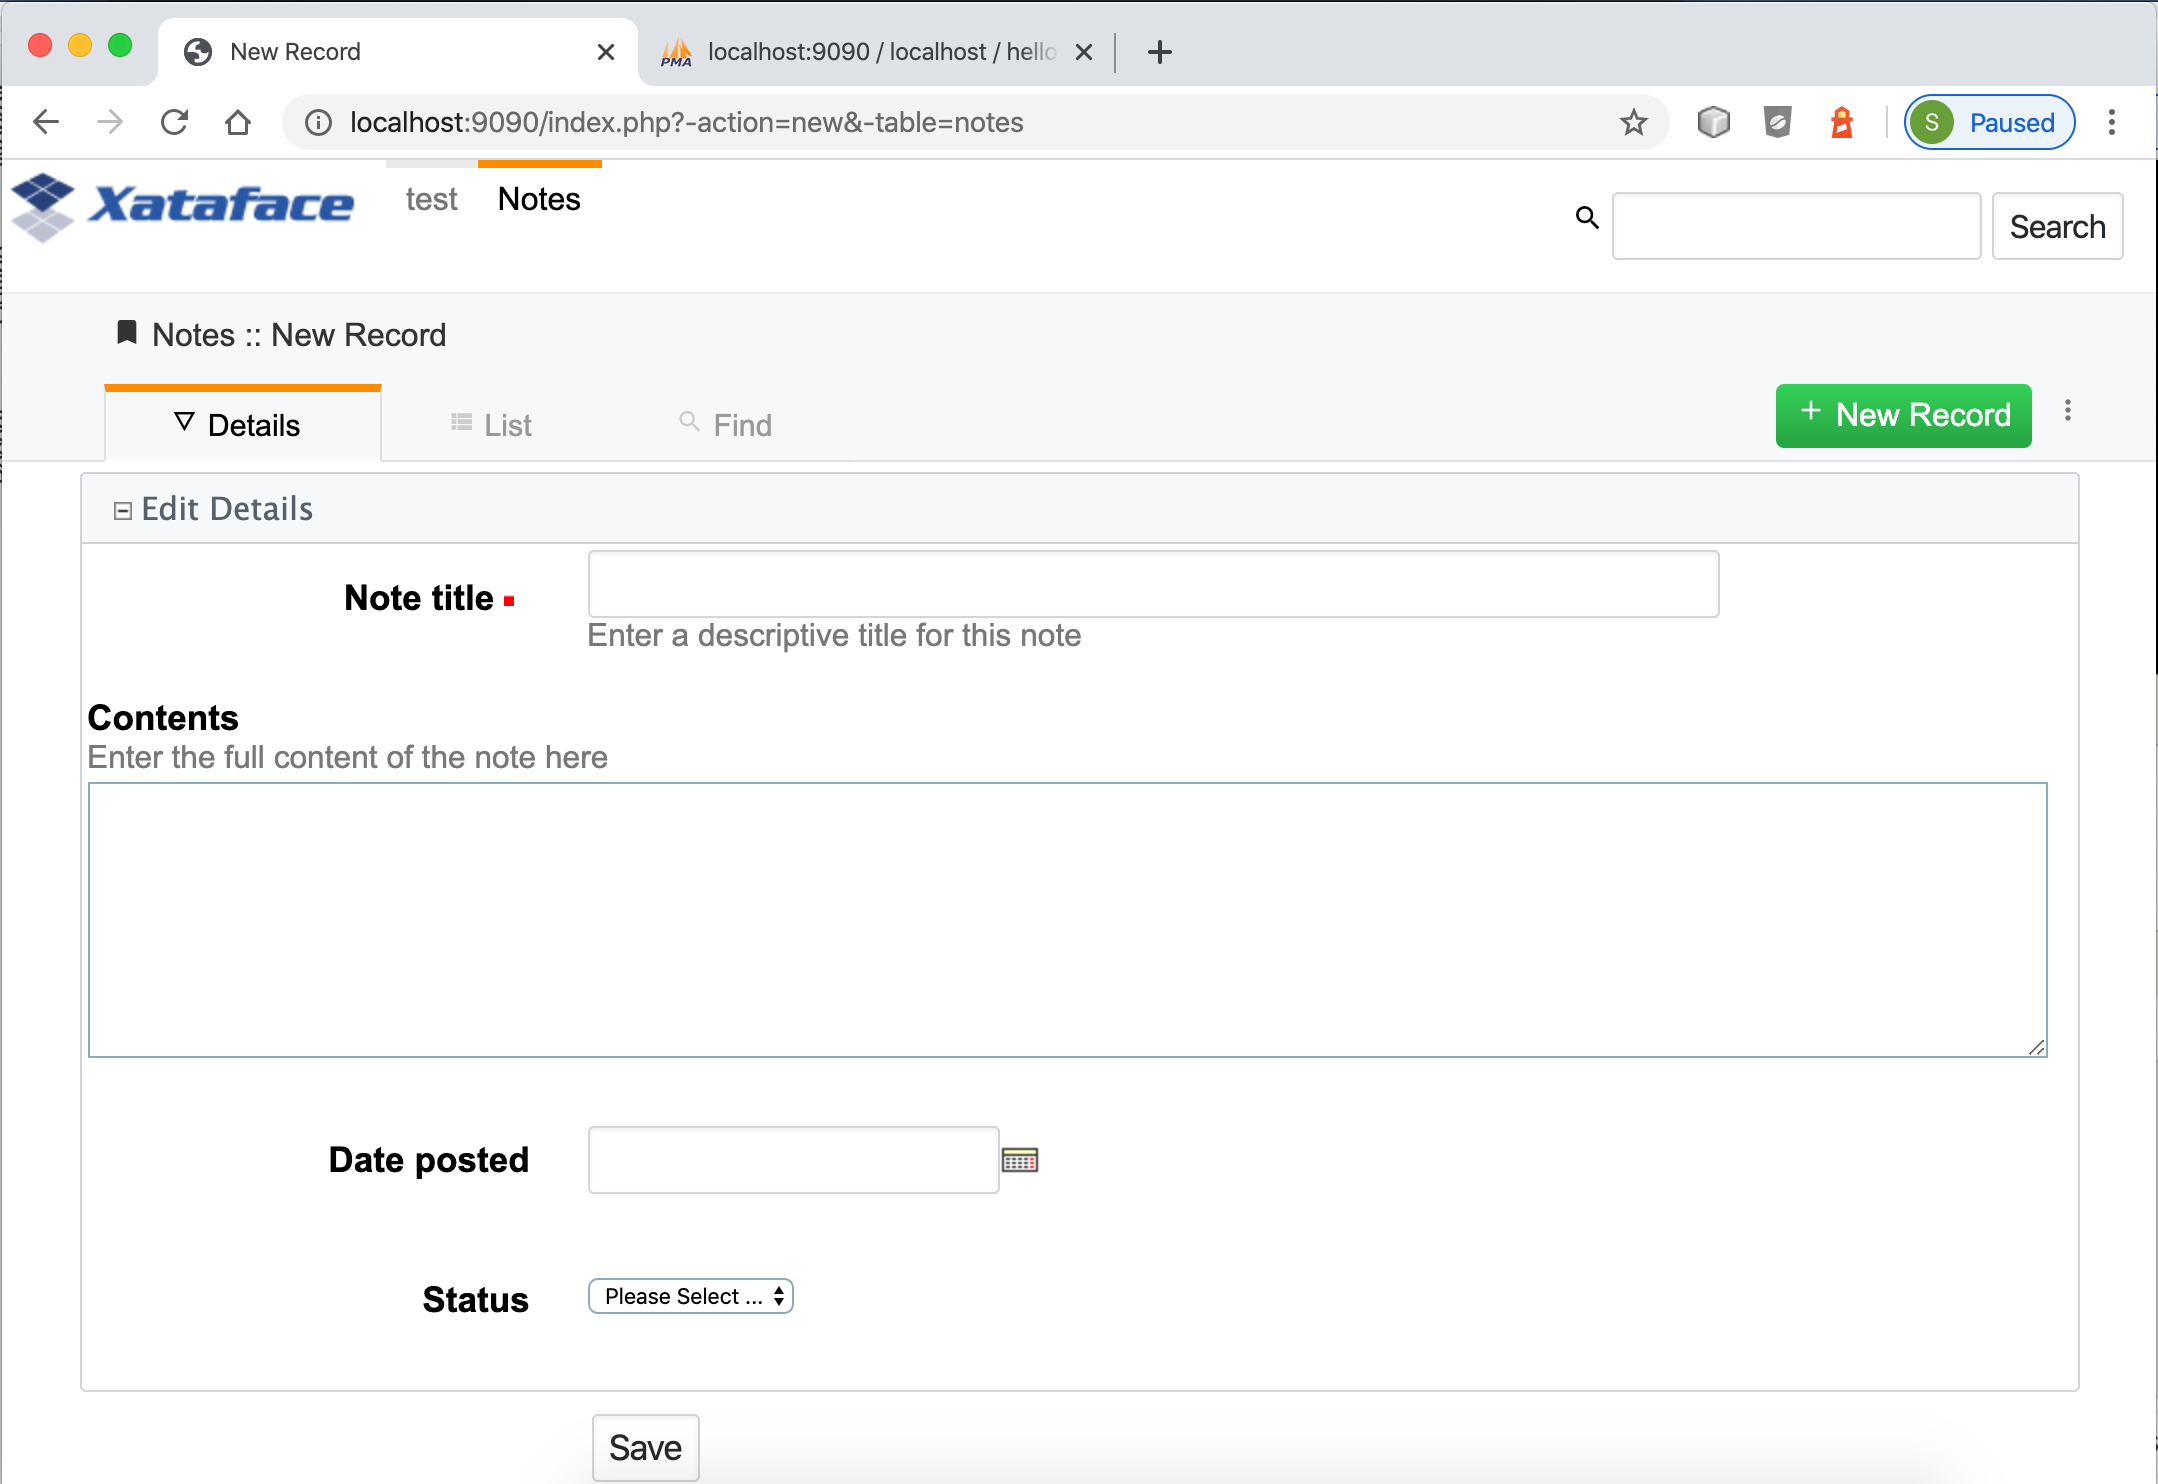
Click on this tab, then press "New Record" to see our form for adding records. You should see something like:
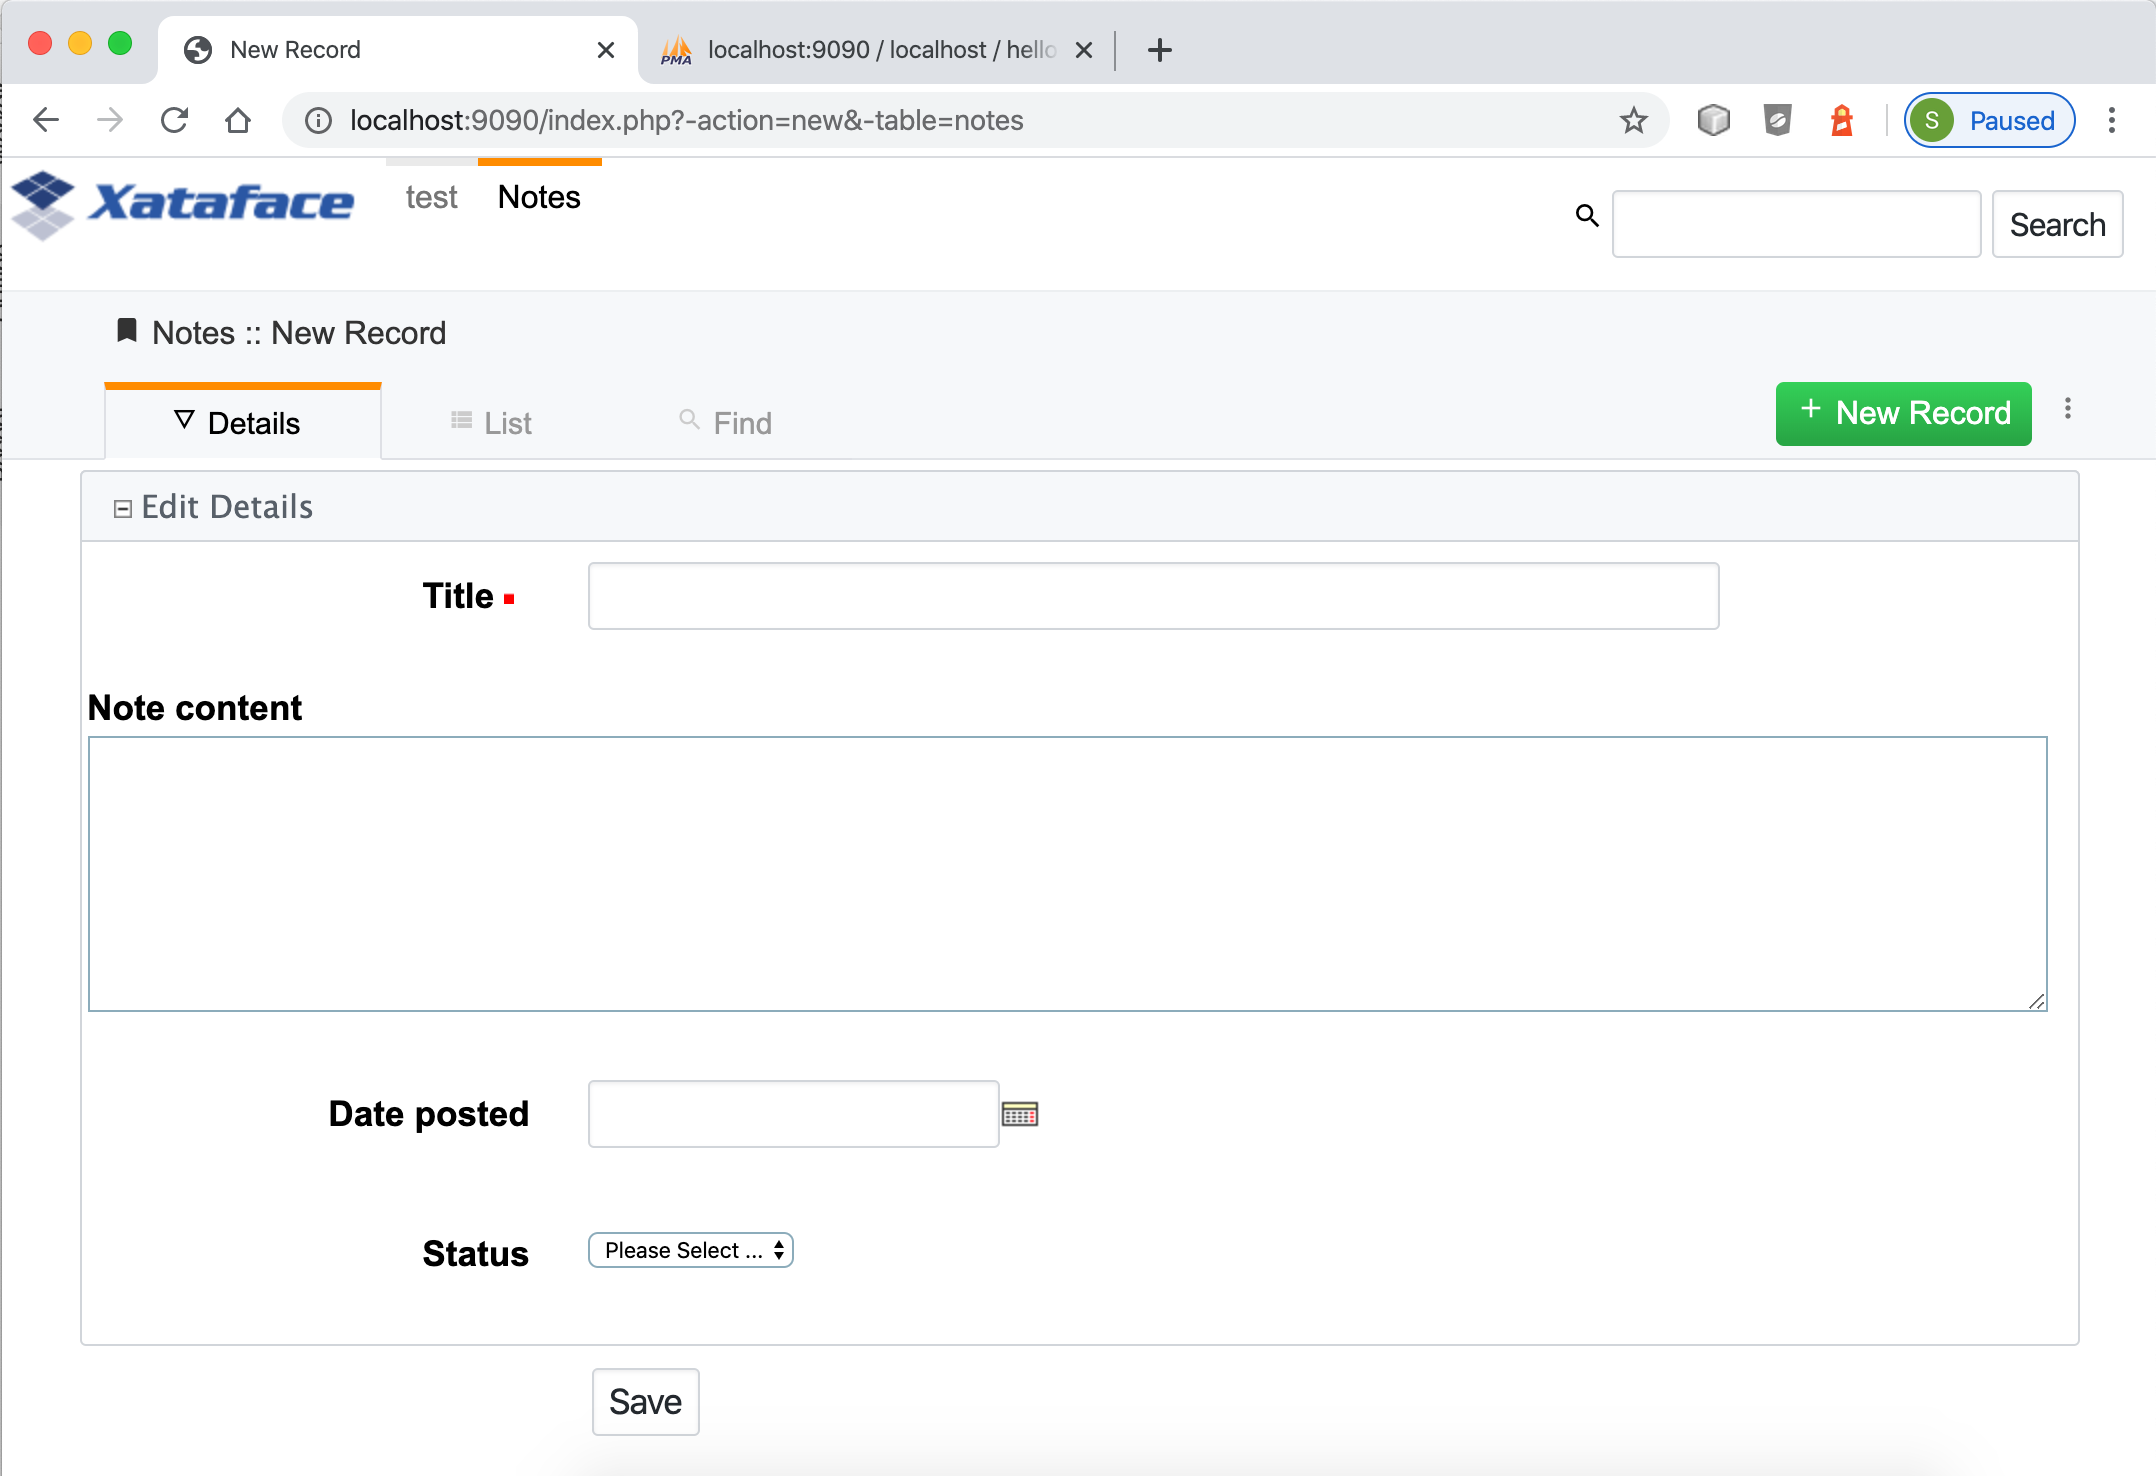
This form includes inputs for all of the columns in our table, except the "note_id" column. This is because "note_id" is an auto-increment field and doesn’t require user input.
Each field uses a different type of widget according to the type of the underlying database column. E.g. the "Title" field is a text field because it is a VARCHAR column. The "note_content" field is a text area because it is a TEXT column, etc… You can override the widget that is used to edit any field very easily by editing the "fields.ini" file for the "notes" table, which we’ll do in the new section.
For now we will use this application as is while we explore the application interface.
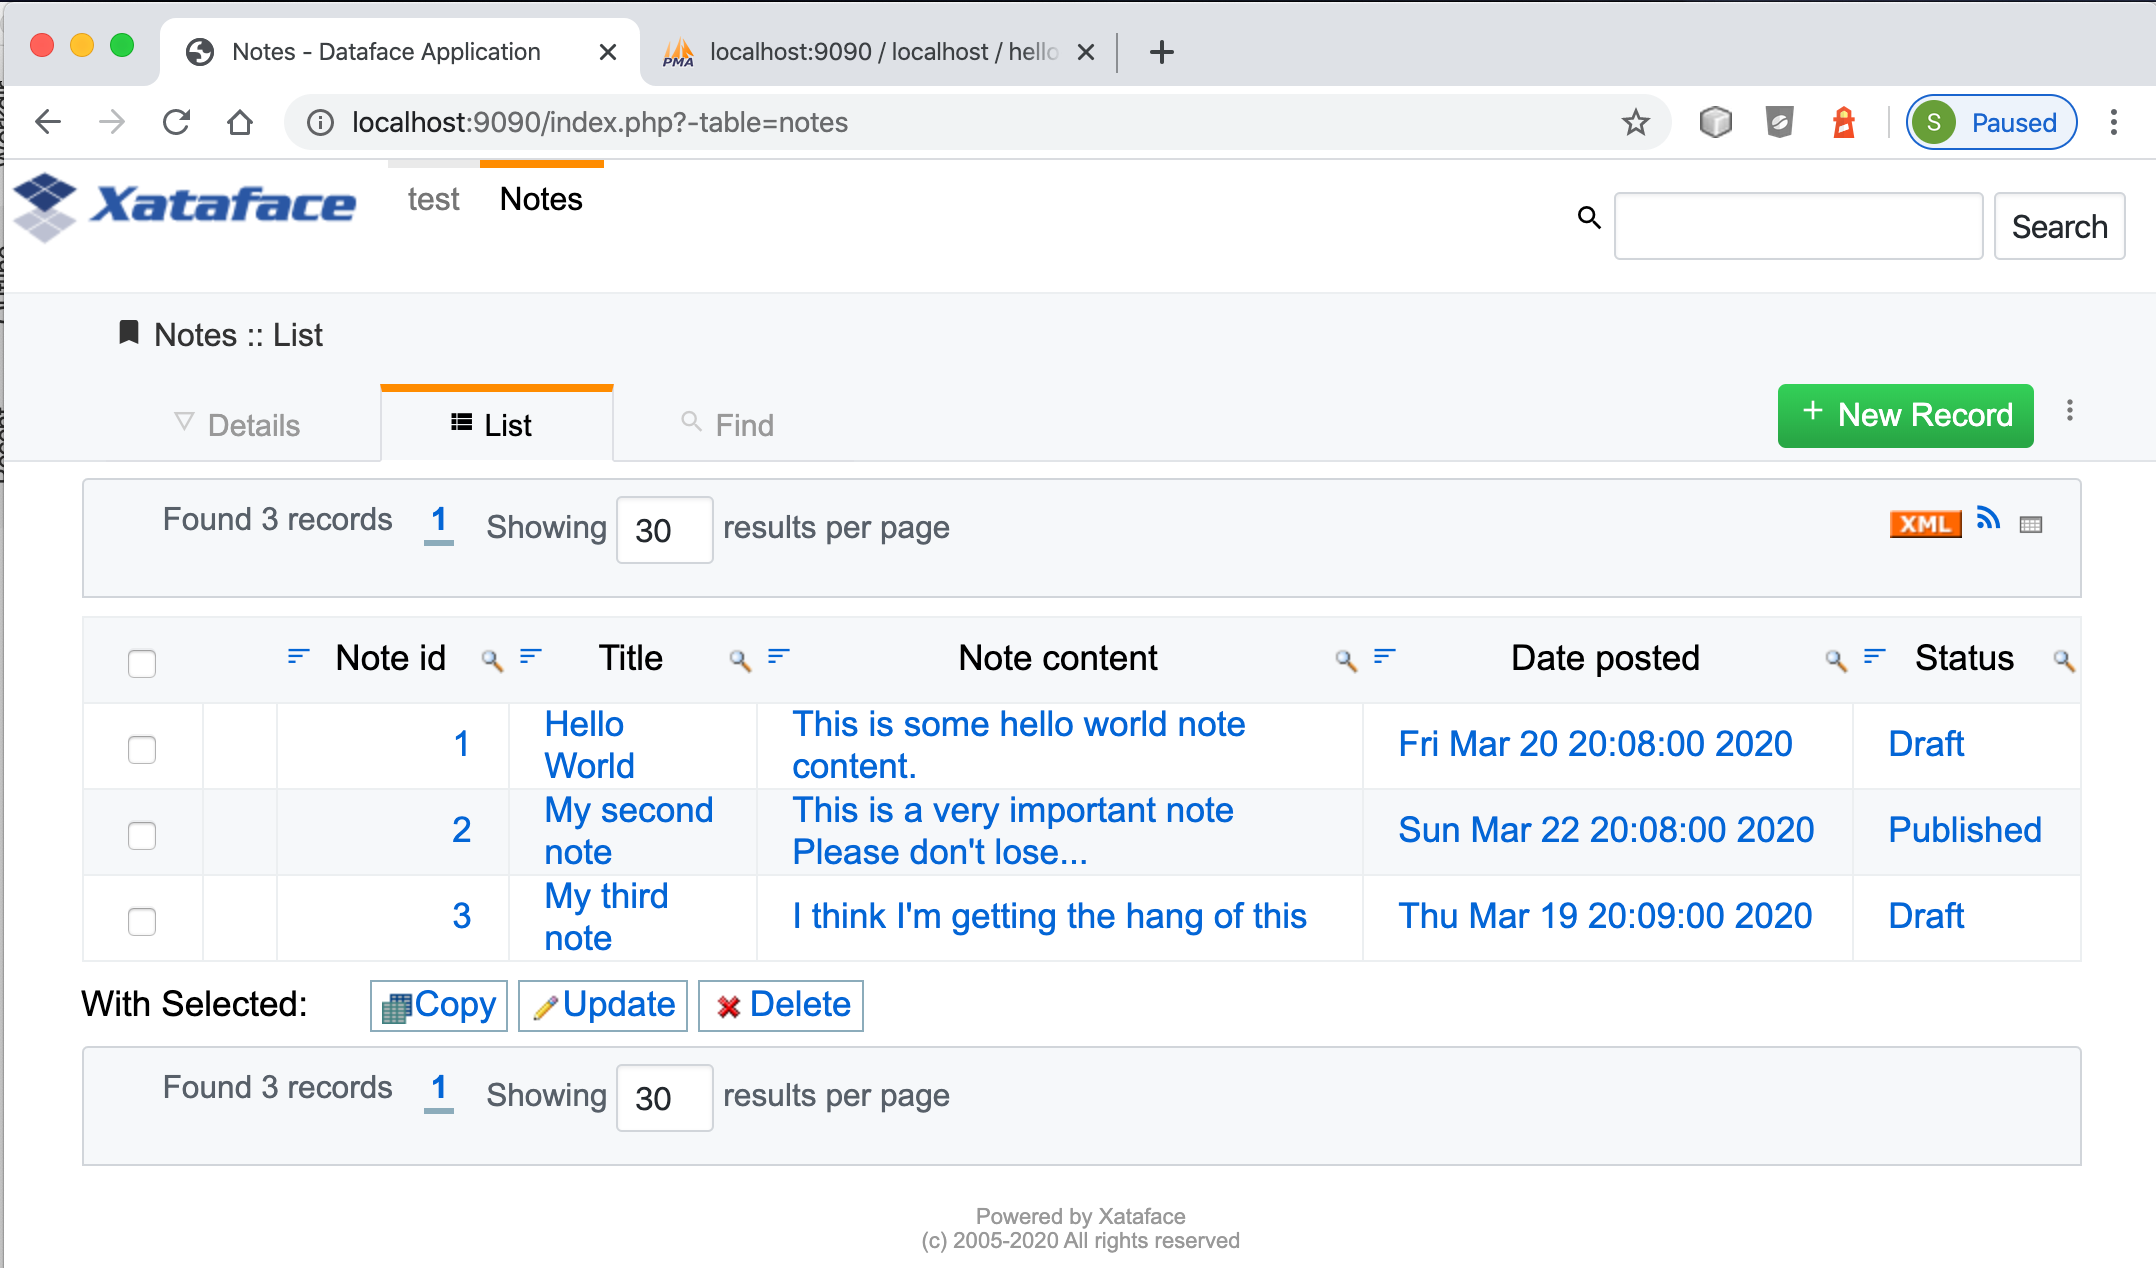
Enter some dummy data into this form and press "Save". Then press "New Record", and enter another new record. Create 3 or 4 notes with different content so that we have something to play with.
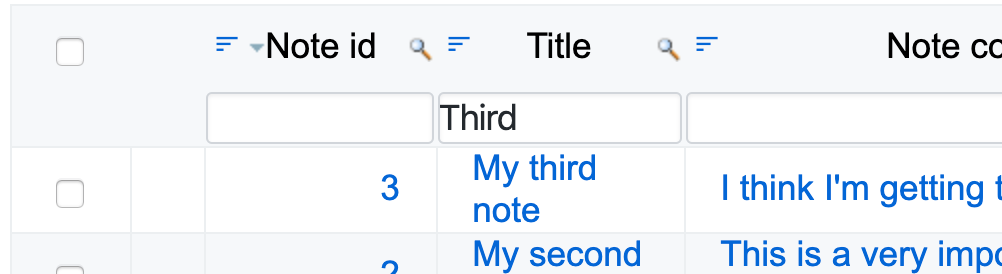
Once you’ve entered a few notes, click on the "Notes" tab to return to the "List" view of the "notes" table. My app looks like the following screenshot, as I’ve entered 3 notes:
Filtering the List
Xataface provides a few different ways to filter the list view. We can:
-
Click on a column header to search by column content.
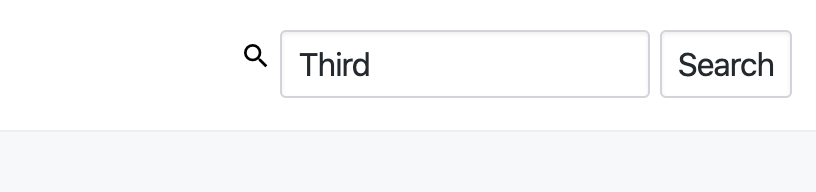
-
Enter a keyword search into the top right search box, which will look for matches in any column of the table.
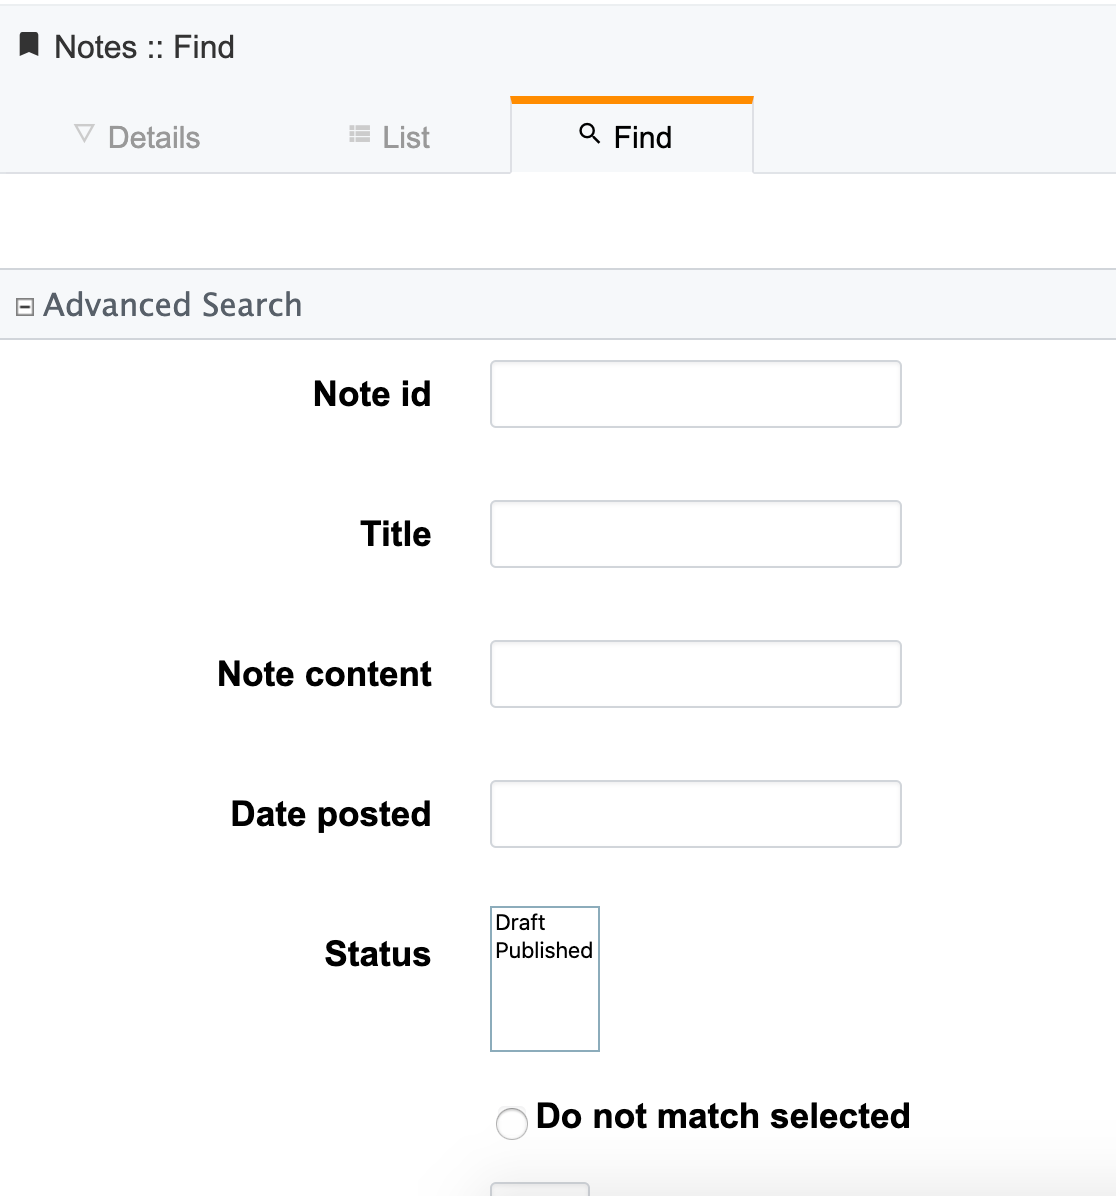
-
We can do an advanced "Find" by clicking on the "Find" tab.
Later we’ll also learn how to add "filter" drop-down lists.
Development Environment
At this point we have a fully-functional database application, and you didn’t have to write a single line of code. Let’s pull the curtain back a little and see what’s going on in our application under the hood.
The "hello-world" directory that was created by xataface when we ran "xataface create hello-world" contains the following folders:
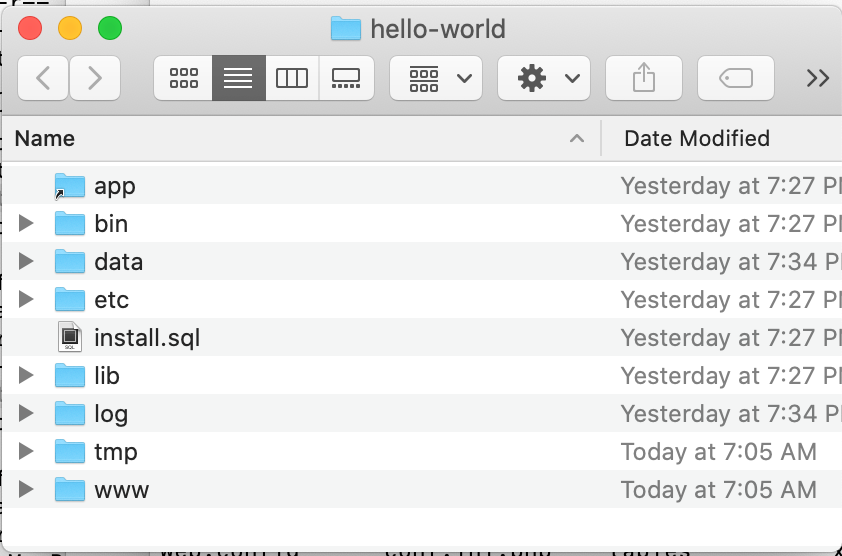
xataface create hello-worldThis root directory comprises a mini development environment for our application. The application itself is entirely contained inside the "www" directory, and when it comes time to deploy the app to production, we will likely only be uploading this directory to the web server.
The subdirectories in this folder include:
-
app - This is a symlink to the www directory, however, in cases where the Xataface app is actually contained in a subfolder of "www", this symlink will point to that subdirectory. The Xataface maintenance scripts always use "app" as the app’s document root (i.e. the directory containing conf.ini).
-
bin - This directory contains a set of maintenance scripts that can be used to automate certain maintenance tasks. This is for the development environment only, and does not need to be copied to the production web server.
-
data - This directory stores the development mysql database files. This is for the development environment only. On the production server, there will likely be a single central MySQL/MariaDB server where your database will reside.
-
etc - This directory stores apache and mysql config files used for the development environment only.
-
install.sql - This stores the SQL to recreate the database.
-
lib - This directory stores some additional libraries that may be useful for the development environment, such as PhpMyAdmin. This is for the development environment only, and should not be copied to the production web server.
-
log - Apache and MySQL log files for the development environment.
-
tmp - The temp directory for the development environment.
-
www - This is the actual directory containing our application. When we deploy to a production, this is the only folder that needs to be copied to the web server.
Application Structure
As mentioned above, the "www" directory contains the meat of our application. Let’s take a look at its contents now.
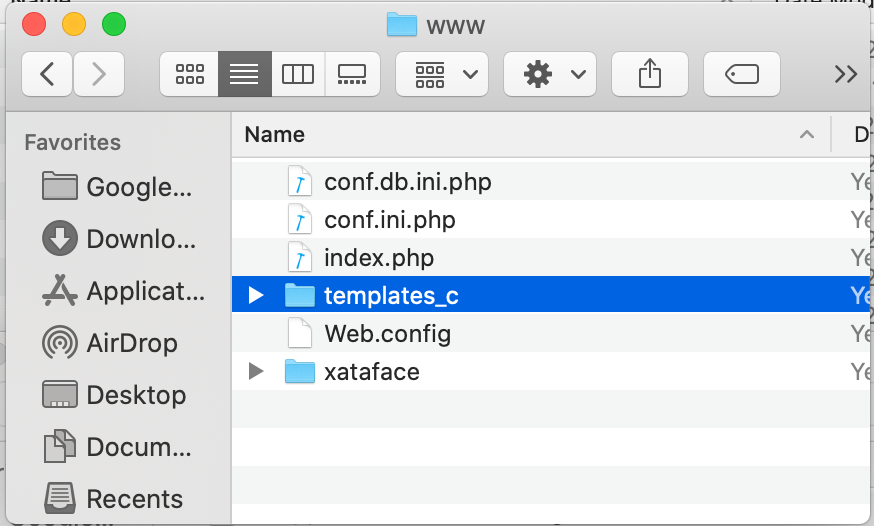
Let’s take a look at the files that were generated and placed in this directory.
-
conf.db.ini.php - Config file containing only the database connection information.
-
conf.ini.php - Config file containing application-wide configuration.
-
index.php - The entry point to your application.
-
templates_c - This directory containes compiled Smarty templates. This needs to be writable by the web server.
-
Web.config - A security file for IIS to prevent it from serving ".ini" files. This is really only necessary when using Xataface on IIS. The .htaccess file provides the equivalent functionality for Apache.
-
xataface - The actual xataface library used by the app. Updating your application to a newer version of Xataface later will be as simple as replacing this directory with the latest version.
-
.htaccess - This file is omitted by the screenshot, but the app also contains an .htaccess file which prevents Apache from serving ".ini" files.
|
Note
|
In this tutorial you’ll notice that all .ini files have a .php extension. E.g. we have "conf.ini.php" rather than "conf.ini". Xataface supports both notations, but you should choose one and stick to it. The benefit of using the ".php" extension, is that you can block any PHP-enabled web server from serving the file by adding ;<?php exit; on the first line of the file. We also include an .htaccess file and Web.config file for blocking .ini files, but these only apply to IIS and Apache web servers respectively. If you’re using a different web server, such as NginX or the PHP development server, then these .htaccess will be ignored and your .ini files may get served to the public - which you don’t want.
|
Changing Field Labels
Out of the box, Xataface will assign appropriate labels to its form fields based on the underlying columns. However, you can override these labels very easily.
To customize labels for the "notes" table we need to create a file at www/tables/notes/fields.ini.php
The xataface CLI script will generate this file for us via the command:
$ xataface create-fieldsini notes
Created tables/notes/fields.ini.php
As the output indicates, this created a file at tables/notes/fields.ini.php. Let’s open it up to take a look at the contents.
;<?php exit; (1)
[note_id]

[title]

[note_content]

[date_posted]

[status]-
First line for security. It will block any php-enabled web server from serving this file.
It has generated empty sections for each field in the "notes" table. All configuration options for a field should go in its section.
Now let’s customize some field labels and descriptions. We can set a field’s label using the "widget:label" property, and we can add some "help" text using the "widget:description" property. Let’s customize the labels and descriptions for this form by adding these properties.
After making a few changes, my fields.ini file now looks like:
;<?php exit;
[note_id]

[title]
  widget:label=Note title
  widget:description=Enter a descriptive title for this note

[note_content]
  widget:label=Contents
  widget:description=Enter the full content of the note here

[date_posted]

[status]
Now, open your browser again and try to add a new note. You’ll notice that the form has changed:
widget:label and widget:description properties I added to the fields.ini file.A More Complex Example: Faculty of Widgetry App
sf
Sorting and Filtering
One of the core features of any database application is the ability to sort and filter results. Xataface applications come with powerful sorting and filtering features out of the box. All HTTP requests define a result set in your database. By following some simple URL Conventions you can easily craft an HTTP request targetting the exact result set you want. At a higher level, Xataface also provides a rich user experience for sorting and filtering result sets inside the application.
This chapter describes the UI components involved in filtering and sorting, how to use them, and how to configure them to suit your needs.
Sorting Results
To sort a result set, you can simply click on the "Sort" button in the upper left of the list view as shown below:
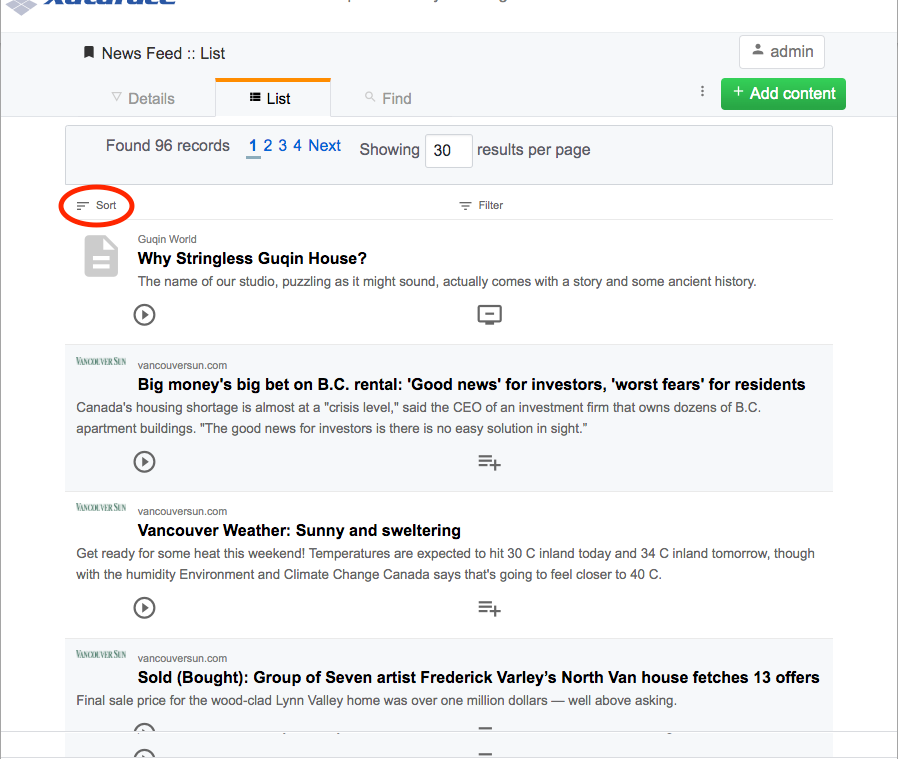
This will reveal the sort options.
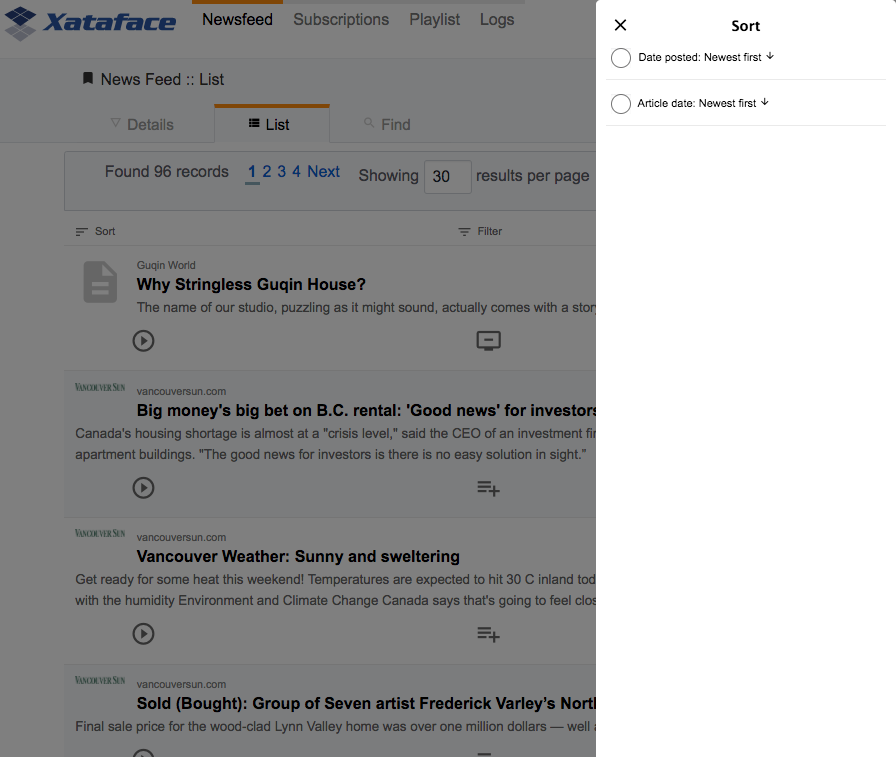
|
Tip
|
Out of the box, Xataface will provide options to sort on every appropriate field in the table. The table in the above screenshot only includes two sort options:
This is because the application includes the following definitions in its fields.ini file: |
You can "sort" the results by clicking on the appropriate sort option in this dialog.
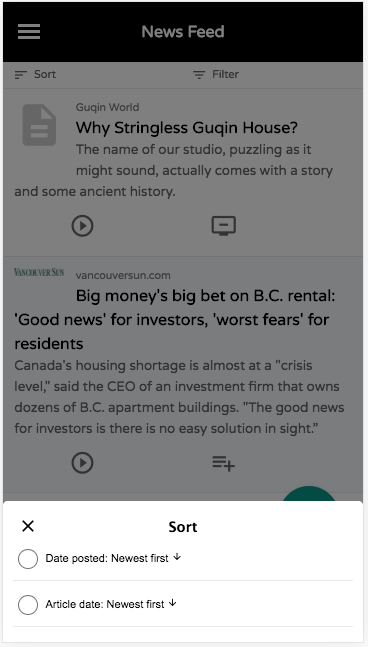
Mobile UI
On desktop, the "sort" dialog slides open from the right of the window. On mobile, it slides up from the bottom as shown below:
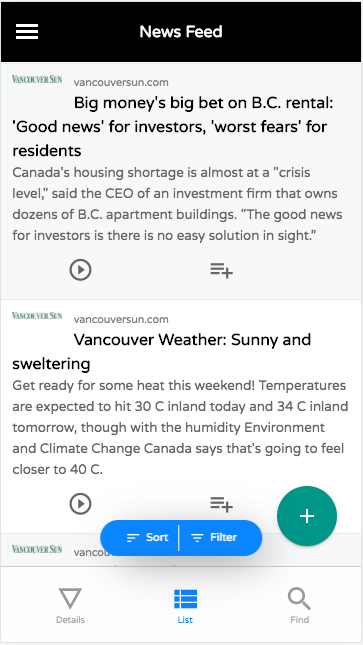
One other nice feature of the mobile UI, is that when you scroll down the page, the "Sort" and "Filter" buttons are changed into floating buttons as shown below:
Sort option Labels
The screenshots above demonstrate only sorting on date fields. The labels "newest first", and "oldest" first are used by default on date and time fields. Text and numeric fields use different labels by default.
Sort Configuration
Xataface provides sorting out of the box without the need for any configuration, but it is recommended that you configure the sorting behaviour explicitly for each table of your app. In many cases you may only want to provide sorting on a few key columns. You can use the "sortable", "sortable-", and "sortable+" fields.ini directives to explicitly mark a field as "sortable". If no fields in your table are explicitly marked as sortable, then Xataface will make a best guess. If it finds at least one field that is marked as sortable, then it will simply hand the reigns over to you (i.e. it won’t make any fields sortable that you haven’t explicitly marked as sortable, in this case).
fields.ini Configuration options
- sortable
-
Set this value to "1" to mark this field as sortable in both ascending and descending order.
- sortable-
-
Set this value to "1" to mark this field as sortable in descending order only.
- sortable+
-
Set this value to "1" to mark this field as sortable in ascending order only.
- sort.label
-
Specifies the label that should be used for this field in the sort dialog. If this is omitted, it will use a sensible label like "Field Name: A-Z".
- sort+.label
-
Specifies the label that should be used for this field in the sort dialog for sorting in ascending order only.
- sort-.label
-
Specifies the label that should be used for this field in the sort dialog for sorting in descending order only.
Example:
[date_posted]
    sortable-=1

[article_date]
sortable-=1Sort Actions
If sorting on individual fields doesn’t provide you with enough flexibility, then you can also define actions in your actions.ini file using the "sort_actions" category.
TODO: Add documentation on using "sort_actions" category for sorting.
Filtering Results
To filter a result set, you can simply click on the "Filter" button in the upper left of the list view as shown below:
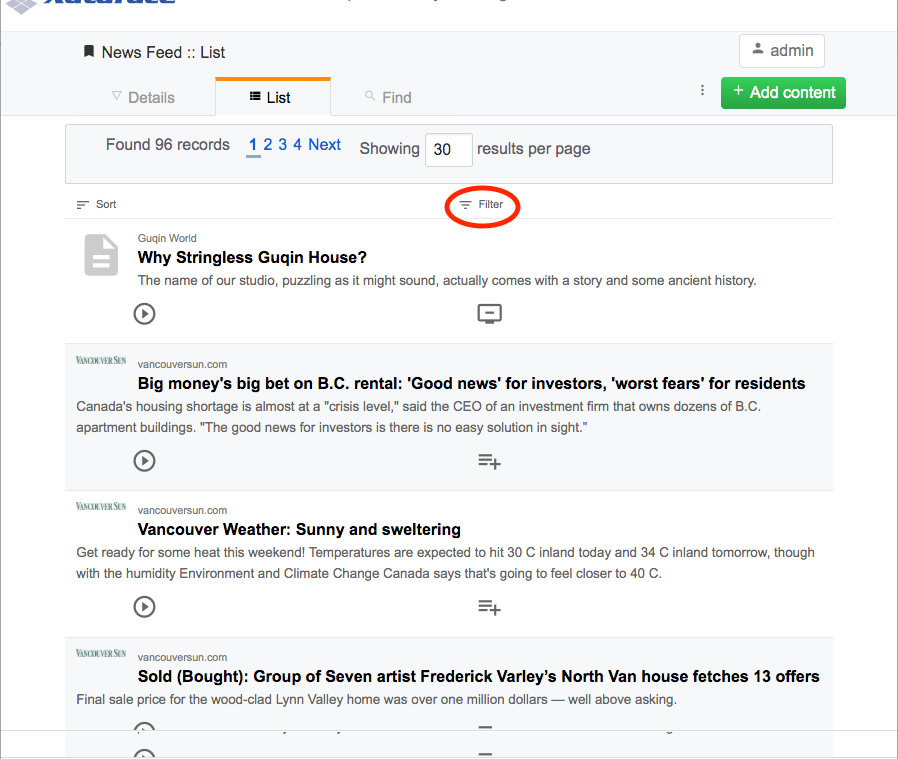
This will reveal the filtering dialog as shown below:
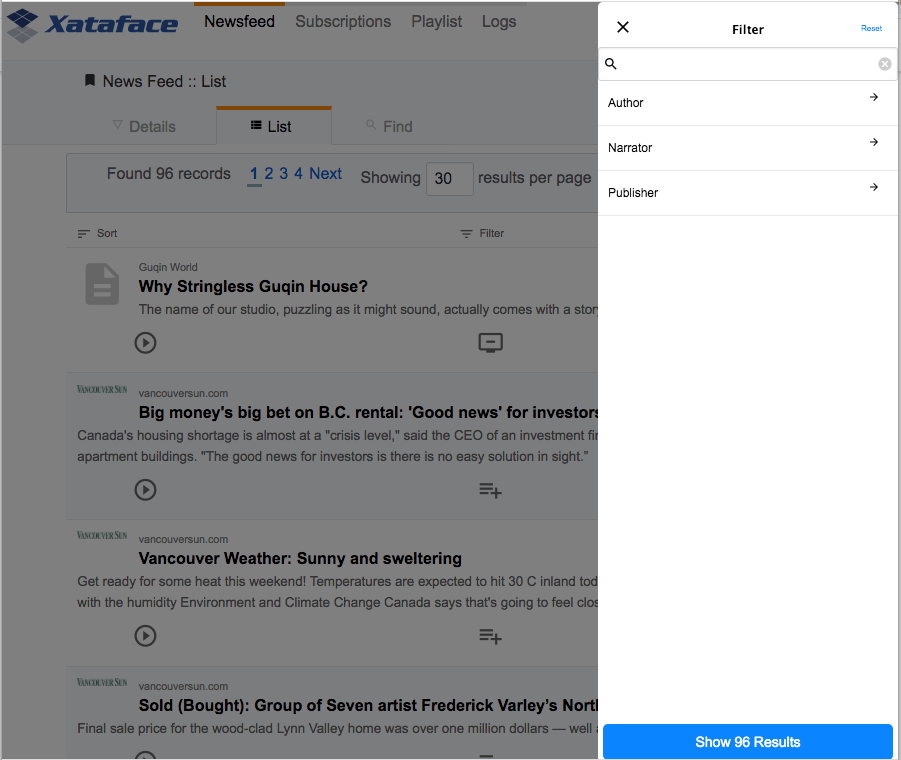
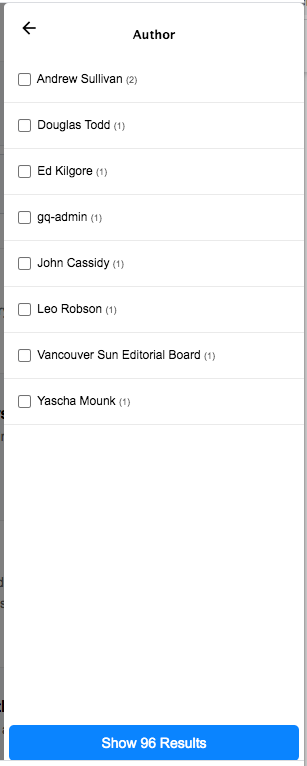
The filter dialog includes a keyword search field, which will perform a search on all eligible columns of the table, followed by options to filter on a selection of fields in the table. The available fields are determined in a similar fashion to the way that sortable fields are determined. If you define "filter=1" on any field of your application, it will include only those fields that are marked with "filter=1". If you don’t mark any fields as filterable, then Xataface will make a best guess at which fields should be filterable - defaulting to all fields except certain obvious ones such as password columns which should not be filterable.
If we follow the flow of the application depicted above, clickin on the "Author" option reveals filter options for the "Author" field.
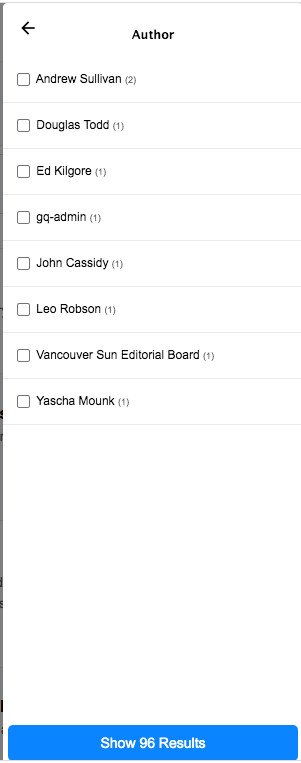
You can select one or more authors to filter the results on these authors. The little parenthesized numbers to the right of the options indicates the number of rows in the current result set that match that author.
|
Tip
|
The "Show X Results" button at the bottom is automatically updated as you adjust your filter preferences to show you how many results match your filter. This is helpful when you’re trying to narrow down the results to a managable size, but also not to zero. |
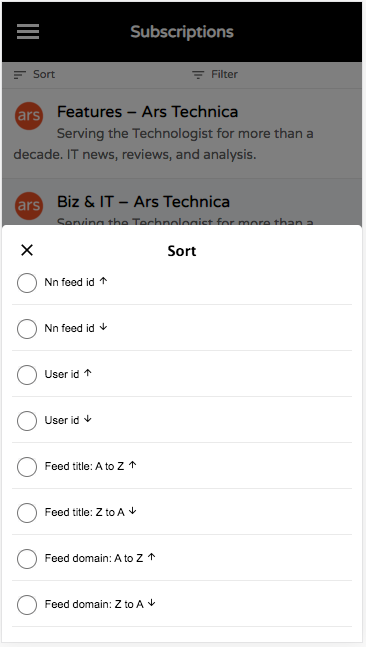
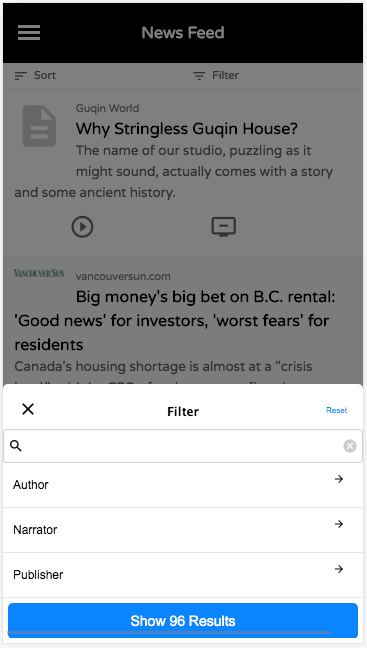
Mobile UI
As with the "sort" dialog, the "filter" dialog will slide up from the bottom of the window instead of the side when viewed on a mobile device.
Filter Types
Xataface supports a few different filter types. Use the "filter.type" fields.ini directive to specify the filter type to use for a given field. If you do not specify this, then Xataface will try to choose the most appropriate filter to use based on the type of field. The following filter types are supported:
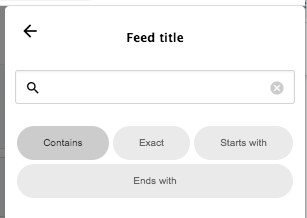
- text
-
A text field to enter keywords to search for. This includes options for "exact", "contains", "starts with", and "ends with". This is the default for VARCHAR, CHAR, and INT columns.
- range
-
Search fields for "min" and "max". This is the default for FLOAT, DECIMAL, and DATE columns. Date columns will also provide some options to perform common searches as well.
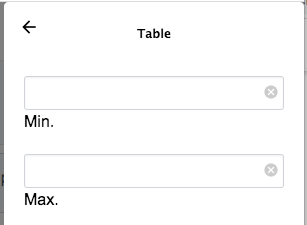 Figure 28. Range filter on a varchar field.
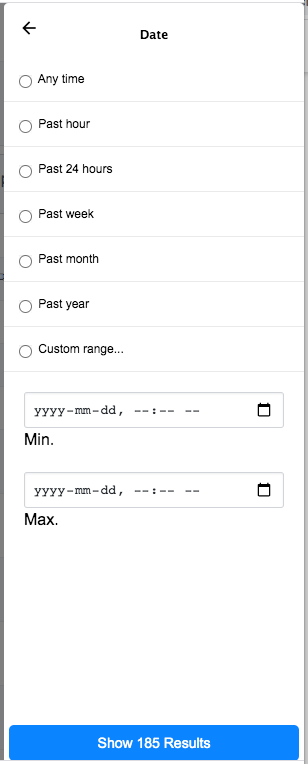 Figure 29. Range filter on a datetime field
 - filter
-
User can select from current values for the column in the result set, and can see the number of matches per value.
- min
-
Same as the "range" filter type, except it only includes the "Min" field.
- max
-
Same as the "range" filter type, except it only includes the "Max" field.
Filters Configuration
The following are some of the configuration options related to filtering that you can define in your fields.ini files.
- filter
-
A value of "1" indicates that this field is filterable.
- filter.type
-
The type of filter to use. Options include "text", "range", "min", "max", and "filter". See Filter Types.
- filter.label
-
The label to use for the filter. This defaults to the
widget:labelfor the field. - filter.icon
-
Icon to use in the text field when using the "text" filter type. This should be the name of a material icon. See Using Material Icons for details about material icons in Xataface.
- filter.min.icon
-
Optional icon to use inside the "min" field for min and range filters. The icon should be a valid material icon name. See Using Material Icons for details about material icons in Xataface.
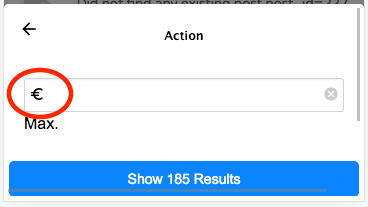 Figure 30. Example
filter.max.icon=euro_symbol - filter.max.icon
-
Same as
filter.min.iconexcept for the "min" field. - filter.input.type
-
Specify the
typeattribute of the<input>tag used in the "text", "range", "min", and "max" filter types. This will be "text" by default in most fields. It will be date by default for date fields, and datetime-local for datetime fields. - filter.sort
-
Used for the "filter" filter type. This specifies the column to use for sorting the options in the fitler.
- filter.placeholder
-
Placeholder text used for the "text" filter type. Placeholder text is only displayed when the field is empty.
- filter.min.placeholder
-
Placeholder text used the "min" field. Placeholder text is only displayed when the field is empty.
- filter.max.placeholder
-
Placeholder text used the "max" field. Placeholder text is only displayed when the field is empty.
- filter.input.*
-
Specify HTML attributes on the
<input>element used in the "text" filter type. E.g.filter.input.maxlength=5 - filter.min.input.*
-
Specify HTML attributes on the
<input>element used in the "min" field. E.g.filter.min.input.maxlength=5 - filter.max.input.*
-
Specify HTML attributes on the
<input>element used in the "max" field. E.g.filter.max.input.maxlength=5 - filter.vocabulary
-
A valuelist that can be used to provide "common" search options. These are displayed before the text or range fields to allow the user to easily select common searches.
Exporting Data
Xataface includes built-in support for exporting data in a variety of formats, including:
-
RSS
-
CSV
-
XML
-
JSON
Additional formats are provided via modules. The following chapters describe how to integrate these formats into your Xataface applications.
RSS Feeds
A default Xataface application provides RSS feeds to any found set in your application. This article explains a little bit about RSS and how you can configure Xataface to give you the desired results for your RSS feed.
What is RSS?
From Wikipedia’s RSS article:
"RSS is a family of Web feed formats used to publish frequently updated works such as blog entries, news headlines, audio, and videoin a standardized format.[2] An RSS document (which is called a "feed", "web feed",[3] or "channel") includes full or summarized text, plus metadata such as publishing dates and authorship. Web feeds benefit publishers by letting them syndicate content automatically. They benefit readers who want to subscribe to timely updates from favored websites or to aggregate feeds from many sites into one place. RSS feeds can be read using software called an "RSS reader", "feed reader", or "aggregator", which can be web-based or desktop-based. A standardized XML file format allows the information to be published once and viewed by many different programs. The user subscribes to a feed by entering the feed’s URI (often referred to informally as a "URL", although technically, those two terms are not exactly synonymous) into the reader or by clicking an RSS icon in a browser that initiates the subscription process. The RSS reader checks the user’s subscribed feeds regularly for new work, downloads any updates that it finds, and provides a user interface to monitor and read the feeds."
In a way, RSS replaces email subscriptions so that you can subscribe to receive updates when content is added or changed on websites that you monitory. This way you can monitory these changes in your RSS reader so that your email box doesn’t get clogged up.
Using RSS in Xataface
Xataface allows you to subscribe to:
-
Entire tables
-
Any found set
-
Changes to a particular record
-
Related record lists
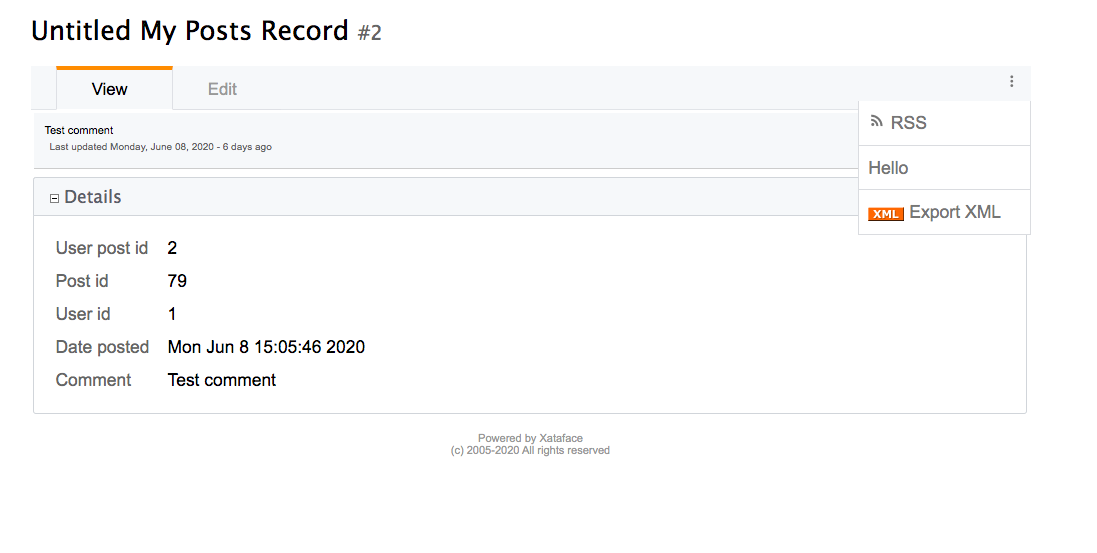
Example 1: Subscribing to receive news updates
A user wants to be alerted whenever a new item is inserted into the news table, so he navigates to the list tab of the news table, and clicks the RSS Feed icon in the upper right. If he has an RSS reader application set up, this is all he has to do to subscribe to the RSS feed for the news table. When new records are inserted, he’ll receive alerts in his RSS reader.
Example 2: Subscribing to receive found set updates
A user wants to be alerted whenever a new item is inserted into the news table that contains the phrase "Buffalo Bills", because he is a Buffalo Bills fan. So he navigates to the news table, and does a search for the phrase "Buffalo Bills". Then he clicks on the "RSS Feed" icon in the upper right of the result set list. If he has an RSS reader application set up, this is all he has to do to subscribe to the RSS feed for news items containing the phrase "Buffalo Bills". Whenever a new item is posted with this phrase, he will be notified via RSS of the new record.
Example 3: Subscribing to a related list
Suppose you want to receive updates whenever a particular author adds a book to his list of published works. Further suppose this is represented by a relationship between the authors table and the books table named publications. You can subscribe to the RSS feed for his publications by navigating to the publications tab for that author, then clicking on the "RSS Feed" icon in the upper right. Now whenever this author adds a new book to his publications list, you’ll be notified via RSS.
Example usage in Xataface
A user wants to be alerted whenever a new item is inserted into the news table, so he navigates to the list tab of the news table, and clicks the RSS Feed icon in the upper right. If he has an RSS reader application set up, this is all he has to do to subscribe to the RSS feed for the news table. When new records are inserted, he’ll receive alerts in his RSS reader.
A user wants to be alerted whenever a new record about "Wayne Gretzky" is inserted in to the news table. He navigates to the news table, then performs a search for "Wayne Gretzky" using the top right search box. Then, he clicks on the "RSS Feed" icon in the upper right of the result list. Now, whenever a new item is inserted with the phrase "Wayne Gretzky", the user will be notified via RSS.
Configuring RSS Feeds
As with everything else in Xataface, you can configure your RSS feeds to appear just as you want them to. The following delegate class methods are available to be defined in the table delegate class for your feed:
See RSS Configuration Directives for available configuration directives and delegate class methods related to RSS feeds.
Example Configuration
There are 2 parts to configuring your RSS feeds:
-
Configuring the feed as a whole
-
Configuring the feed items (that is each record that will appear in your RSS feed).
Configuring the Feed as a whole
For configuring the feed as a whole, we have 2 options. We can specify the title, description, and link for the feed in the [_feed] section of your "conf.ini" file. This is sort of a "one size fits all" approach where all feeds generated from your application will share the same title. E.g.
[_feed]
    title="My Site News"
    description="News updates from my site"
    link="http://www.example.com"
However, if we want our feed’s information to depend on the user’s query (e.g. what the user was searching for, or which table the feed is generated on, we have more flexibility if we define the getFeed method in either the application delegate class or the table delegate class. E.g.
function getFeed($query=array()){
    $params = array();
    if ( @$query['-search'] ) $params['title'] = '"'.$query['-search'].'" results';
    else $params['title'] = 'All records from my table';
    return $params;
}
Notice that I don’t need to define all possible parameters. Any parameters that I don’t define will be provided automatically by Xataface, or it will simply use the values specified in your [_feed] section of the "conf.ini" file.
Configuring Feed Items
Configuring the feed items is quite important for ensuring that subscribers are seeing what you want them to see in the RSS feed. Xataface tries to guess appropriate content for your feed items if you don’t specify it explicitly, but you’ll likely want to tweak it a little bit to make the feed look more polished for your purposes.
Use the getFeedItem delegate class method to specify how a feed item behaves (e.g. the title, content, date, author, link). E.g.
function getFeedItem(&$record)){
    return array(
        'description' => $record->val('body')
    );
}
Once again, notice that we don’t need to specify all available options. Only those options that we want to override. In this case we want the description of the feed item to simply display the body of our news item. The description of an RSS feed item is effectively the body text that the user sees why they click on an item in their news reader, so this is quite important.
Recipes
This section of the book includes recipes for common patterns in Xataface applications.
Actions and Menus
The following sections pertain to actions in Xataface. An action may either be a menu item, or an HTTP request handler. Or it can be both. They are defined in the actions.ini file (or actions.ini.php file) of your application, and their "handlers" are defined inside the "actions" directory of your application.
Using Material Icons
Problem
You want to use a material icon for a menu-item in your application, instead of an image.
Solution
The default theme of Xataface includes the material icons web font, so you can use any icons in that font on your actions via the materialIcon directive in your action. For example, suppose we want to add a "Play" button to the rows of our table in list view. We define our action as follows:
[play]
    condition="$query['-table'] == 'songs'" (1)
    category=list_row_actions (2)
    materialIcon=play_circle_outline (3)
    label="Play" (4)
    description="Play narration" (5)
url="javascript:playSong()"-
The
conditiondirective is used to limit our action so it only displays for the "songs" table. -
The
categorydirective makes the action appear in the "list_row_actions" menu (which is displayed as icons in each row of the list view. -
The
materialIcondirective specifies that we want to use the play_circle_outline material icon. -
The label, which is hidden for this menu type because the stylesheet is set to show only icons for the "list_row_actions" action. It is still a good idea to define the label though in case this action is used in other contexts.
-
The description which is shown as tool-tip text if the user mouses over the action.
Finding the Right Material Icon
You can browse the available material icons here.
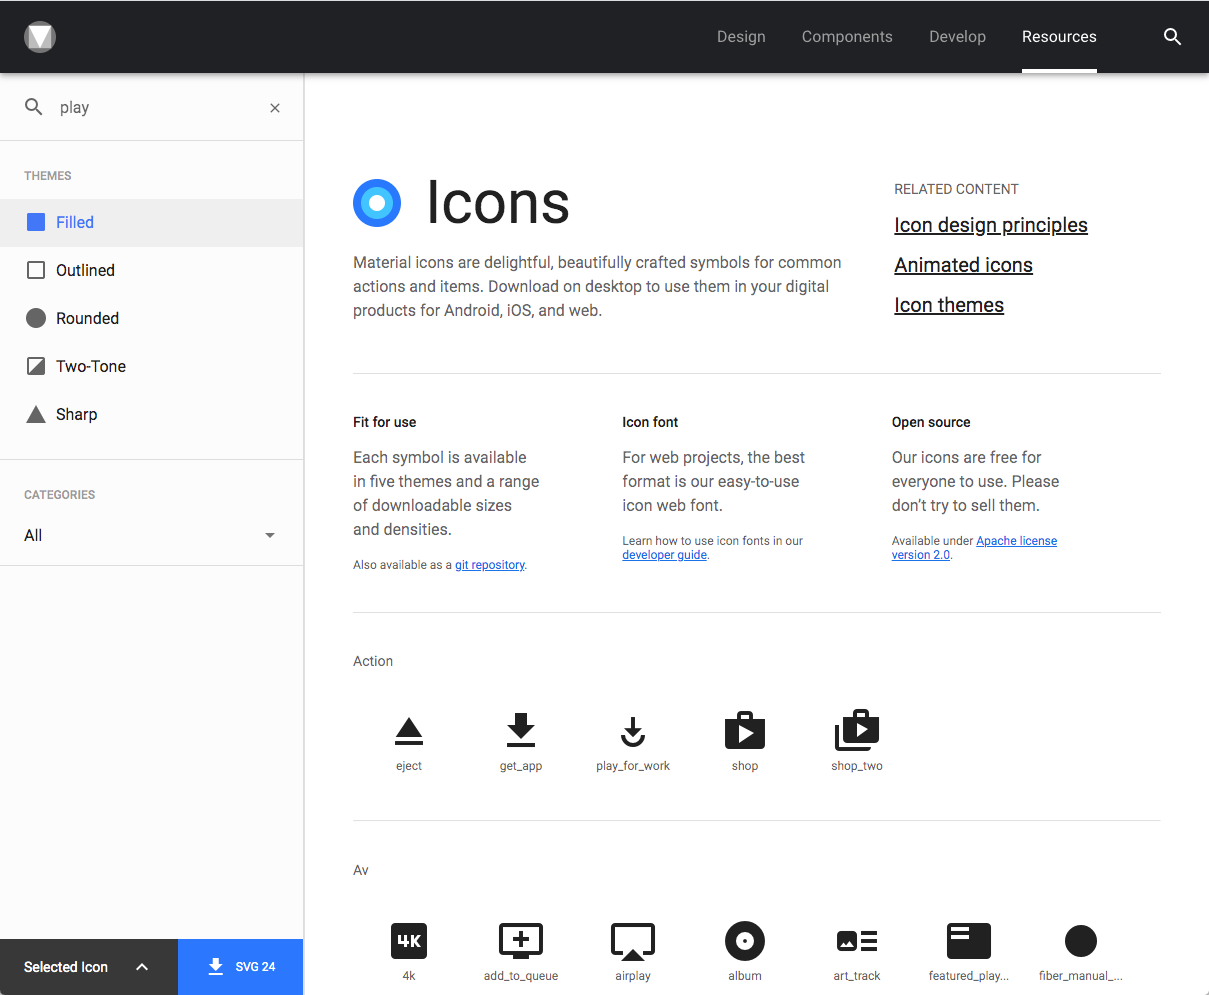
The label below the icon is the name of the icon, that you would use for your materialIcon directive. If the lable is truncated, you can click the "Selected Icon" button in the lower left to get a more detailed view.
Triggering Javascript Function with Action
Problem
You want to trigger a Javascript function when the user clicks on an action.
Solution
Use the onclick directive for the action definition in your actions.ini file. The javascript you specify here will be executed when the user clicks on the action. Perhaps the "hardest" part of this recipe is simply knowing where to put the javascript function that you wish to call. There are many ways to include custom Javascript into your application. My preferred way is to use the xf_script($scriptpath) inject your Javascript file.
I’ll illustrate this process by way of an example. I’m going to create a simple action called "hello_world" that pops up an Alert box that says "Hello World".
|
Note
|
This example is simple enough that it could have been achieved without having to include a separate Javascript file. E.g. onclick="alert('Hello World!');" would do the trick in the action definition. But, I’m going create a separate Javascript file with this functionality for educational purposes.
|
Step 1: Create a Javascript File
If you don’t have a "js" directory in your application yet, create it now. This is where you will place all Javascript files in your application.
Now create a file inside the "js" directory named "hello.js", with the following contents.
window.helloWorld = function() { (1)
    alert('Hello World!');
}
Step 2: Include the Javascript File
You can include this Javascript file into your application by calling:
xf_script('hello.js');|
Important
|
Notice that we include 'hello.js', and not 'js/hello.js'. This is because the Javascript tool always looks in its "include" paths for Javascript files, and it treats all paths as relative to the include path root. |
Where you choose to call this code depends on when it will be needed. If your Javascript file is only needed inside a particular page of your app, then you are probably best to call this inside the action for that page, or inside a block which only appears on that page.
If you want it to be included application-wide, then you should call this inside a method that will be called for every request. I usually place all "global" stuff inside the beforeHandleRequest() method of the Application Delegate class.
In this case, I’m not sure yet, which pages will be displaying the menu item for my "hello" action, so I’ll include it inside the beforeHandleRequest() method:
conf/ApplicationDelegate.php) with beforeHandleRequest() method defined.<?php
class conf_ApplicationDelegate {
function beforeHandleRequest() {
xf_script('hello.js');
}
}
?>|
Tip
|
By default, If you need to include a Javascript file that is included in the The down-side of adding the script to the |
Step 3: Defining the Action
Now that we have our script included, we can define our action:
[hello]
    onclick="window.helloWorld();"
category=record_actions (1)-
For demonstration we’ll add this to the "record_actions" category, which are displayed in a drop-down menu on the record details page.
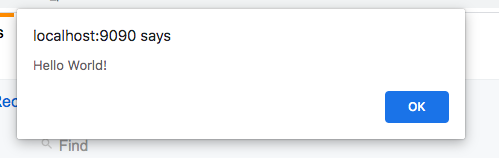
Now, we can click on our "Hello" button to see the pay-off:
Troubleshooting
Things never work the first time. There are a couple of things that can go wrong in setting up this recipe for the first time:
My "hello" Action doesn’t appear in the menu
Things to check:
-
Double check the "category" directive of your action. It be
category=record_actions. Case-sensitivty matters!! -
Ensure that your actions.ini file is getting picked up. Your actions.ini file should be located in the root directory of your application. E.g. "/path/to/myapp/actions.ini". Make sure it is named "actions.ini" and not "Actions.ini". Case-sensitivity matters! (on Linux)
-
Check your PHP error log. It is possible you have a syntax error in your actions.ini file, and the app isn’t able to load it.
-
If nothing shows up in your PHP error log, add the "debug=1" directive to the beginning of your
conf.inifile, then reload the page. You’ll see a whole bunch of warnings now when you look at your PHP error log. See if there are any fatal errors on your actions.ini file.
Nothing happens when I click on my "hello" Action
Things to check:
-
Make sure you have the "onclick" directive in your action definition. Check for typos.
-
Look at the Javascript error log in your browser. E.g. Right click on your page, if using Chrome, and select "Inspect". Then click on the "Console" tab. This will show you errors. If you see an error like "window.helloWorld is not a function", it means that your Javascript file did not get included. If you see a syntax error listed, probably you have a Javascript error in your hello.js file.
-
Enable Debug mode in the Javascript tool. This will cause your Javascript files to NOT be minified so it will be easier to debug in the browser. You can do this by adding the following to your conf.ini file:
[Dataface_JavascriptTool]
    debug=1
Customizing Action Labels
Problem
You want to customize the label for an existing action
Solution
If you want to customize the action for all tables, you can simply override the action in your app’s actions.ini file, and set the label property.
[new > new]
label=Insert New Record|
Tip
|
To override the tooltip text for the action, you could set the description directive.
|
Alternatively, you can use Xataface’s internationalization support to override the label. E.g. in your app’s "lang/en.ini" file (which contains your English translations), you can define the key "actions.[ACTION_NAME].label". E.g.
actions.new.label="Insert New Record"|
Tip
|
To override the tooltip text for the action, you can set the actions.new.description property.
|
Overriding Label on a Particular Table
The above examples would override the action label in the entire application. If you want to specify the label in a particular table, you can define the "tables.[TABLENAME].actions.[ACTIONNAME].label" proeprty in your language file (e.g. lang/en.ini).
tables.articles.actions.new.label="Insert Article"|
Tip
|
You can also override the the tooltip text using tables.[TABLENAME].actions.[ACTIONNAME].description, and the material icon using tables.[TABLENAME].actions.[ACTIONNAME].materialIcon
|
Customising Navigation Menu
Problem
You want to customize the options in the navigation menu
Solution
Define actions in the _tables category. These will be used instead of the tables listed in the _tables section of the conf.ini to form the tables navigation menu.
Discussion
The top-level navigation menu in Xataface allows you to select which database table you with to work with. By default, it is generated from the [_tables] section of the conf.ini file.
For example, given the following _tables section:
[_tables]
    students=Students
    countries=Countries
    provinces=Provinces
Xataface will generate a menu that looks like:

In some cases, you may want to generate your own custom menu. For example, you may want to group some tables together into a single drop-down menu. You can do this by defining actions inside your actions.ini file in the _tables category.
For example:
_tables category in your actions.ini file. These will be used to form the navigation menu instead of your app’s tables.[menu_students]
label=Students
category=_tables
url="?-table=students"
selected_condition="$table=='students'"
[menu_setup]
label=Setup
category=_tables
subcategory=_tables_setup
order=10
[menu_countries]
label="Countries"
category=_tables_setup
url="?-table=countries"
selected_condition="$table=='countries'"
[menu_provinces]
label="Provinces"
category=_tables_setup
url="?-table=provinces"
selected_condition="$table=='provinces'"In this case we have defined two top-level menus in the _tables category: "menu_students" and "menu_setup". The "menu_setup" action has uses the "subcategory" property to assert that it is a drop-down menu. Any actions in the "_tables_setup" category will be included in this drop-down menu.
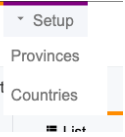
The resulting menu for this setup would be:

If you hover over the "Setup" menu, it will expand:
Action to Trigger AJAX Request
Problem
You want your action button to trigger an AJAX (background) request rather than linking to another page. Additionally you would like to provide some UI feedback to inform the user that the action is in progress. And finally, when the action completes, you would like some UI feedback to the user to indicate the result of the action, and handle errors and failures gracefully.
Solution
There are two parts to this problem:
- The server-side
-
We need to write a PHP handler that your action should trigger. Since we are using AJAX, this action will output JSON instead of HTML.
- The client-side
-
We need to provide a button or menu that the user clicks to trigger the action, as well as the user interface elements to keep the user informed on the progress of the action.
The Server-Side
For the Server-side, let’s create a simple action that outputs JSON. In your app’s "actions" directory, create a file named "hello.php" with the following contents:
<?php
class actions_hello {
    function handle($params = []) {
        df_write_json([ (1)
            'code' => 200, (2)
            'message' => 'Action succeeded' (3)
        ]);
    }
}-
We use the
df_write_json()function to encode our output as JSON. -
The
codeis a status code that you create. Generally follow the HTTP convension where codes from 200-299 indicate success. 400-499 indicate some sort of "not allowed" error. 500-599 indicate some sort of server error. Etc.. -
The
messageProperty will contain a human-readable message about the result of the action.
The Client-Side
I’ll discuss two different solutions for the client side:
Solution 1: Writing a Custom Javascript Function
See Triggering Javascript Function with Action for details on triggering a Javascript function using an action. After setting up your action, you’ll have a definition in your actions.ini file like:
[hello]
    onclick="window.helloWorld();"
    category=record_actions
Once you have your action linked up to your Javascript function you can use the jQuery.post() function to trigger your action handler as follows:
window.helloWorld = function() {
    jQuery.post(DATAFACE_SITE_HREF, { (1)
        '-action' : 'hello' (2)
    }, function(result) { (3)
        var message = (res && res.message) ? res.message : 'Server error';
        if (result && result.code == 200) {
            alert('Success: ' + message);
            return;
        }

        alert("Failed: " + message);

    });
}-
The
DATAFACE_SITE_HREFconstant is always available, and refers to the entry point of your Xataface application. Uauallyindex.php. -
The 2nd parameter of
jQuery.post()is a dictionary with the POST request variables. In our case we want to call our custom handler so we reference it using the-actionparameter. -
The 3rd parameter of
jQuery.post()is a callback function that will be run with the action completes. The JSON result of our action PHP handler is includd in theresultargument.
The example above will perform an AJAX request to trigger our PHP action handler. It will then display the result in an alert() dialog.
This example is overly simplistic. You can improve it in a number of ways, including:
-
Adding some sort of progress indicator to provide some feedback to the user while the action is processed. This is especially important for long-running actions.
-
Add a
fail()callback to deal with the case where the HTTP request completely fails for some reason. The callback in this example will only be called if the handler returns a non-error HTTP status code.
Solution 2: Using ajax=1 Directive
Xataface provides a simpler alternative to providing your own Javascript function for triggering your action handler. You can simply specify the ajax=1 directive for our action:
[hello]
    category=record_actions
    ajax=1
This directive instructs Xataface to treat this as an AJAX action. When the user clicks on the action button, it will issue a POST AJAX request, and it will display the result in a status message.
When the action completes, it will display the contents of the "message" property of the JSON response in a similar status dialog. If the action fails, it will display an error message.
It expects the following properties in the JSON response:
- code
-
The Status code. It will interpret any code between 200 and 299 as a success.
- message
-
The message to display to the user.
- silent
-
Optional boolean parameter that will suppress the error or success message so that the action completes silently.
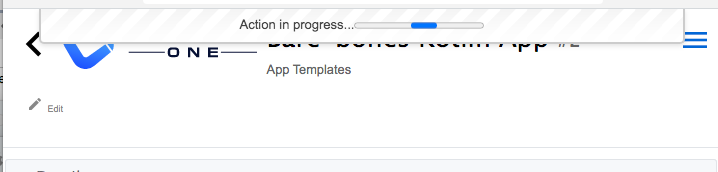
Showing a Progress Indicator
Problem
You want to display a progress indicator when the user performs a long-running action so that the user knows that the app is doing something.
Solution
Use the xataface.showInfiniteProgress() Javascript function to show an infinite progress indicator, and xataface.hideInfiniteProgress() to hide the indicator when you are done.
Example
showInfiniteProgress()$('button.download-btn').click(function(e) {
// A click handler that initiates a project download
downloadProject();
e.preventDefault();
return false;
});
// Boolean flag to prevent the user from double-clicking the
// download button and initiating two downloads.
var downloadInProgress = false;
// Function to download a project. This may take a few seconds
function downloadProject() {
if (downloadInProgress) {
// download is already in progress
// do nothing
return;
}
downloadInProgress = true;
// Display an infinite progress dialog to the user
// so they know that something is happening.
xataface.showInfiniteProgress(); (1)
if (!validateFormInputs()) {
// Some validation failed... abort
// Hide the infinite progress
xataface.hideInfiniteProgress(); (2)
// Release the "in progress" flag so that
// the download button will work again.
downloadInProgress = false;
alert('Download failed... check form inputs');
return;
}
var formData = new FormData();
formData.append("-table", "app_templates");
formData.append('-action', 'download_project');
formData.append('arg1', 'foo');
formData.append('arg2', 'bar');
fetch(DATAFACE_SITE_HREF, {
method : 'POST',
body : formData
}).then(function(response) {
if (!response.ok) {
throw new Error('Network response was not ok');
}
return response.blob();
}).then(function(blob) {
// The download completed.
// Now we can hide the infinite progress and
// re-enable the download button.
xataface.hideInfiniteProgress(); (3)
downloadInProgress = false;
var link = document.createElement('a');
link.href = window.URL.createObjectURL(blob);
link.download = mainName + ".zip";
document.body.appendChild(link);
link.click();
document.body.removeChild(link);
}).catch(function(error) {
// The download failed
// Hide the infinite progress
xataface.hideInfiniteProgress(); (4)
downloadInProgress = false;
console.log(error);
alert("Download failed "+error);
});
return;
}-
We show the infinite progress before performing the network request
-
We call
hideInfiniteProgress()if the network request was canceled. -
Call
hideInfiniteProgress()when the network request completes successfully. -
Call
hideInfiniteProgress()if the network request fails.
The above example shows the use of showInfiniteProgress() to show a progress indicator when the user initiates a network request. It calls hideInfiniteProgress() when the request completes or fails.
Relationships
Setting Default Sort for Related Lists
Problem
You want sort the related record tab on a particular column by default.
Solution
Use the table.default_sort.RELATIONSHIP_NAME fields.ini directive.
Suppose we want to sort our "posts" relationship by date posted in descending order (i.e. newest first). Then we would add the following directive to the beginning of the fields.ini file.
table.default_sort.posts=date_posted desc|
Tip
|
See Specifying Default Sorting to learn how to set the default sorting behaviour of the list view (i.e. for sorting NON-related records). |
Security
The following chapters cover all things security-related in Xataface.
Authentication
Xataface comes with authentication ready to roll out of the box. With a couple of configuration options in the conf.ini file, you can activate the default authentication scheme which uses a table (of your choice) in the database to authenticate against. It supports password encryption, and even includes a registration form if you choose to allow registrations for your application.
In addition Xataface’s authentication is pluggable, meaning you can write your own plug-ins to integrate your application with any authentication scheme you choose. Some authentication modules that already exist include:
- Yale CAS
-
A module to use Yale’s Central Authentication Service for authentication.
- LDAP
-
A module to use LDAP for authentication. There is also another, more advanced LDAP module developed by Viharm available here.
- HTTP
-
A module to use standard HTTP basic authentication.
- OAuth
-
A module to use an OAuth service for authentication. This module provides all of the common infrastructure required to support OAuth. There are also modules built on this module which provide authentication using a few popular web sites such as Facebook, Twitter, LinkedIn, and Instagram.
See Adding OAuth2 Login Support for more information about setting up OAuth authentication.
Setting up Basic Authentication
-
Create a table (if you haven’t already) to store your application’s users. At the bare minimum, this table should have fields to store the username and password (you may call these fields whatever you like). An example table might be:
CREATE TABLE `users` ( `username` VARCHAR(32) NOT NULL, `password` VARCHAR(32) NOT NULL, PRIMARY KEY (`username`) ) -
Add the following (
_authsection) to yourconf.inifile:[_auth] users_table=users username_column=username password_column=passwordThis tells Xataface which table you are storing your user accounts in, and the names of the username and password columns.
-
Add a sample user record to the users table if one does not exist yet.
INSERT INTO `users` (`username`,`password`) VALUES ('steve','mypass') -
Load your application in your web browser and you’ll notice a "login" link in the upper right that allows you to log in.
Using Encryption for the Password
It is good practice to perform some type of encryption on passwords that you store in a database, so that they will be safe, even if your server’s security is compromised. Some common forms of encryption are SHA1 and MD5. You can apply encryption to your passwords by defining the encryption property to the password field’s section of the users table fields.ini file. E.g.
[password]
encryption=md5This tells Xataface to save data to the password field of the users table with MD5 encryption.
[password]
encryption=sha1This tells Xataface to save data to the password field of the users table with SHA1 encryption.
|
Important
|
In order to switch to MD5 or SHA1 encryption with an existing Xataface installation, all un-encrypted (plain text) passwords must be first converted to MD5. There are several ways to do this. One method is to directly convert the passwords in the database with the MySQL MD5 or SHA1 function. This can be done from the command-line or using a tool such as phpMyAdmin. |
|
Tip
|
If you only have a small number of user accounts that require encryption to be updated, it may be easier to just change the passwords manually through Xataface by editing the user records. They will be automatically encrypted according to the |
Limiting Access Based on User
Authentication and permissions are distinct issues, but they are related. It is quite common to require a user to log in to access a section of an application. Permissions can be defined in either the Application delegate class or a table’s delegate class - or both.
As an example, if we want to require users to log in to access our application we could define the following getPermissions() method to our application delegate class:
getPermissions() implemented. This implementation allows ALL access to logged in users, and NO access otherwise.<?php
class conf_ApplicationDelegate {
function getPermissions(Dataface_Record $record=null){
// $record is a Dataface_Record object
$auth = Dataface_AuthenticationTool::getInstance();
$user = $auth->getLoggedInUser();
if ( $user ) return Dataface_PermissionsTool::ALL();
else return Dataface_PermissionsTool::NO_ACCESS();
}
}Checking Who Is Logged In
The Dataface_AuthenticationTool class handles all of the dirty work of Xataface’s authentication. It provides public methods to check who is logged in and perform authentication if necessary. Anywhere inside your Xataface application you can find out who is logged in using one of the following two methods:
-
getLoggedInUser()- Returns a Dataface_Record object representing a record from the users table. -
getLoggedInUsername()- Returns a string.
It is quite useful in the getPermissions() method of your delegate classes to find out who is logged in:
function getPermissions(Dataface_Record $record=null){
$auth = Dataface_AuthenticationTool::getInstance();
$user = $auth->getLoggedInUser();
if ( $user and $user->val('username') == 'shannah' ){
// Steve is logged in so we give him special permissions
return Dataface_PermissionsTool::ALL();
} else {
// Steve is not logged in so we give only read only permissions
return Dataface_PermissionsTool::READ_ONLY();
}
}Checking Who is Logged In from a Template
All templates in Xataface have access to the $ENV array that contains references to lots of useful information, including the currently logged in user:
$ENV.user-
The user object of the currently logged in user (or null if nobody is logged in). This is a Dataface_Record object.
$ENV.username-
The name of the currently logged in user. A string.
For example:
<!--
Print 'Hello Steve' if Steve is logged in,
'Hello Helen' if Helen is logged in, or just
'Hello' if nobody is logged in.
-->
Hello {$ENV.username}
<!-- Print some personal user info -->
{if $ENV.user}
Phone number: {$ENV.user->val('phone')}<br/>
Email address: {$ENV.user->val('email')}<br/>
{/if}This example presumes that the users table has phone and email fields.
Allowing User Registration
By default, there is no way for users to create an account themselves. A user account would need to be set up by the system administrator first. If you want users to be able to register for accounts themselves, you can add the allow_register=1 directive to the _auth section of the conf.ini file.
E.g.
[_auth]
    users_table=users
    username_column=username
    password_column=password
email_column=email (1)
allow_register=1 (2)-
The
email_columndirective specifies the column that should store the user’s email address. This is required for user registration since it needs to send an activation email to verify the user’s email address. -
The
allow_register=1directive turns on user registration.
With these settings, the login form will now contain a "Register" link as shown below:

If the user clicks on this link, they’ll be taken to a registration form, which is basically a "new record" form on the Users table.
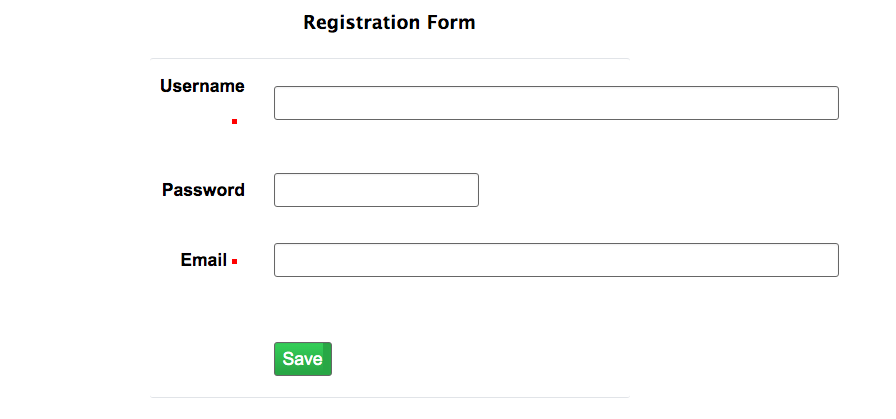
The difference between the registration form and the New record form is that the registration form doesn’t immediately add records into the database. When the user submits the form, it stores the data in a special registrations table, and sends the user an email with a link to confirm their registration. If the user clicks on this link, it will then copy the registration information into an actual record of the users table and save it.
Recommended Users Table Permissions
The registration form includes all fields of the users table that grants the "register" permission. The register permission is the only permission that is part of the "NO ACCESS" role, and it is not included in any of the default roles. Ideally you should be explicit about which fields of the users table you grant the "register" permission on.
The following is a snippet from the delegate class for the users table of an application which demonstrates one way to define permissions.
<?php
class tables_users {

    /**
     * Record/Table-level permissions.
     * Admins = ALL access
     * Owner (i.e. the user whose record this represents) = READ ONLY access
     * Non-logged in user = Only 'register' permission
     * Other users = NO ACCESS
     */
    function getPermissions(Dataface_Record $rec = null) { (1)
        if (isAdmin()) {
            // Admins get ALL access (this defers to application delegate class
            // which grants all access to admin).
            return null;
        }
        $user = getUser();
        if ($user and $rec and $rec->val('userid') == $user->val('userid')) {
            // This record is the user record for the current user.
            // give him read only access.
            return Dataface_PermissionsTool::READ_ONLY();
        }
        $user = getUser();
        if (!$user) {
            // User is not logged in.
            // Grant the 'register' permission to allow the register action
            // to work properly.
            return array('register' => 1);
        }

        // No access to anyone else.
        // This defers to the application delegate class which grants no
        // access to non-admin users.
        return null;
    }

    /**
     * Default field permissions.
     * Non-Logged-in users = Deny the 'register' permission
     * All other users = Defer to record-level permissions.
     */
    function __field__permissions(Dataface_Record $rec = null) { (2)
        $user = getUser();
        if (!$user) {
            return array('register' => 0);
        }
    }

    /**
     * Permissions for username field.
     * Non-logged-in users = Allow the 'register' permission.
     * All other users = Default to default field permissions.
     */
    function username__permissions(Dataface_Record $rec = null) { (3)
        $user = getUser();
        if (!$user) {
            return array('register' => 1);
        }
    }

    /**
     * Permissions for password field.
     * Non-logged-in users = Allow the 'register' permission.
     * All other users = Default to default field permissions.
     */
    function password__permissions(Dataface_Record $rec = null) { (4)
        $user = getUser();
        if (!$user) {
            return array('register' => 1);
        }
    }

    /**
     * Permissions for the email field.
     * Non-logged-in users = Allow register permission.
     * All other users = Default to default field permissions.
     */
    function email__permissions(Dataface_Record $rec = null) { (5)
        $user = getUser();
        if (!$user) {
            return array('register' => 1);
        }
    }

    // ...
}-
getPermissions()defines record-level permissions. -
fieldpermissions()defines default field-level permission overrides. In this case we are denying the "register" permission by default so that no fields appear on the registration form by default. -
username__permissions()overrides permissions of the "username" field to grant the "register" permission, so that it will appear on the registration form. -
password__permissions()overrides the permissions of the "password" field to grant the "register" permission, so that it will appear on the registration form. -
email__permissions()overrides permissions of the "email" field.
|
Tip
|
This snippet makes use of the getUser() and isAdmin() functions which are not a part of the Xataface public API. They are defined separately in this app. You can see sample implementations of these functions here.
|
Disabling Email Validation
By default the registration form doesn’t create the account directly. It will first send a validation email to the user. When the user clicks on the "activation link" in this email, the account is created and the user is automatically logged in.
If you with to skip this step, and have the registration form create accounts directly, you can override the "register" action in your actions.ini file and override the "email_validation" directive as follows:
[register > register]
  email_validation=0
Enabling Email Login
I hate passwords. I hate having to think of a new password every time I register for a website, as I know I won’t remember it. When visiting a website for the first time in a while, I almost always need to use the "Forgot Password" function. This process is painful as it requires several extra steps, and, at the end of it all, I’m forced to create yet another password that I won’t remember.
In many cases a better option is for the site to support "Email Login" directly. The workflow for email login is simple:
-
The login form has a single field for "Email", and a button "Email Login Link" as shown here:
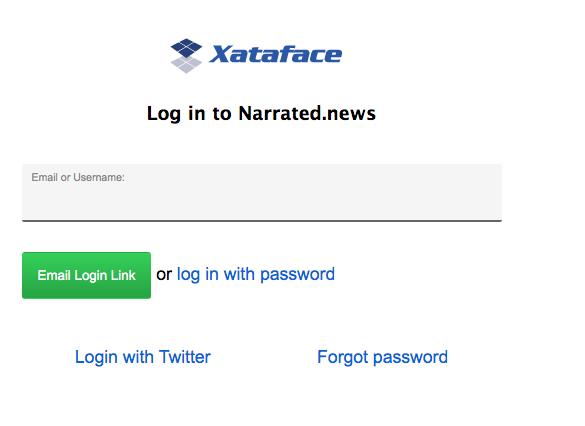
-
The user enters their email address and presses "Email Login Link".
-
An email is sent to the user’s email with a single-use link to log into the app. The email looks like the following:
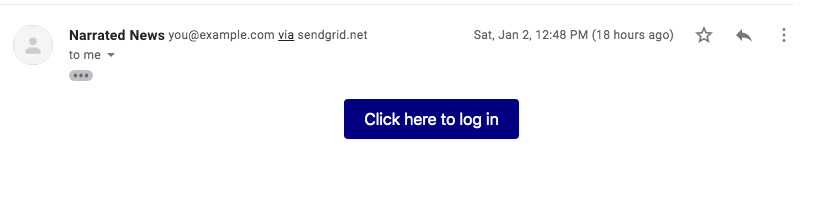
-
The user clicks on the link and they are logged in directly without being hassled to enter a password.
To enable Email login, your users table must have an email field. You may use the "username" field to store the email address if you like, but the _auth section of the conf.ini file needs to declare which field contains the email.
[_auth]
    users_table=users
    username_column=username
    password_column=password
    email_column=email (1)
allow_email_login=1 (2)-
email_columndirective, specifying that the user email address is stored in the "email" column. -
allow_email_logindirective enables Email login.
|
Warning
|
If you are allowing users to log in with their email address, you should take some care to prevent duplicate emails. Xataface puts some automatic safe-guards in place such as login won’t work if it finds two user accounts with the same email address. You should additionally add a Unique Key/Index on your email column to further prevent users from having the same email address. |
|
Warning
|
While you can use the same field for the username and email address, but I don’t recommend this as users sometimes change their email address, and the username should stay unchanged to ensure referential integrity. |
With these directives in place, the login form will look something like the following:
Notice that there is a link to "log in with password". Pressing this link will toggle back to the password login form:
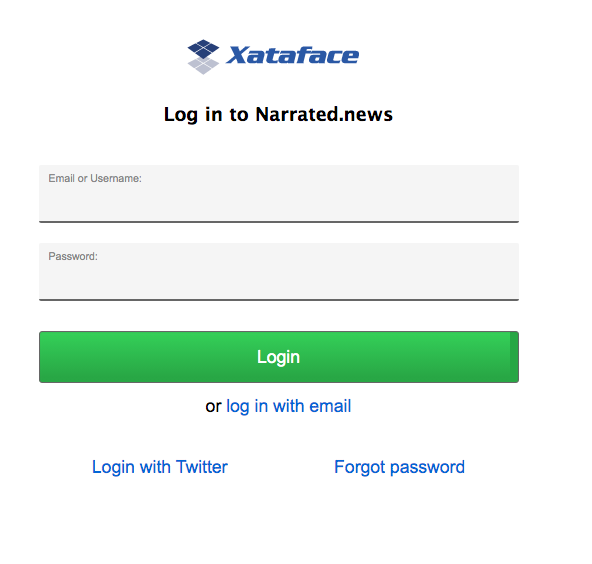
Also notice that there is still a "Forgot password" option, in case the user would prefer to log in with their password.
Disabling Password Login
If you have email login enabled, you can optionally disable password login entirely. This may make sense for some services, in the spirit of "less is more" in terms of usability. You can use the allow_password_login=0 directive in the _auth section of the conf.ini file to achieve this:
[_auth]
    users_table=users
    username_column=username
    password_column=password
    email_column=email
    allow_email_login=1
allow_password_login=0 (1)-
The
allow_password_logindirective disables password login so that email login is the only option.
With these options, the login form will not include the "or log in with password" link as shown below:
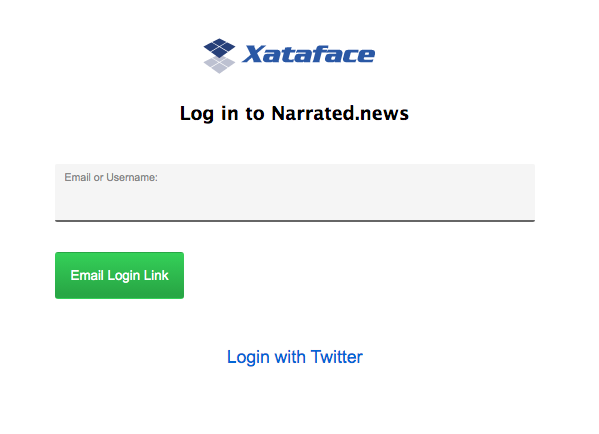
Also notice that the "Forgot Password" option is no longer displayed. With allow_password_login=0 you’ll also notice that there is no "Change Password" option once logged in.
Requesting Short Login Code
In some cases a login link may not be the ideal format for the second step of email login. For example, if you are requesting a login link for a mobile app, it may be easier to provide the user with a short login code in their email which they can enter in the app to complete the login. This is disabled by default because a shorter login code is a little bit less secure than a full login token.
Short login codes can be enabled for API Authentication only using the following workflow:
-
Add the
short_token_lengthdirective to the[_auth]section of the conf.ini file to set the number of characters in the login code. E.g.Setting login code length to 6 in conf.ini file.[_auth] ... short_token_length=6 -
Send a POST request to the xf_email_login action with the following parameters:
Parameter Value -action
xf_email_login
--redirectUrl
Any URL
--email
The email address of the account
--request-login-code
1
--remember-me
0 or 1. 1 indicates that the login should be sticky.
-
This will trigger an email to the user with the login code. The email will include the code as shown below.
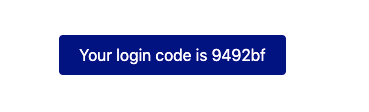
The user would copy this code into your app
-
Your app would then issue a login request with this code as the
--tokenparameter, using a POST request with the following parameters:Parameter Value -action
login
--token
The login code that the user entered as received in their email.
--no-prompt
1
TipThe HTTP request should include the header
Content-type: application/x-www-form-urlencodedSee API Authentication for more details about API authentication.
Email Registration
The email login examples shown thus far have not included user registration. (See Allowing User Registration), but it is fully supported. If the user clicks on the "Email Login Link", and there is a valid email address in the Email field, it will always at least "pretend" to send a login email. I.e. it will always display the following dialog:
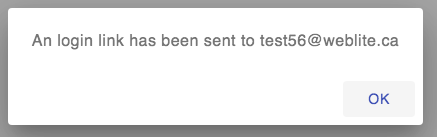
This is for security purposes to prevent malicious actors from testing different email addresses to see if they have an account.
However, depending on your authentication configuration, it will do something different.
- If
allow_register=0orallow_registeris not set -
The system won’t send an email at all, but it will log this to the PHP error log.
- If
allow_register=1 -
The system will send an email, but instead of a login link, it will include a link to the registration form. The email will look something like:
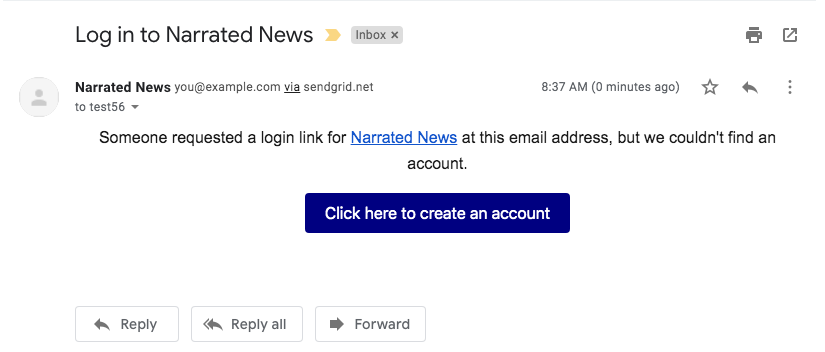
Enabling Auto-Registration
Xataface supports an auto-registration feature that helps to minimize the amount of friction involved in creating a user account. When Auto-registration is enabled, the "Email login link" will work (almost) identically for existing user accounts as they do for non-existent accounts.
To enable auto-registration, you can add the auto_register=1 directive to the _auth section of your conf.ini file. E.g.
[_auth]
    users_table=users
    username_column=username
    password_column=password
    email_column=email
    allow_register=1 (1)
    allow_email_login=1
auto_register=1 (2)-
The
auto_register=1directive turns on auto-registration. -
The
allow_register=1directive is required for auto-registration to work.
Auto-registration pertains to the scenario when a user presses the "Email Login Link" and they don’t already have an account on the system. The "normal" workflow, in this case is to send a registration link (if allow_register=1), which takes the user to the registration form.
With auto_register=1, the register link simply creates an account for the user and logs them in directly, without visiting any registration form.
This presents the minimum amount of friction possible for creating new accounts.
The Register Action
If you have email authentication enabled (i.e. allow_email_login=1), password authentication disabled (i.e. allow_password_login=0), and auto registration enabled (i.e. auto_register=1 and allow_register=1), then the "Register" link will still appear on the login form, but it will merly display a prompt advising the user to use the "Email Login Link" button to create an account.
Session Configuration
By default, Xataface authentication uses PHP sessions, which relies on a SESSION ID cookie to link requests to a session file on the server file system. The logged in username is stored in the $_SESSION['UserName'] variable. If you want to log the user out programmatically, you could simply unset this variable, or destroy the session. Most of the time, however, it is recommended that you just use the built-in Xataface workflows for login/logout.
The three most common aspects of sessions that developers want to configure are:
-
The Cookie Timeout - E.g. When should the cookie expire. This can be configured using the
session_timeoutproperty in the_authsection of the conf.ini file. The default value is "0", meaning that the cookie will persist in the browser until the browser is closed. -
The Cookie Path - E.g. What path in your app’s domain will have access to the session cookie. By default the cookie is only availalble to the application root. E.g. If your application is located at
http://example.com/path/to/myapp/index.php, then the cookie path will be "/path/to/myapp/". Therefore scripts running under "/path/to/anotherapp/" won’t be able to access the cookie (and thus won’t share sessions with this app). Neither will scripts in a parent directory (e.g.http://example.com/anotherscript.php). Only scripts under the path/path/to/myapp/…will have access to the session cookie. This can be configured using thecookie_pathproperty in the_authsecton of the conf.ini file. -
Garbage Collection Timeout - E.g. How long after a session is idle, before the server will delete the session files. By default this is set to 5 minutes longer than the cookie timeout, and thus, can be configured using the same
session_timeoutproperty.
Example Settings
[_auth]
  session_timeout = 86400   ; 1 day
  cookie_path=/             ; Session cookie available to whole domain
  session_name=my_app_sid   ; Optional custom session name to avoid collisions with other apps
Auto-Login Support
In some cases you may want your sessions to last "forever". I.e. If the user logs in once, you want them to stay logged in forever- or until they explicitly log out. Your first instinct might be to use the session_timeout directive to a really big number so that sessions last for 10 years. This is problematic for two reasons:
-
Keeping session files lingering for 10 years can fill up your server disk space pretty quickly. Especially on sites that get a lot of traffic.
-
Some servers may thwart your intentions and delete the session files despite your explicit intention to keep them. Especially on a shared server, it can be difficult to get full cooperation of the server to not delete those session files.
A better alternative is to activate "auto-login" support in your app. With auto-login support enabled, the login form will include a "Remember me" checkbox as shown below:
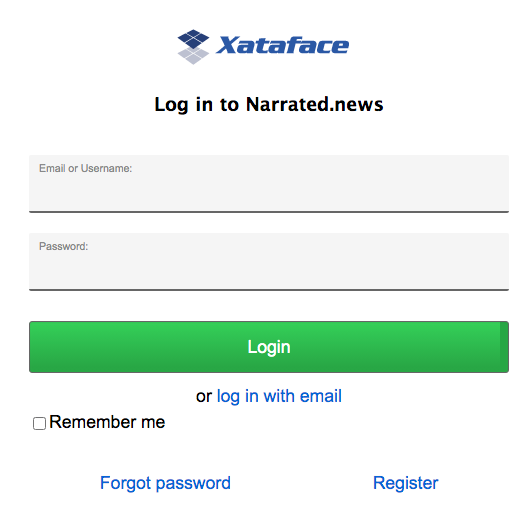
If the user checks this box, it will save a token on the server (in the dataface__autologins table), add a long-lived cookie. If the user tries to load a page a few days later, Xataface will first try to load the session. If none is found, it will look for an "autologin" cookie to and, if found, it will log the user in automatically, starting a new session seamlessly.
Example
[_auth]
    users_table=users
    username_column=username
    password_column=password
    email_column=email
    allow_register=1
    allow_email_login=1
    allow_password_login=1
    auto_register=1
autologin=1 (1)-
The
autologindirective which enables autologin support.
Auto-Login Configuration Directives
You can customize the behaviour of the auto-login support using the following directives, which all go in the _auth section of the conf.ini file.
autologin_cookie-
The name of the cookie to use for storing the autologin token. Default is "xf_pulse"
autologin.logout_all_devices-
Set to "1" to cause the autologin tokens to be invalidated for ALL devices when the user logs out. By default, when the user logs out, it will invalidate the autologin token in the current device, but if they are logged in on other devices, it will leave those untouched.
OAuth2 Authentication
Xataface supports Oauth2 authentication via the oauth module. This module provides all of core functionality to support OAuth2. There are also modules built to provide Oauth support for specific services, such as Facebook, Twitter, LinkedIn, and Instagram. These "sub" modules all depend on the core oauth module. They simply provide a few specific configuration settings to support OAuth2 on those services.
|
Tip
|
OAuth 2.0 is the industry-standard protocol for authorization. OAuth 2.0 focuses on client developer simplicity while providing specific authorization flows for web applications, desktop applications, mobile phones, and living room devices. This specification and its extensions are being developed within the IETF OAuth Working Group. For more information about the Oauth2 spec, see the official OAuth 2.0 website. |
Adding OAuth2 Login Support
The first step toward adding OAuth2 support in your app, is to download the oauth module into the modules directory of your application. E.g.
modules/oauth/oauth.php
And add a a corresponding entry to the [_modules] section of your conf.ini file:
[_modules]
  modules_oauth=modules/oauth/oauth.php
You’ll also need to add the pre_auth_types entry to the [_auth] section oc your conf.ini file:
pre_auth_types=oauth_token to the _auth section of your conf.ini file instructs Xataface to attempt authentication using the oauth[_auth]
users_table=users
username_column=username
password_column=password
pre_auth_types=oauth_tokenAPI Authentication
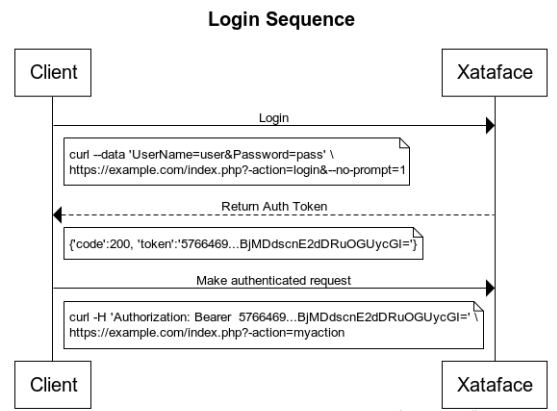
Xataface provides a REST API for authentication so that you can access your application using a REST client. When using this API, you’ll perform a request to the "login" action to obtain an authentication token. You can then make authenticated requests to your app by adding this token in the Authorization header as a bearer token.
Login
To log in using the API, simply perform a POST request to ?-action=login&--no-prompt=1
-
UserName- The username to log in with. -
Password- The password to log in with.
If login succeeds, you’ll receive a JSON response with a token. E.g.
{
  "code":200,
  "token":"576646...2dDRuOGUycGI=",
  "message":"Logged in"
}
An unsuccessful login will look something like:
{"code":500,"message":"No UserName provided."}Making Authenticated Requests
Once you have obtained a token, you should include this token in the Authorization header of HTTP requests. E.g.
curl -H 'Authorization: Bearer {TOKEN}' https://example.com?index.phpBut replace {TOKEN} with your token received during login.
Logging Out
To log out, simply perform a POST or GET request to ?-action=logout&--no-prompt=1
Relationship Permissions
As relationships are a core feature of Xataface, it is helpful to understand how to handle permissions on related records. Even if you apply permissions to every table individually, you need to take into account the relationships that you have defined between tables, because they may open access to actions that you did not intend.
For example, suppose we have two tables: people and publications, and we have a relationship from publications table to the people table called publication_authors.
Suppose you give a user write access to a record of the publications table, but no access to the people table. If you are allowing the add new related record permission on the publications table record, then the user will still be able to add new people, via the "Add related people record" function of the database. This may or may not be desirable.
This section discusses the issues that arise due to relationships and permissions, and how to deal with them.
The Xataface permissions.ini file defines a handful of permissions that are related to the management of related records. These include:
- add new related record
-
Permission to add a new related record to a relationship.
Roles:
EDIT,DELETE,OWNER,ADMIN,MANAGER - add existing related record
-
Permission to add an existing record to a relationship.
Roles:
EDIT,DELETE,OWNER,ADMIN,MANAGER - remove related record
-
Permission to remove a record from a relationship. (This only allows removing a record from the relationship - not deleting the record from the database, so this is only really relevant in a many-to-many relationship). Roles:
EDIT,DELETE,OWNER,ADMIN,MANAGER - delete related record
-
Permission to delete a related record. This allows both removing the related record from the relationship, and deleting the record from the database. This permission is not included in any default roles. A combination of permission for remove related record? in the source table and delete? in the target table, are equivalent to access to this permission. Use this permission only when you need to override the ability to delete records from the database based on membership in a relationship.
Roles: -
- view related records
-
Permission to view the records of a relationship.
Roles:
READ ONLY,EDIT,DELETE,OWNER,ADMIN,MANAGER - related records feed
-
Permission to access the RSS feed of a relationship.
Roles:
READ ONLY,EDIT,DELETE,OWNER,ADMIN,MANAGER
Fine-grained, Per-relationship Permissions
You may often find that defining a flat set of permissions to all relationships on a record is insufficient for your purposes, because some relationships may demand different access levels than others. You can override the permissions for any particular relationship by implementing the rel_relationshipname__permissions method in the table’s delegate class, where relationshipname is the name of the relationship.
e.g. Consider the relationship manufacturers:
function rel_manufacturers__permissions($record){
    // $record is a Dataface_Record object
    return ['view related records' => 0];
}
This will tell xataface that users should not be able to view related records on the manufacturers relationship. This will override any permissions that were defined in the getPermissions method.
More Complete Example
In the following example, we design a products database. We use two relationships on our products table. One to keep track of the parts that are used in our product. The other to keep track of the users that are allowed to edit our products.
We want to make it so that only the product owner can manage the editors for a product, but anyone in the product_editors relationship is allowed to edit the product or add/remove parts from the product.
We don’t want to give any users access directly to the parts, product_parts, or product_editors tables. We want all access to go through the relationships on the products table.
Database/Relationship Design
Consider a database with five tables:
-
products (product_id, product_name, owner_username) -
parts (part_id, part_name) -
product_parts (part_id, product_id) -
product_editors (product_id, editor_username) -
users (username, password, role)
And we have the following relationships on the products table:
[parts]
parts.part_id=product_parts.part_id
product_parts.product_id="$product_id"

[editors]
product_editors.product_id="$product_id"
Application Permissions : Very Restrictive
Like a good boyscout, we define our default permissions in the Application Delegate Class to be very restrictive: Don’t let anyone do anything.
class conf_ApplicationDelegate {
    function getPermissions($record){
        return Dataface_PermissionsTool::NO_ACCESS();
    }
}
Products Table Permissions: Less restrictive
Now we open it up for our products table in the getPermissions() method of the products delegate class.
class tables_products {
    function getPermissions(Dataface_Record $record = null){
        $user = Dataface_AuthenticationTool::getInstance()
                ->getLoggedInUser();
        if ($user and $record and $record->val('owner_username') == $user->val('username')){
            // Give the record owner Edit permissions on the product
            return Dataface_PermissionsTool::getRolePermissions('EDIT');
        }

        // Everybody else gets read only access to the products table.
        return Dataface_PermissionsTool::READ_ONLY();
    }
}
Checking if the current User is an Editor
So far we have given the product owner edit permissions and everyone else read only permissions. We still need to allow editors to edit the product. In order to do this we need to be able to efficiently find out if the current user is an editor of a particular product. There are a few different ways to do this, but some are better than others. Some strategies include:
- Perform an SQL query inside the
getPermissionsmethod to see if the user is an editor for the product -
THIS IS VERY BAD!!! The
getPermissionsmethod should not include any IO or database queries because it is called a large number of times per request… making expensive calls in this method will slow down your app dramatically. - Create a function to load and cache all of the current user’s products so that this can be easily checked at will.
-
This is fine if the user is expected be able to edit only a few products. If he could be an editor for thousands of products, this may not be practical as it will cause you to have to load thousands of records into memory on every page request.
- Use the
__sql__method of the delegate class to create a grafted field on the products table indicating whether the current user is an editor for the product -
This results in a very quick and accessible indicator variable that can be used in the
getPermissionsmethod to check to see if the current user is an editor for the current product. E.g. In the tables/products/products.php file (delegate class):function __sql__(){ return sprintf("select p.*, pe.editor_username from products p left join product_editors pe on p.product_id=pe.product_id where pe.editor_username='%s'", addslashes(Dataface_AuthenticationTool::getInstance()->getLoggedInUsername()) ); }This will result in a situation where product records will have an additional field editor_username which will either be blank if the current user is not an editor for the product; or will contain the current user’s username if they are an editor for the product.
Table Permissions for Product Editors
Now that we have a reliable way to tell, for any given product, whether the current user is, in fact, an editor, we can ammend the getPermissions method of the products table to include our editor permissions.
class tables_products {
    function getPermissions($record){
        $user = Dataface_AuthenticationTool::getInstance()->getLoggedInUser();
        if ( $user and $record and $record->val('owner_username') == $user->val('username')){
            // Give the record owner Edit permissions on the product
            return Dataface_PermissionsTool::getRolePermissions('EDIT');
        }

        if ( $user and $record and $record->val('editor_username') == $user->val('username') ){
            // If the user is an editor, we give them edit permissions
            // also
            return Dataface_PermissionsTool::getRolePermissions('EDIT');
        }


        if ( $user ){
        // Other logged in users have read only access
            $perms = Dataface_PermissionsTool::READ_ONLY();
            $perms['new'] = 1; // We'll also let them add new products
            return $perms;
        }

        // Regular users just get the default permissions as
        // defined in the Application Delegate class
        return null;
    }
}
=====Removing Editor Access to the Editor Relationship
You’ll notice that at this point, the product editor has exactly the same permission as the product owner. They both have permission to add and remove records from all relationships on the product. However, we don’t want them to be able to access the editors relationship at all. We will use the rel_relationshipname__permissions method to override the permissions for the editors relationship.
function rel_editors__permissions($record){
    $user = Dataface_AuthenticationTool::getInstance()->getLoggedInUser();
    if ($user and $record and $record->val('owner_username') == $user->val('username')) {
        // Owners should just get their normal permissions
        return null;
    }

    if ($user and $record and $record->val('editor_username') == $user->val('username')) {
        // If the user is an editor, we give them edit permissions
        // also
        return [
            'view related records' => 0,
            'add new related record' => 0,
            'add existing related record' => 0,
            'remove related record' => 0,
            'delete related record' => 0
        ];
    }

    // Other users just get their normal permissions
    return null;

}
Assigning product owner by default
With the current permissions, something funny would happen. Users have permission to add new records, but once the record is added they won’t be able to edit it because they are neither an editor nor the owner of the product. We’ll fix this by assigning the current user as the product’s owner using the beforeSave trigger in the products delegate class:
function beforeSave($record){
    $user = Dataface_AuthenticationTool::getInstance()->getLoggedInUser();
    if ( $user ){
        $record->setValue('owner_username', $user->val('username'));
    }
}
Testing Out Our Solution
In your testing of the solution, you should find the following:
-
Trying to access any table other than the products table should result in a permission denied error.
-
If you access the products table, you should be able to see a list of existing products, and the "Add New Record" action.
-
After you add a new product you should see that you are the product owner.
-
As a product owner you should see both the parts and editors tabs in your product record. You should be able to view and add new records to both of these relationships.
-
Add another user as an editor to your product, then log in as that user. You should be able to edit the product, but you shouldn’t be able to see the editors tab for the product.
Theme Customization
The following sections form a sort of cook book with recipes for customizing themes in Xataface.
Changing the Site Logo Image
Problem
You want to use a custom logo for your application instead of the default "Xataface" logo.
Solution
Use the site_logo directive in your conf.ini file to point to your custom logo image.
E.g.
site_logo=images/my-custom-logo.pngResponsive Logo Image
Problem
You want mobile browsers to display a different logo image than desktop browsers.
Solution
Define the [alt_logos] section of your conf.ini file to specify the different images you want to use, along with the rules that define when they are used. The values in this section are used to construct a <picture> element with corresponding <source> elements for each image.
Example
[alt_logos]
images/mobile-logo.png="media:max-width:768px"
images/desktop-logo.png="media:min-width:768px"
In the above example, the mobile-logo.png will be used on devices with width smaller than 768px, and desktop-logo.png will be used on devices with greater tan 768px.
|
Note
|
The
For more information about the |
Using WebP Images for the Logo
Problem
You want to use a .webp image for the app logo, but some browsers (e.g. Safari) don’t support the .webp format.
Problem
Use the [alt_logos] solution described in Responsive Logo Image, but use the type attribute on the logos to specify the mimetype, so that browsers that don’t support .webp will automatically choose the format that they support.
E.g.
[alt_logos]
images/site-logo.webp="type:image/webp"
images/site-logo.png="type:image/png"|
Tip
|
The .webp image format can result in images that are 10x smaller than the same image in .png format, without sacrificing quality. The only catch right now is that some browsers (notably Safari) don’t support .webp. Use the Squoosh online app to easily experiment with different image formats to find the best solution for your needs. |
Adding a Custom Stylesheet
Problem
You want to add a custom stylesheet to your application so that you can override the default styles, and provide styles for your custom elements.
Solution
The xf_stylesheet() function can be used to inject a stylesheet into either the <head> section of the app’s page, or into the CSS bundle that is compiled by the CSSTool. Let’s start with the simplest case, where you want to include the stylesheet in the entire application (i.e. it should be loaded in every page of the app), and the stylesheet is hosted on a CDN (content-delivery network). In this case, you should place the call to xf_stylesheet() inside the beforeHandleRequest() method of the application delegate class.
e.g.
<?php
class conf_ApplicationDelegate {
    function beforeHandleRequest() {
        xf_stylesheet('https://example.com/styles.css');
    }
}
This will append a <link rel="stylesheet"…> tag in the <head> section of every page.
Hosting Stylesheet
If you want to host the stylesheet as part of the app, it is customary to create a css directory in your application’s main directory where you place your CSS files. So we can copy our stylesheet into this directory:
myapp/
  css/
    mystylesheet.css
And use embed it just as before in the beforeHandleRequest() method.
<?php
class conf_ApplicationDelegate {
    function beforeHandleRequest() {
        xf_stylesheet('mystylesheet.css');
    }
}
The CSS Tool and Include Paths
xf_stylesheet() takes an optional 2nd parameter which is a flag to indicate whether the stylesheet should be included directly in the <head> section, or bundled by the CSS tool, and injected dynamically on page load.
xf_stylesheet('mystylesheet.css')is the same as
xf_stylesheet('mystylesheet.css', true)Which means that the stylesheet will be bundled by the CSS tool. All stylesheets in a particular request that are included using the CSS tool are bundled together into a single minified file, which is added to the document on load. The CSS tool has a set of include paths where it looks for CSS files to include, and these paths are treated as "roots" for all CSS files. The "css" directory is one of these "roots" by default. This is why we only need to specify "mystylesheet.css" in the path rather than "css/mystylesheet.css" - because all CSS files processed by the CSS tool are searched relative to the include path roots.
You can set the 2nd argument to false to simply include the CSS file in the `<head> of the document, and not have the CSS tool process it. In this case, you would need to include the full relative path to the CSS file. E.g.
xf_stylesheet('css/mystylesheet.css', false);When to use the CSS Tool
With two different options for including stylesheets, you might be wondering when you should and should not use the CSS tool. Generally, I’ll use the CSS tool if I’m building a module and I want other modules and apps to be able to override the CSS file. However, if I’m just including a CSS file that will be used for my application styles, I won’t use the CSS tool.
|
Tip
|
If you specify the CSS file using a full URL (e.g. "http://…" or "https://…." or "//…"), |
Changing the Color Scheme
Problem
You want to override the default color scheme with your own color scheme.
Solution
Add a custom stylesheet that redefines Xataface’s theme color variables
Xataface uses CSS variables to define the colors for its theme. You can create an entirely new color scheme by simply creating a custom stylesheet (see Adding a Custom Stylesheet) which redefines these variables. Here is a bare-bones example of such a "theme" stylesheet:
:root {

    --mainBgColor: white; /* Body background color */
    --mainTextColor: black; /* Default text color */
    --secondaryTextColor: #666666; /* Used for descriptions text*/

    /* Link text colors */
    --linkTextColor: #0366d6;
    --linkTextVisitedColor: Purple;
    --linkTextActiveColor: Red;

    /* Colors used for block borders */
    --highlightColor: rgb(225, 228, 232);
    --highlightColorLight: rgb(236, 239, 241);

    --trimBgColor:#f6f8fa; /* Alt background color used for striping or providing contrast */

    /** Color of text in main buttons and menu items **/
    --buttonColor: rgb(118, 118, 118);
    --buttonBgColor: #28a745;

    /** Color of text in main buttons and menu items when selected */
    --buttonSelectedColor: black;

    /** Navigation tab top border color when tab is selected */
    --tabRidgeSelectedColor: darkorange;
    --menuSelectedColor: black;
    --menuBorderColor: rgb(218, 220, 224);
    --menuBgColor: #fefefe;
    --menuColor: #888888;

    /** Navigation tab top border color when hovering over the tab. */
    --tabRidgeHoverColor: purple;

    /** The navigation tab ridge color when not selected. */
    --tabRidgeColor: #eeeeee;

    /** Bg color of tab when hovering */
    --tabHoverBgColor: rgb(244, 246, 250);

    --inputBgColor: var(--mainBgColor);
    --inputTextColor: var(--mainTextColor);
    --inputBorderColor: #666666;
    --inputFocusedBorderColor: #ffa500;

    /** Login Form-specific Colors */
    --loginFieldBgColor: #f5f5f5;   /* Input fields background */
    --loginFieldUnderlineColor: #666666;  /* Input fields underline */
    --loginFieldUnderlineFocusedColor: #28a745;
    --loginFieldLabelColor: #888888;
    --loginFieldLabelFocusedColor: #28a745;

    /* Submit buttons */
    --submitButtonBgColor: #28a745;
    --submitButtonBgImage: linear-gradient(-180deg,#34d058,#28a745 90%);
    --submitButtonTextColor: #fff;

    /* Alert and error message colors */
    --messageBorderColor: #222;
    --messageBgColor: #eaeaea;
    --messageTextColor: #333;

    /* Mobile theme footer colors.  E.g. for bottom tabs */
    --mobileFooterBgColor: #fefefe;
    --mobileFooterBorderColor: #666666;
    --mobileTabIconColor: #999999;
    --mobileTabLabelColor: #999999;
    --mobileTabIconSelectedColor: rgb(10,132,255);
    --mobileTabLabelSelectedColor: rgb(10,132,255);

    /* Mobile theme status bar/titlebar */
    --mobileStatusBarBgColor: black;
    --mobileStatusBarBorderColor: black;
    --mobileTitleTextColor: white;


    /* Mobile theme sidebar */
    --sidebarMenuTextColor: #fff;
    --sidebarTextColor: rgba(255, 255, 255, 0.50);

}|
Note
|
The list of CSS variables may grow or change over time. Refer to the plone.css file in the Xataface root directory for a definitive list of styles. |
The following is an example "dark" theme for Xataface defined wholly overriding CSS color variables:
:root {
    --mainBgColor: black;
    --trimBgColor:#333333;
    --stripeBgColor: #333;
    --mainTextColor: white;
    --secondaryTextColor: #eaeaea;
    --buttonColor:white;
    --menuColor:#ddd;
    --highlightColor: #333;
    --highlightColorLight: #222;
    --menuBorderColor: #111;
    --menuBgColor:#222;
    --tabHoverBgColor: #444;
    --menuSelectedColor: white;
    --linkTextColor: #eee;
    --linkTextVisitedColor: #ddd;

    --loginFieldBgColor: #333;
    --loginFieldUnderlineColor: #666;
    --loginFieldUnderlineFocusedColor: #999;
    --loginFieldLabelColor: #eee;
    --loginFieldLabelFocusedColor: #fff;
    --submitButtonBgColor: #444;
    --submitButtonBgImage: linear-gradient(-180deg,#555,#333 90%);

    --mobileFooterBgColor: #333;
    --mobileFooterBorderColor: #555;

    --inputBgColor: #333;
    --inputBorderColor: #eee;


}
The result is:
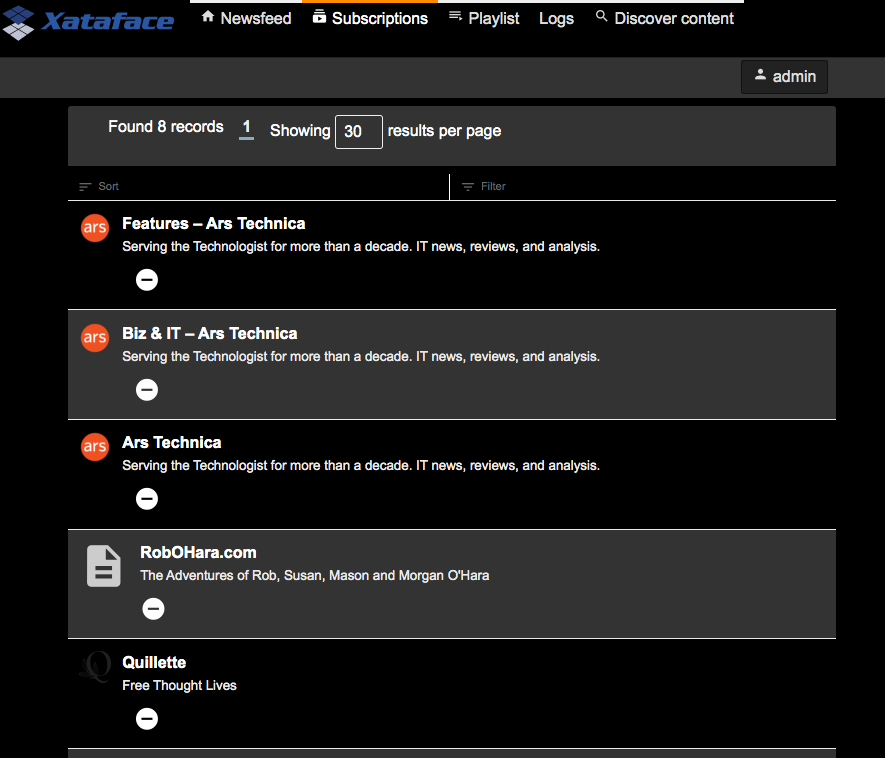

Using Preferences to Override Color Scheme
Problem
You want to use a different color scheme depending on which user is logged in, or other run-time environment factors.
Solution
Use the user_stylesheet preference to specify the name of a stylesheet to use.
The "user_stylesheet" preference (See Preferences Directives) allows you to specify the name of a stylesheet to inject into the current request. Since preferences can be dynamically defined using the Application delegate’s getPreferences() method, you can easily use environment information such as the current user or the current URL to define a custom color scheme on a per-user basis.
For example:
getPreferences() method inside the conf/ApplicationDelegate.php file for an application that defines a custom stylesheet for user "fred".<?php
function getPreferences() {
$prefs = [];
if (getUserName() == 'fred') {
// Assuming you've defined your own getUserName() function somewhere
$prefs['user_stylesheet'] = 'fred.css';
}
return $prefs;
}Now add a CSS file as "css/fred.css" with your custom styles for fred.
See Changing the Color Scheme for details on changing the color scheme usinc CSS variables.
|
Tip
|
Since preferences can also be defined statically in the conf.ini file, you can also provide a custom default stylesheet by specifying the "user_stylesheet" preference there. E.g. In this case every user would receive the fred.css file. |
Allowing Users to Choose Their Own Color Scheme
Problem
You want users to be able to select their own preferred color scheme.
Solution
Add a field to the "users" table with the prefs.key=user_stylesheet fields.ini property.
Xataface allows you to override preferences values using data from the currently logged in user’s record. The prefs.key fields.ini directive allows you to specify that the value of the field, in the currently logged in user record, will be used as a value for the specified preference.
As an example, let’s add a VARCHAR(100) column named "stylesheet" to the "users" table.
Add the following to the "tables/users/fields.ini" file:
[stylesheet]
    prefs.key=user_stylesheet
    vocabulary=stylesheets (1)
    widget:type=select
    widget:label="Theme"
widget:description="Select your preferred theme"|
Note
|
I specify the location as "tables/users/fields.ini", but, of course, your path will depend on the name of your users table. |
Notice that we specified a vocabulary for the vield. We’ll define that in the valuelists.ini file.
E.g.
[stylesheets]
dark.css="Dark Theme"
ocean.css="Ocean Theme"
.. etc..
And, finally, ensure that we have added our stylesheets (dark.css and ocean.css) into the "css" directory of our app.
For details on creating custom color schemes using CSS, see Changing the Color Scheme.
Now the user can change their own color scheme, by simply editing their profile inside the app.
|
Important
|
The user will require edit permissions for the "stylesheet" field of their own user record in order for this solution to work. |
Using a Custom favicon
Problem
You want to install a custom favicon for your app.
Solution
Use the favicon block/slot.
function block__favicon($params = []) {
        $icons = [
            '16x16' => '/images/AppImages/chrome/chrome-favicon-16-16.png',
            '32x32' => '/images/AppImages/firefox/firefox-generate-32-32.png',
            '96x96' => '/images/AppImages/android/android-launchericon-96-96.png'
        ];
        foreach ($icons as $sizes => $url) {
            printf('<link rel="icon" type="image/png" href="%s" sizes="%s" />', htmlspecialchars($url), htmlspecialchars($sizes));
        }
    }
Templates
The following sections form a sort of cook book with recipes for working with Smarty Templates in Xataface
Passing Parameters to Blocks
Problem
You want to pass a parameter from the template to a block so that the block can output different content depending on the parameters.
Solution
Add parameters as as smarty parameters on the {block} tag.
E.g.
$productId smarty variable.{block name="product_description" productId=$productId}The block implementation inside a delegate class may look like:
function block__product_description($params = []) {
    if (@$params['productId']) {
        echo "<p>A description for product {$params[productId]}</p>";
e
    } else {
        echo "<p>A generic description</p>";
    }
}|
Important
|
Special Parameter Names A small set of parameter names are treated specially by Xataface, so make sure your custom parameters don’t collide with these. These special parameter names are:
|
Form Customization
The following chapters form a sort of cook book with recipes for customizing forms in Xataface.
Multiple Tabs in Forms
Problem
You want to split your edit/new record forms into multiple tabs
Solution
Use the `tab`directive in each field definition of the fields.ini file to specify the "tab" that each field should be placed in.
The tab directive of the fields.ini file specifies which tab of the record edit form a field should be displayed on. Xataface supports multiple tabs on the edit form by way of this tab directive. If no fields contain the tab directive then all fields are displayed in a single tab (named main).
Example 1: Placing address info on separate tab Consider the following people table:
CREATE TABLE `people` (
    person_id int(11) not null auto_increment primary key,
    first_name varchar(32) not null,
    last_name varchar(32) not null,
    address varchar(100),
    city varchar(100),
    province varchar(100),
    country varchar(100),
    postal_code varchar(20)
)
We want to split the fields into two tabs: "Personal Info" and "Address Info"
We’ll do this in two steps. We use the tab directive to assign all address-related fields to the address_info tab.
[address]
    tab=address_info

[city]
    tab=address_info

[province]
    tab=address_info

[country]
    tab=address_info

[postal_code]
    tab=address_info
Now, when we load the edit form of the people table, we see two tabs: "__main__" and "address_info"
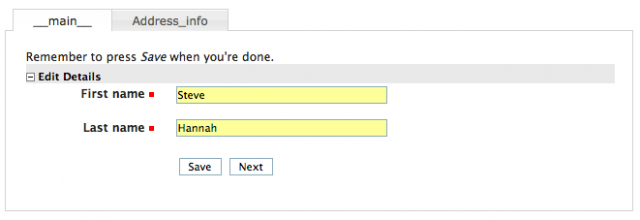
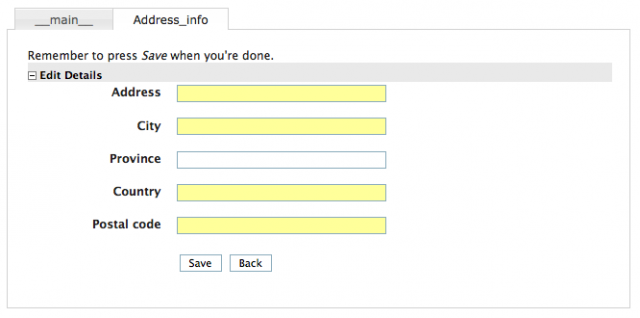
|
Tip
|
__main__ is the name assigned to the default tab (for all fields that don’t have a tab defined explicitly.
|
Customizing the tab labels
Next we will customize the tab labels by adding the following to the beginning of the fields.ini file:
[tab:__main__]
    label="Personal Information"

[tab:address_info]
    label="Address Information"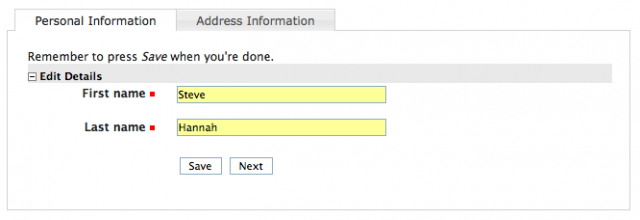
Reordering the tabs
If we want to reorder the tabs so that the "address_info" tab comes first, we would just reorder the definitions of the tabs:
[tab:address_info]
    label="Address Information"

[tab:__main__]
    label="Personal Information"
Delegating "New Record Form" to a Different Table
Xataface allows you to delegate "new record" input to a different table. E.g. Given a Table A, you can configure Xataface to use the "new record" form for a different table B for inserting new records.
Why might you want to do this?
Xataface forms are built around the data model of the underlying table. It generates input fields for each column of the underlying table. In some cases, the "new record" form may want to take data in a different form that allows you to generate the underlying data.
For example, if you have a "Contacts" table, but you want the user to be able to insert contacts by simply entering their employee ID - and this will be used in the back-end to fetch some initial data about the user from another database. In this case, your "new record" form should really just include a single field: "Employee ID".
Instructions: Short Version
Definitions
-
SOURCE_TABLE- The source table into which you wish to insert records. -
TARGET_TABLE- The target table whose "New Record" form you wish to use for the UI.
Steps:
-
Add the
new_record_table=TARGET_TABLEdirective to the beginning of the fields.ini file of the SOURCE_TABLE. -
Add a column named
xf_inserted_record_idof typeTEXTinto the TARGET_TABLE. -
In either the
beforeInsert()orafterInsert()hooks of the TARGET_TABLE, process the inputs, and programmatically insert the appropriate record into the SOURCE_TABLE. -
Also inside the
beforeInsert()orafterInsert()hooks of TARGET_TABLE, set the value of thexf_inserted_record_idto the record ID of the SOURCE table that you programmatically inserted in step 3.
Instructions By Example
Let’s take the example I mentioned above. We have a "contacts" table with lots of details about a contact, including employee_id. When the user inserts a record, all they need to do is enter the "employee_id" and it will pull the rest of the data in from an external database. So we will create a second "dummy" table that is only here to facilitate the creation of a new contact. It includes only a single field "employee_id".
Our two tables might have the following definitions.
CREATE TABLE contacts (
  employee_id VARCHAR(32) PRIMARY KEY,
  first_name VARCHAR(64),
  last_name VARCHAR(64),
  ....
 )

 CREATE TABLE new_contact_form (
   employee_id VARCHAR(32) PRIMARY KEY,
   xf_inserted_record_id TEXT (1)
)-
The
xf_inserted_record_idfield is a special field that will be used to pass the record ID of the corresponding contact record after insertion.
Step 1: Set new_record_table
At the beginning of the fields.ini file for the "contacts_table", add:
new_record_table=new_contact_formThis tells Xataface that the "new" action for the "contacts" table should redirect to the "new" action of the "new_contact_form" table.
Step 2: Implement beforeInsert() Hook
If we simply defined the new_record_table directive, it would result in the user being redirected to the new_contact_form table when they want to insert a new record into the contacts table, but it wouldn’t actually insert anything into the contacts table. Nor would it return them back to the contacts table when done. It would just leave the user in the "new_contacts_form" table - and would insert the record there only.
If we want to actually insert a record into the "contacts" table, we just do this programmatically. Preferably inside the beforeInsert() or afterInsert() hooks of the new_contact_form table.
In the delegate class for the new_contact_form, we’ll do:
<?php
class tables_new_contact_form {
    function beforeInsert(Dataface_Record $record) { (1)
        $employeeData = fetchEmployeeData($record->val('employee_id');
        // Assume that you've implemented fetchEmployeeData() elsewhere to get
        // the employee info from another database

        if (!$employeeData) {
            XFException::throwValidationFailure("Failed to find employee data for given employee ID.");
        }


        // Create a new contact record
        $contact = new Dataface_Record('contacts', array()); (2)
        $contact->setValues(array(
            'employee_id' => $employeeData['empid'],
            'first_name' => $employeeData['empFirstName'];
            ...
        ));
        $res = $contact->save(); (3)
        if (PEAR::isError($res)) {
            XFException::throwValidationFailure("Failed to insert contact: ".$res->getMessage());
        }

        // Store the record ID of the new contact record
        $record->setValue('xf_inserted_record_id', $contact->getId()); (4)
    }
}-
We implement the
beforeInsert()callback, which is executed before the "new_contact_form" record is inserted. -
We create a new
Dataface_Recordobject for the "contacts" table, and insert data for the contact. -
We call
save()to store the "contacts" record. -
Get the ID of the newly inserted contact, and add it to the
xf_inserted_record_idfield of the "new_contact_form" record. This will be used by Xataface after to redirect back to the original contact table record when it is done.
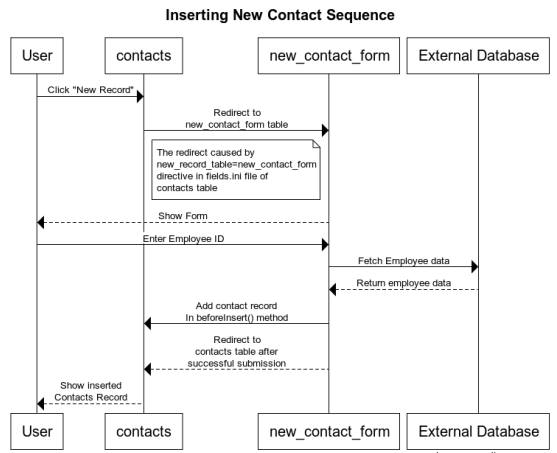
Using ownerstamp to Mark Record Ownership
Problem
You want to "stamp" a record with the username or user ID of the user who created a record automatically.
Solution
Use the ownerstamp fields.ini directive on the field that you wish to store the userid in.
For example, consider a table "posts" that stores posts that users of the system make. This table has a posted_by field to record the user that posted it. You want this field to automatically populated with the user ID of the user that is currently logged in, so you can add the ownerstamp directive in the fields.ini file.
[posted_by]
  ownerstamp=1
Adding this directive does a number of things simulataneously:
-
It will set the user ID of the currently logged in user at the time that the record is inserted.
-
It will prevent the field from being updated later.
-
It will hide the "posted_by" field from all forms.
Discussion
Before the "ownerstamp" directive existed, you could accomplish the same thing by implementing a beforeSave() trigger and setting the field value to the currently logged in user, changing the field permissions so it can’t be changed after the fact, and setting the widget type to "hidden". But since this is such a common requirement, it is much simpler to just set ownerstamp=1 and be done with it.
Redirecting User to Different Page After Saving Record
Problem
By default, when the user presses "Save" on the "Edit record form", they will be redirected back to the edit record form again after the save is complete. You want to redirect them to a different page, such as the "View" page.
Solution
Override the "edit" action in your actions.ini file to specify the "after_action" directive.
E.g. Add the following to your application’s actions.ini (or actions.ini.php) file.
[edit > edit]
    after_action=view
If you only want to apply this rule to a particular table, you can use the after_action.{TABLENAME} instead. E.g.
[edit > edit]
after_action.users=view|
Tip
|
The "new" action also supports the |
Auto-Updating a Field When Other Fields are Changed
Problem
You want the contents of a field to be automatically updated when the value of another field on the same form is changed. For example, you have a "Program Title" field that should automatically be populated when the user selects the program ID.
Solution
You can use the ajax_value fields.ini property to make a field dynamically update whenever one or more other fields on the same form is changed. When a change is detected, the field will load new data from a JSON web service specified by the URL in the property.
Syntax:
ajax_value=<url-template>#<json-path-query>
<url-template> is a string that is used as a template for the URL to the web service from which to load the field’s content. The template should contain one or more placeholders of the form {fieldname} which are replaced by the form value of the corresponding field.
<json-path-query> is a jsonPath query describing which part of the JSON response should be used as the new field value.
|
Tip
|
You can omit the json path query (everything from #), if the HTTP request will just return plain text or HTML.
|
Triggers
The field will be updated whenever the URL would be changed. The URL template may include variables with the syntax {fieldname} that will be replaced by the corresponding field when generating the web service URL. If the values of any of the fields marked as variables changes, it will trigger an update.
Example
Consider the following fields.ini file:
[source,ini
[ProgramID]
widget:type=select
vocabulary=programs

[ProgramTitle]
ajax_value="?-action=export_json&-table=Programs&ProgramID={ProgramID}#0.ProgramTitle
In the above example, whenever the ProgramID field is changed (say to a value of "1"), it will trigger an AJAX request to index.php?-action=export_json&-table=Programs&ProgamID=1.
The JSON response will look like:
[{"ProgramID":"1", "ProgramTitle":"Some program", ....}]When it receives the response, it will take the ProgramTitle attribute of the first result in the JSON response, and place it in the ProgramTitle field. In the above example, it would be "Some program".
|
Tip
|
You can use the |
Displaying Field Preview using AJAX
Problem
You want to display some richer feedback to the user based on the value entered into a field. For example, on a field where the user enters a URL, you may want to display some information about the URL so that the user knows that they have entered the correct URL.
Solution
Use the ajax_preview directive, which works just like the ajax_value directive, except that it displays the result of the AJAX request just below the field as a "preview", rather than in the field itself.
Consider the scenario where you have the following table structure:
CREATE TABLE posts (
    post_id INT(11) PRIMARY KEY AUTO_INCREMENT,
    page_url TEXT,
    article_title TEXT,
    article_description
)

CREATE TABLE user_posts (
    user_post_id INT(11) PRIMARY KEY AUTO_INCREMENT,
    post_id INT(11),
    comment TEXT
)
The "posts" table is central repository of posts. The user_posts table is for a user to "post" a comment about a post. The idea is that a particular URL should only be imported into the "posts" table once, but many users can post comments around a "post" in the "users_posts" table. We will only give the user direct access to the "user_posts" table, where they will provide the URL they want to post along with a comment about the post.
The challenge here is that the user_posts table doesn’t have a "page_url" field - just a post_id field. We could use the depselect widget here, but this adds a step. It would be better to hide the post_id field, and just provide a page_url field, which will automatically populate the "post_id" field with the correct post ID from the posts table.
So for our first step, we’ll hide the "post_id" field and add a page_url transient field:
[post_id]
    widget:type=hidden

[post_url]
    transient=1
    order=-1
    widget:description="Please enter the URL to the article you wish to post"
When the user enters a URL into the post_url field we want to trigger an AJAX request to a custom action that will:
-
See if a post has already been added at that URL, and return the ID of the post if found.
-
If the post hasn’t been added yet, we add it, and return the ID.
In either case the AJAX request should obtain a post ID which can be inserted into the post_id field.
Such a custom action might look like the following:
<?php
class actions_get_post_id {
    function handle($params) {
        header('Content-Type:text/plain');
        if (!@$_GET['page_url']) {
            return;
        }
        //echo $_GET['page_url'];exit;
        $user = getUser();
        $post = df_get_record('posts', array('page_url' => '='.$_GET['page_url']));

        if (!$post) {
            $post = new Dataface_Record('posts', array());
            $post->setValues(array(
                'posted_by' => $user->val('user_id'),
                'page_url' => $_GET['page_url']
            ));
            $res = $post->save();
        }
        echo $post->val('post_id');
    }
}
?>
We will use the ajax_value directive on the post_id field to automatically populate it from that AJAX action when the value of page_url changes.
[post_id]
    widget:type=hidden
    ajax_value="?-action=get_post_id&page_url={post_url}"
Lastly, we want to display a preview of the page content below the page_url field. We will use the ajax_preview directive for this. First we’ll create an AJAX action to display this preview, given the post ID.
<?php
class actions_ajax_post_preview {

    function handle($params) {
        if (!@$_GET['post_id']) {
            return;
        }
        $post = df_get_record('posts', array('post_id' => '='.$_GET['post_id']));
        if ($post) {
            df_display(array('post' => $post), 'ajax_post_preview.html'); (1)
        }
    }
}
?>-
"ajax_post_preview.html" template should be in the application’s templates directory.
Now we can use this from our `ajax_preview directive:
[post_url]
    transient=1
    order=-1
    widget:description="Please enter the URL to the article you wish to post"
    ajax_preview="?-action=ajax_post_preview&post_id={post_id}"
Bonus Points
We’re not quite done. Our current setup works great for the new record form, because the user will be adding the URL. But if they’re editing an existing record, the post_id value will already by set, but the user hasn’t entered anything the post_url field (because it is transient). We need to add an ajax_value directive to the post_url field so that it auto-populates based on the value of the post_id field.
We’ll use the export_json action as our AJAX action so we don’t need to create a custom action.
[post_url]
    transient=1
    order=-1
    widget:description="Please enter the URL to the article you wish to post"
    ajax_preview="?-action=ajax_post_preview&post_id={post_id}"
    ajax_value="?-table=posts&-action=export_json&post_id=={post_id}&-mode=browse&-limit=1&--fields=page_url#0.page_url"
Disabling Client-side Validation
Problem
You want to disable client-side validation for a particular field, but keep the server-side validaton.
Solution
Use the widget:validation=server fields.ini directive.
E.g.
[myfield]
  widget:validation=server
Setting Fixed Number of Rows in the Grid Widget
Problem
You have a grid widget for editing related records on a form. Rather than have it start with only a single row, and have additional rows appear only as the user enters data into the last row, you want it to display a fixed number of rows and have some of the data pre-populated.
Solution
Use the widget:fixedrows directive to a specific number of rows, and you can implement the fieldname__prepareGridData($record, $cols, $data) delegate method to return the data to prepopulate the grid with.
[exam_results]
  relationship=exam_results
  widget:type=grid
  widget:fixedrows=3
widget:cols="exam_name,exam_grade"class tables_students {
function exam_results__prepareGridData($record, $cols, &$data) {
if (count($data) == 0) {
$data[] = array('exam_name' => 'Midterm 1', 'exam_grade' => '');
$data[] = array('exam_name' => 'Midterm 2', 'exam_grade' => '');
$data[] = array('exam_name' => 'Final', 'exam_grade' => '');
}
}
}Adding Actions to Fields
Problem
You want to add an an action button next to a field in your form. For example, suppose you have a text field that stores the URL to a logo for the record, and you want to provide a link for the user to be able to upload an image, and then copy its URL into the field. Ideally the field would have an "upload" button next to it.
Solution
Use the actions directive of the fields.ini file to specify an action category on the field, and then define an "upload" action with that category.
E.g.
actions directive.[feed_cover_art_url]
logo=1
group=details
order=-10
widget:type=text
display=inline
actions=feed_cover_art_url_actions[upload_feed_cover_art]
category=feed_cover_art_url_actions
label="Upload"
description="Upload cover art for this feed"
url="javascript:void(0)"
onclick="uploadCoverArt(this)"And the result:

|
Tip
|
This example uses the Defining the before_feed_cover_art_url_widget block inside the table delegate class.
Then, I would create my Javascript file inside at "js/uploadCoverArt.func.js": Implementing the uploadCoverArt function in js/uploadCoverArt.func.js
|
|
Tip
|
See the RecordBrowser usage example for an example implementation of the uploadCoverArt() function that allows the user to actually select records from a table, and upload images.
|
List Customization
The following sections form a sort of cook book with recipes for customizing result lists in Xataface.
Adding Option to Filter Result LIst
Problem
You want to add a drop-down list for the user to select filters for the result set.
Solution
Use the filter directive in the fields.ini file on any field that you want the filter to be added for.
[test_field]
  filter=1
Now, if you navigate to this table’s list view, you’ll see a drop-down list at the top of the results where you can select all of the distinct values in the test_field column.
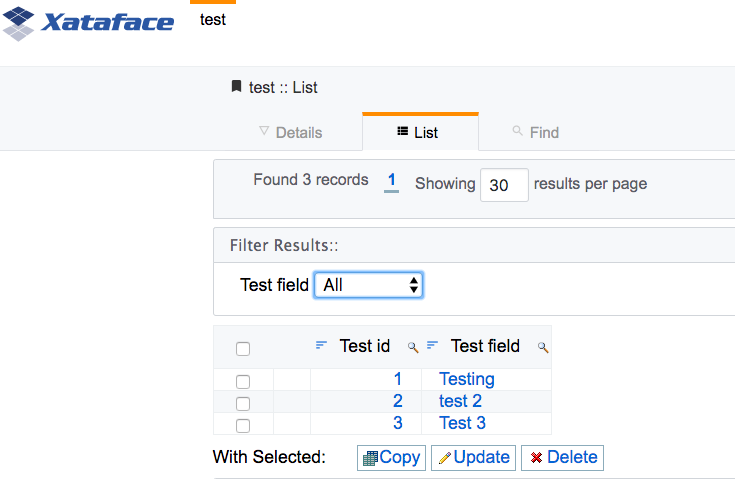
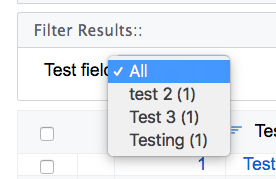
If you select one of the options, it will filter the results to only show those results that match the filter.
Hiding Filter Counts
Problem
You want to hide the counts for each entry in the "filters" drop-down list on the list view. By default when you add a filter list via the filter directive, each row has the "count" displayed beside it:
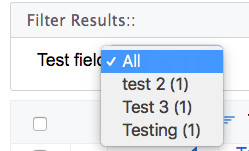
We want to hide this.
Solution
Use the show_filter_counts preferences directive to hide these counts as follows. In the _prefs section of the conf.ini file, add:
show_filter_counts=0After this change, the filter lists will look like:
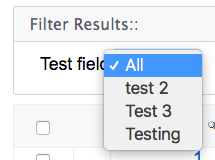
Sorting Filter Results
Problem
Filter lists are sorted by the "filtered" field in alphabetical order. You want to sort the filter lists on some other column.
Solution
Use the filter.sort. fields.ini directive to specify the field that the filter should sort on.
E.g.
[city]
  filter=1
  filter.sort="city desc"
Adding CSS Classes to Rows
Problem
You want to add custom CSS classes to the rows of the table in list view.
Solution
Implement the css__tableRowClass() method in the table delegate class. Have it return a string with the CSS classes you wish to add.
<?php
class tables_MyTable {
    ...

    function css_tableRowClass(Dataface_Record $rec) {
        if ($record->val('status') == 'approved') {
            return 'status-approved another-css-class';
        } else {
            return 'another-css-class status-pending';
        }
    }
}
In the above example, on rows where the 'status' field is a approved you’ll see something like:
<tr class="status-approved another-css-class">and in other rows you’ll see
<tr class="another-css-class status-pending">Adding Row Actions
Problem
You want to add a button to each row of the list view to perform some action on that row.
Solution
Define an action with category=list_row_actions and condition="$query['-table'] == 'tablename'.
E.g.
_tmp_newsfeed table.[play_post]
condition="$query['-table'] == '_tmp_newsfeed'" (1)
category=list_row_actions
materialIcon=play_circle_outline (2)
label="Play"
description="Play narration"
url="{$record->getURL('-action=play_post')}" (3)
url_condition="$record" (4)
order=1-
Only display this action in the
_tmp_newsfeedtable. -
Uses a material icon for the action.
-
The
urldirective specifies the URL where the action should go when the user clicks on it. THe$recordvariable is aDataface_Recordobject that encapsulates the current row. We call thegetURL()method to get the URL for that record with theplay_postaction. -
The
url_conditiondirective is necessary to stop Xataface from trying to parse theurldirective if$recordisnull. It is interpretted as a boolean expression. When it evaluates to a falsey value, it will skip parsing theurldirective.
|
Important
|
When the user clicks on this action, they will be directed to the URL index.php?-table=_tmp_newsfeed&-action=play_post&….. You need to make sure to implement this action handler in actions/play_post.php.
|
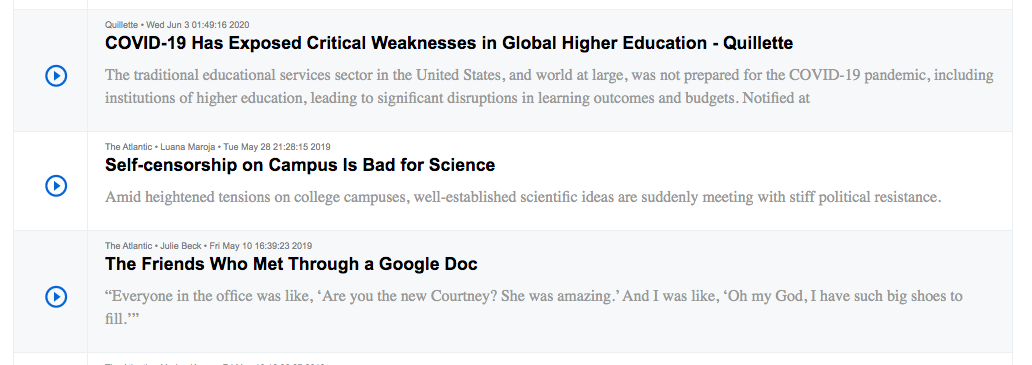
Customizing Row Action Styles
Problem
You want to customize the style on a particular action
Solution
Use the class directive on the action to specify a custom CSS class on the <a> tag of the action. Then use this CSS class to target that button specifically from your stylesheet.
[play_post]
    condition="$query['-table'] == '_tmp_newsfeed'"
    category=list_row_actions
    materialIcon=play_circle_outline
    label="Play"
    description="Play narration"
    order=1
    class=large-button
Then in your CSS file you can target this action directly:
.large-button {
    font-size: 150%;
}
Adding Javascript Row Actions
Problem
You want to trigger a Javascript function when the user clicks on a row action instead of just directing the user to a URL.
Solution
Use the onclick directive instead of the url directive.
See Triggering Javascript Function with Action for an introduction to Javascript actions with a detailed example using the onclick handler. The only thing we need to add to make our Javascript action useful, is the ability to retrieve the record ID of the current row. There are two ways to do this:
-
Use the
$recordvariable inside theonclickdirective to obtain details about the record, and add them as parameters to your Javascript function.
e.g.
[myaction]
    category=list_row_actions
    onclick="window.playPost('{$record->val('post_id')}');"
An alternative way is to make user of the xf-record-id attribute that can be found on the <tr> tag of the row in list view. If you look at the resulting HTML source of the list view, and drill down to the individual rows of the table, you’ll see something like:
<tr class="listing odd " xf-record-id="_tmp_newsfeed?post_id=73">
...
We can use this inside our Javascript function, as follows. First we pass this as an argument to our function. this will refer to the <a> tag that was clicked.
[myaction]
    category=list_row_actions
onclick="window.playPost(this);"playPost function(function(){
var $ = jQuery;
window.playPost = playPost;
function playPost(el) {
if (!$(el).attr('xf-record-id')) { (1)
var trTag = $(el).parents('[xf-record-id]').first();
if (trTag.length == 0) {
return new Promise(function(resolve, reject){ (2)
reject('Not found');
});
} else {
el = trTag; (3)
}
}
return new Promise(function(resolve, reject) { (4)
// Do the actual playing here, and either call resolve() or reject()
// when done.
});
}
})();-
Check to see if the HTML element that element contains the
xf-record-idattribute. If it doesn’t we need to walk up the DOM until with find an element that does. -
If we didn’t find any elements with the xf-record-id attribute, we’ll just return a promise that rejects.
-
If we found an element with
xf-record-idwe will just use this element instead of the one that was passed into the method. Since our action is called withwindow.playPost(this), it will always be passing the<a>tag to theplayPost()method, and theatag doesn’t have the attribute. The parent<tr>tag has the attribute, so this is where we crawl up to. -
We perform our action on the provided element. In this case, I’m returning a Promise to get us prepared for performing asynchronous actions cleanly.
Making Row Actions Toggleable
Problem
You want to add an action to each row of the list view that can be toggled between two different states. For example, we have functionality to add and remove rows from a playlist. If the record is currently "on" the playlist, we want the action to display "Remove from playlist". If the record is not on the playlist, we want the action to display "Add to playlist".
Solution
Use two different actions: "add_to_playlist" and "remove_from_playlist" and conditionally show either action depending on whether the record is currently "on" the playlist.
I’ll include two different recipes here to achieve this:
-
A fully server-side solution using the
conditiondirective. -
A server and client-side solution using Javascript, CSS, and AJAX to add and remove rows from the playlist.
The 2nd option is more complex but yields a better user experience.
Solution 1: Using condition directive
We can define our actions as follows: (And assume that our table has an "on_playlist" field that indicates whether or not a record is on the playlist currently.
[add_to_playlist]
    condition="$query['-table'] == '_tmp_newsfeed' and $record and !$record->val('on_playlist')"
    category=list_row_actions
    label="Add to Playlist"
    materialIcon="playlist_add"
    order=2
    onclick="window.addToPlaylist(this)"


[remove_from_playlist]
    condition="$query['-table'] == '_tmp_newsfeed' and $record and $record->val('on_playlist')"
    category=list_row_actions
    materialIcon="remove_from_queue"
    order=3
    onclick="window.removeFromPlaylist(this)"
    label="Remove from Playlist"
The key here is in the condition directives of these actions. The add_to_playlist is set to appear only when we are on the _tmp_newsfeed table AND the record is not on the playlist. The remove_from_playlist action is set to appear only when the record is on the playlist.
|
Important
|
In both actions we need to ensure that and not just |
There is a lot hidden in this solution inside the addToPlaylist() and removeFromPlaylist() Javascript functions. These are responsible for actually adding and removing records from the playlist. See Using AJAX To Modify Row Records for an example using AJAX to do this.
Solution 2: Using CSS to Show/Hide Actions
The first solution relies on the condition directive to show or hide our actions. However, this directive is processed on the server-side, so we would need to reload the whole page if we wanted to update state. We can offer a better user experience by using CSS to show/hide the actions.
The gist of this solution is to:
-
Add a CSS class,
on-playlist, to the<tr>tag (i.e. each record row) to indicate whether that record is currently on the playlist. -
Add CSS classes to the two actions, so that we can easily target them from a stylesheet.
-
Add custom CSS to show/hide actions depending on whether the
<tr>tag includes theon-playlistCSS class. -
The
addToPlaylist()function removes theon-playlistCSS class from the<tr>tag, and theremoveFromPlaylist()adds it.
Adding the CSS class to the <tr> tag:
|
Tip
|
See Adding CSS Classes to Rows for more details on adding CSS classes to rows. |
<tr> tag to have the on-playlist CSS class if the record is on the playlist.function css__tableRowClass(Dataface_Record $rec = null) {
if ($rec->val('on_playlist')) {
return 'on-playlist';
}
return '';
}Adding CSS classes to the two actions:
|
Tip
|
See [custom-row-actions-styles] for more details on using the class directive to customize action styles.
|
add_to_playlist]
    condition="$query['-table'] == '_tmp_newsfeed'"
    category=list_row_actions
    label="Add to Playlist"
    materialIcon="playlist_add"
    order=2
    onclick="window.addToPlaylist(this)"
    class="add-to-playlist" (1)

[remove_from_playlist]
    condition="$query['-table'] == '_tmp_newsfeed'"
    category=list_row_actions
    materialIcon="remove_from_queue"
    order=3
    onclick="window.removeFromPlaylist(this)"
    label="Remove from Playlist"
class="remove-from-playlist" (2)-
We add the
add-to-playlistCSS class to the<a>tag for the "add" action. -
We add the
remove-from-playlistCSS class to the<a>tag for the "remove" action.
Defining Styles to Show/Hide Actions
Now that we have our CSS actions defined, we’ll be dealing with HTML like:
<tr class="on-playlist">
  ....
  <a class="remove-from-playlist" ...> ... </a>

  <a class="add-to-playlist"...> ...</a>
Now we can target our <a> tags with the following CSS directives in our stylesheet.
/* Hide add-add-to-playlist when tr has on-playlist class */
tr.on-playlist .add-to-playlist {
    display:none;
}

/* Hide remove-from-playlist by default */
span.row-actions .remove-from-playlist {
    display:none;
}

/* Show remove-from-playlist when tr has on-playlist class */
tr.on-playlist .remove-from-playlist {
    display:block;
}
Adding/Removing CSS classes using Javascript
As we’ve seen above, our actions will trigger the addToPlaylist() and removeFromPlaylist() functions respectively. We just need add/remove the CSS class as appropriate here.
e.g.
function addtoPlaylist(el) {
    if (!$(el).attr('xf-record-id')) {
        var trTag = $(el).parents('[xf-record-id]').first();
        if (trTag.length == 0) {
            return new Promise(function(resolve, reject){
                reject('Not found');
            });
        } else {
            el = trTag;
        }
    }
    $(el).addClass('on-playlist'); (1)
    return new Promise(function(resolve, reject) {
        // Do the actual playing here, and either call resolve() or reject()
        // when done.

        addToPlaylistImpl(el.attr('xf-record-id')).then(function(data) {
            // success
            resolve(data);
        }).catch (function(data) {
            // Failed
            $(el).removeClass('on-playlist'); (2)
            reject(data);
        });;
    });
}

function removeFromPlaylist(el) {
    if (!$(el).attr('xf-record-id')) {
        var trTag = $(el).parents('[xf-record-id]').first();
        if (trTag.length == 0) {
            return new Promise(function(resolve, reject){
                reject('Not found');
            });
        } else {
            el = trTag;
        }
    }
    $(el).removeClass('on-playlist');(3)
    return new Promise(function(resolve, reject) {
        // Do the actual playing here, and either call resolve() or reject()
        // when done.

        removeFromPlaylistImpl(el.attr('xf-record-id')).then(function(data) {
            // success
            resolve(data);
        }).catch (function(data) {
            // Failed
            $(el).addClass('on-playlist'); (4)
            reject(data);
        });;
    });
}-
Optimistically add the 'on-playlist' CSS class when user clicks the "add" button. This will toggle the actions immediately.
-
If the action failed, we revert the CSS class back, by removing the "on-playlist" CSS class.
-
Optimistally remove the 'on-playlist' CSS class when user clicks the "remove" button. This will toggle the actions immediately.
-
If the action failed, we revert the CSS class back, by re-adding the "on-playlist" CSS class.
Using AJAX To Modify Row Records
Problem
You need to perform a server-side action when the user clicks on a row action. E.g. From Making Row Actions Toggleable, we needed to add and remove the row record from the playlist.
Solution
Create a custom action handler that performs the the function, and returns JSON, and write a Javascript function that calls this AJAX action.
TODO: Need to write this solution
Specifying Default Sorting
Problem
You want the records in a particular table to be sorted on a particular column by default.
Solution
Use the table.default_sort property of the fields.ini file.
table.default_sort property in the fields.ini file to sort records in descending order on the date_posted field.table.default_sort=date_posted desc|
Tip
|
See Setting Default Sort for Related Lists to learn how to set the default sort order on a related tab. |
Rendering List View as a Grid
Problem
You want to display the "list" view as a grid for one or more tables in your app.
Solution
Add list_template=@grid to the beginning of your table’s fields.ini file.
This will cause the list to use the actions/list/grid.html template for rendering the list view.
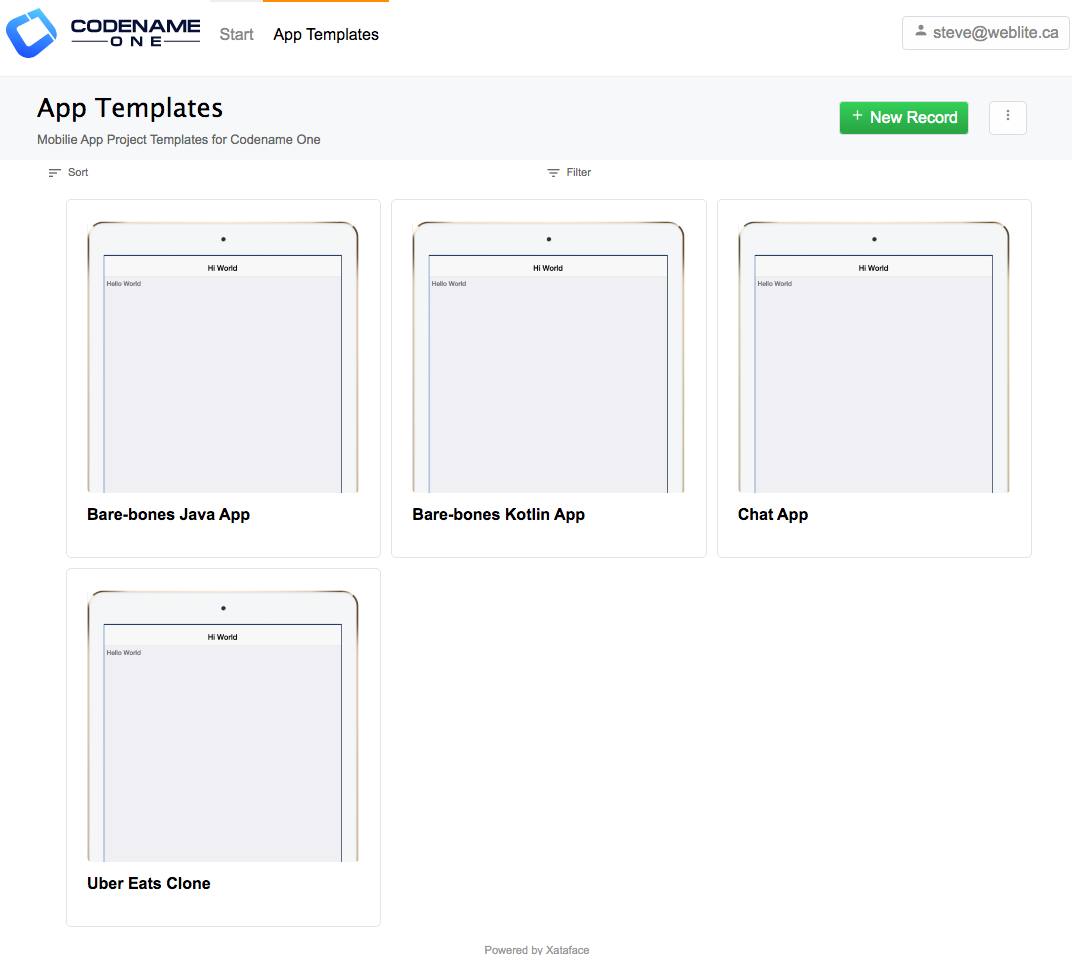
Note: For the "grid" layout to make sense, you should have at least one image column column in the table. You can specify a column as an "image" column by adding the image=1 fields.ini directive.
Using Mobile List Template on Desktop
Problem
The Xataface list view is responsive, and renders lists differently on mobile devices than on desktop. In some cases you may prefer to use the mobile list style on desktop also to achieve a unified look.
Solution
Set the table.listStyle=mobile directive in the table’s fields.ini file. This is a table-level directive, so it should be at the top of your fields.ini file, before any of the field definitions.
Let’s look at a quick example. Here is a list using the mobile theme.
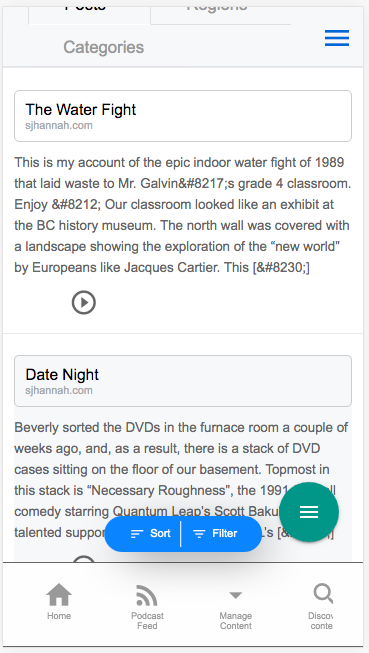
Here is the same list when viewed on a desktop:
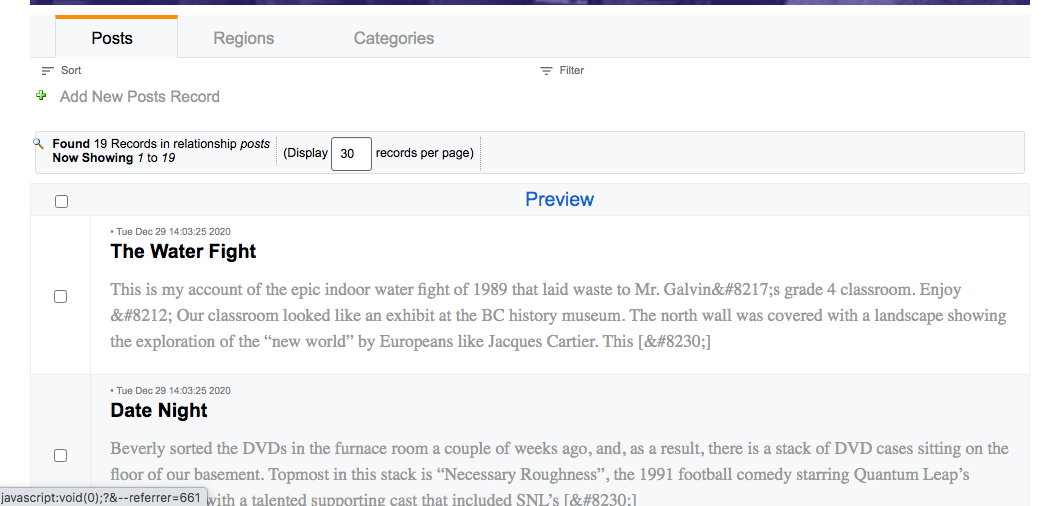
Now, I’ll add the table.listStyle=mobile directive to the beginning of the table’s fields.ini file.
The result is:
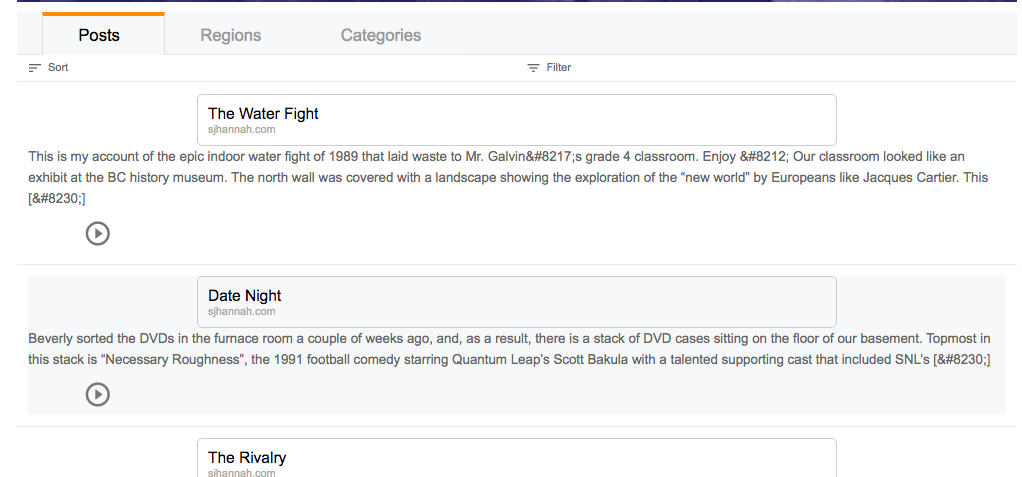
|
Note
|
This directive will also affect how related lists to this table are rendered, but only in one-to-many relationships to this table (i.e. where the rows are essentially records of this table). |
Rendering Row as Link to External URL
Problem
You want to render the rows of your table such that they summarize some external web page, and provide a link to it, similar to the way that Twitter renders tweets that contains a link to a webpage.
Solution
Use the table.listStyle=mobile fields.ini directive in conjunction with the table.row_style=external-link directive, and implement a calculated field on the table named external_link as I will describe below. The result will be something that looks like:
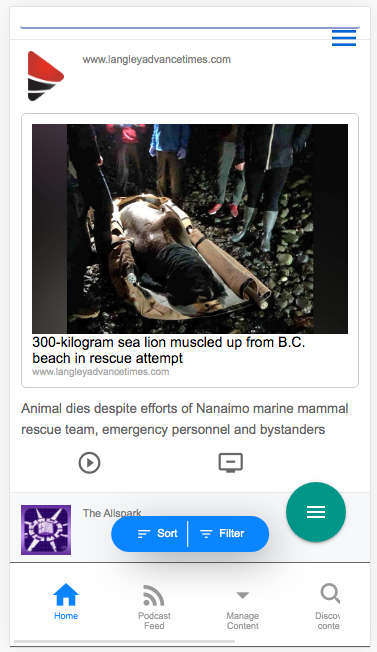
Steps
-
Add the following to the beginning of your fields.ini file (before any field definitions):
table.listStyle=mobile (1) table.row_style=external-link (2)-
The
table.listStyledirective will make sure that the desktop version uses the mobile list theme, since theexternal-linkstyle is only rendered in the mobile theme. -
The
table.row_styledirective tells the list view and related list views to render rows in the external-link theme.
-
-
Define a method named
field__external_link()in your table delegate class as follows:function field__external_link(Dataface_Record $rec) { // return an array with url, title, and cover_image keys return [ 'url' => $rec->display('page_url'), (1) 'title' => $rec->display('article_title'), (2) 'cover_image' => $rec->display('article_image') (3) ]; }-
The
urlkey should refer to the URL for the given record. In this example we assume that the table has a column namedpage_urlcontaining the URL to the link. -
The
titlekey should refer to an article title to display. In this example we assume that the table has a column namedarticle_title. -
The
cover_imagekey should refer to the URL for an image for the article. In this example, we assume that the table includes a field calledarticle_imagecontaining a URL - though this could also be a container or blob field in this example, as thedisplay()method would get the URL to the container’s image.
-
View Tab Customization
The following sections form a sort of cook book with recipes for customizing the view tab, also known as the Details tab. This is the tab in the UI that shows the details of a single record.
Displaying Synthetic/Calculated Field
Problem
You want to create a synthetic field, and display it in the view tab just as you would with all of the regular fields.
Solution
-
Define your synthetic field in your table’s delegate class using the
field__prefix. E.g.function field__mycustomfield(Dataface_Record $record) { return "My custom field value"; } -
Add an entry to the fields.ini file for this field, and set
visibility:browse=visible:[mycustomfield] visibility:browse=visible
Example
Tuxpin includes a podcasts table that allows users to create their own podcast. Each podcast has a unique ID, which is stored in the podcast_uuid column. It also provides a website for the podcast, which is located at a URL of the form:
Beause the website URL can be derived from the podcast_uuid, we don’t need to actually store it in the database. However, we would like to display this URL in the View tab.
To achieve this, we first define the website_url field in the delegate class as follows:
function field__website_url(Dataface_Record $record) {
    return 'https://podcasts.tuxpin.com/' . $record->val('podcast_uuid').'/';
}
By default synthetic (or calculated) fields are not displayed in the view tab (or anywhere in the UI, for that matter). You need to set the visibility:browse property of the field to visible, in order to have it appear in the view tab.
So, in the table’s fields.ini file we add:
[website_url]
    visibility:browse=visible
    group=website    ; Tell it to display this field in the website fieldgroup
And the result:
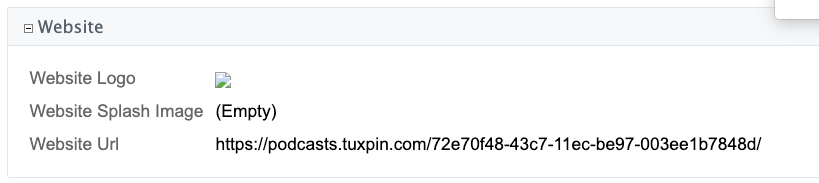
We can now treat this field like any other field in our view tab. We can further customize using configuration options and delegate class methods, just as we would with a real field.
Searching
The following section include tips on configuring search support in Xataface application.
Case-Sensitive Searches
Problem
You searches on a particular column to be case-sensitive. (E.g. If the user searches for "Bob", it should match "Bob" but not "bob").
Solution
Use the collate fields.ini directive to "utf8_general_cs" (or any other supported collation that is case-sensitive.
E.g.
[source,ini
[name]
   collate=utf8_general_cs
Discussion
By default, the case-sensitivity of searches depends on the collation of the underlying table and column in MySQL. If the column was defined with a case-sensitive collation (e.g. utf8_general_cs), then all searches on this column will be case-sensitive. If, however, it was defined with a case-insensitive collaction (e.g. utf8_general_ci), all searches will be case-insensitive. If you want to change the behaviour of the app, you could simply change the underlying collation. But in some cases you may not want to modify the table structure (or you won’t have access to the table structure). In such cases, the "collate" directive is helpful.
Explicitly Specifying Case-sensitivity of a Search
Problem
You want to perform a case-sensitive search on a field that has a case-insensitive collation.
Solution
Wrap the query value in a command wrapper, and use the "cs" command to specify "case-sensitive" (or "ci" to specify case-insensitive").
E.g.
If you want to search for "Bob" in the name field, enter the following in the search field for "Bob".
#Bob#cs
If you, instead wanted to explicitly perform a case-insensitive search you would enter
#Bob#ci
Making Columns Not-Searchable
Problem
The main search box at the top of the application searches for matches in all of the char, varchar, and text fields by default. What if you want to only match against specific fields?
Solution
Use the not_searchable fields.ini directive on any field cause searches not to match using that column.
E.g. If I don’t want the search field to match on a the "private_info" column, I could do the following:
[private_info]
    not_searchable=1
Now, if the user enters a search in the top search box, it won’t match against the "private_info" column.
You can "inverse" this behaviour, and make all of the columns not searchable by default, using the __global__ section.
E.g.
myfield column.[__global__]
not_searchable=1
[myfield]
not_searchable=0|
Important
|
If you want to make a field completely "un-findable", you should use the |
File Uploads
The following sections pertain to management of file uploads.
Specifying Content Disposition of File Download
Problem
By default the contents of blob fields and container fields are downloaded as a file download in the browser. You want the browser to navigate to the file instead of downloading it.
Solution
Use the contentDisposition=inline fields.ini directive.
[myfield]
    contentDisposition=inline
Now, when users click on the link for this field, the browser will navigate to the field content.
|
Tip
|
The contentDisposition directive will be used to set the Content-Disposition HTTP header. Learn more about this header here.
|
Generating Thumbnails
Problem
I want to automatically resize uploaded images to specific dimensions.
Solution
Use the transform property on the Container field in the fields.ini file.
[file]
    Type=container
    widget:description="Select image to upload"
    transform="itunes300 fill:300x300; itunes1400 fill:1400x1400"
In the above snippet, I’ve defined two thumbnail sizes for uploaded images:
-
itunes300, which resizes images to 300 pixels wide and 300 pixels high, and crops the image so that it fills the entire image (so it may cut off some of the image on top/bottom or left/right.
-
itunes1400, which resizes images to be 1400 pixels high and wide. It also fills the entire image, so may cut off some of hte image on top/bottom or left/right.
The Right Thumbnail for the Right Occasion
The transform directive will cause images to be automatically resized at the time that the images are uploaded, but it doesn’t specify how and when the thumbnails are used. You might want a small (100px) thumbnail used when displaying the record in list view, and a slightly larger image (640x480) used in the view tab. In the above example we’ve defined two thumbnail sizes "itunes300" and "itunes1400".
The default behaviour is to display the first thumbnail type defined in all situations. If you want a particular action to use a different thumbnail by default, then you can use the thumbnail.ACTIONNAME fields.ini directive to specify this.
For example, if you want the "view" action to use the "itunes1400" thumbnail, you would add the following:
thumbnail.view=itunes1400So the full snippet becomes:
[file]
    Type=container
    widget:description="Select image to upload"
    transform="itunes300 fill:300x300; itunes1400 fill:1400x1400"
    thumbnail.list = itunes1400
Storing Files on Amazon S3
Problem
Rather than storing uploaded files directly on the server file system, you want to store them on Amazon S3 for scalability purposes.
Solution
Use the s3 module.
Installation Instructions
You can find installation instructions for the s3 module in the README.
|
Note
|
The S3 module requires the Amazon AWS SDK for PHP which you can install in your project using Composer. |
Configuration
Once the module is installed, you need to add some configuration to your app’s conf.ini file.
[modules_s3]
  key=YOUR_AWS_API_KEY      ; Change to your AWS key
  secret=YOUR_SECRET_KEY    ; Change to your AWS secret key
  region="us-east-1"        ; Change to the region of your S3 buckets
fields.ini Configuration
In addition to the conf.ini configuration, you need to add the s3.bucket directive to any Container fields that you wish to store on S3, to specify the name of the bucket where it should store the files.
[file]
	Type=container
    s3.bucket=YOUR_BUCKET
    s3.key.prefix=FILE_PREFIX/
	widget:description="Select image or video to upload"
	transform="itunes300 fill:300x300; itunes1400 fill:1400x1400"
	thumbnail.view=itunes1400
The key properties in the above example are:
- s3.bucket
-
The name of the bucket where your files should be stored.
- s3.key.prefix
-
A prefix for the file names that is prepended to the autogenerated file names in S3.
|
Tip
|
The S3 module fully supports Xataface’s thumbnail feature, as demonstrated in the example above with the "transform" and "thumbnail.view" directives. |
HTTP Request Handling
The following sections include tips for configuring how Xataface applications respond to HTTP requests. This includes topics such as event routing, response types, etc…
Specifying a Default Action
Problem
You want your application to use a default action other than the Xataface default, if the user doesn’t explicitly provide an "-action" parameter.
Solution
Use the default_action conf.ini directive.
E.g.:
default_action=findThis would result in the user being directed to the "find" action by default.
|
Note
|
If "default_action" is not specified, then Xataface will use the "list" action as the default. |
Using Different Default Action Depending on Table
Problem
You want to specify a default action only for one table in your application. The "default_action" conf.ini directive sets the default action application-wide.
Solution
Use the default_action.tablename directive in your conf.ini file. (tablename should be replaced with your desired table name. For example, suppose I want to make the "view" action the default action for the "posts" table, then I would define the following at the beginning of the conf.ini file:
default_action.posts=viewSpecifying Default Query Parameters for Default Actions
Problem
You want to supply additional query parameters for your default actions. These parameters should only be applied when the default action is used.
Solution
Use the default_params.tablename directive. E.g.
default_action.posts=view
default_params.posts="post_id=2&foo=bar"
These default parameters will be used if the user requests a URL like:
index.php?-table=posts
The above would effectively be the same as:
index.php?-table=posts&-action=view&post_id&foo=bar
|
Important
|
The index.php?-table=posts&-action=view The default params would not be applied because the "-action" has been specified explicitly by the user. |
The above example shows the default_params.posts directive specified as a URL-encoded string. However, you can also define the parameters as a section.
E.g.
[default_params.posts]
  post_id=2
  foo=bar
This would be equivalent to
default_params.posts="post_id=2&foo=bar"Showing the "Edit" Tab By Default for Record Details
Problem
By default, when the user clicks on a record to see its details, they will be shown the "View" tab. You want to show them the "Edit" tab instead.
Solution
Use the default_browse_action directive of the conf.ini file. This directive is analagous to the default_action directive, except it is only applied when the user requests the "browse" action, which is the default action used for displaying record details.
The direct solution to our problem would be the following at the beginning of the conf.ini file.
default_browse_action=edit|
Tip
|
Just like the Only setting the default browse action to edit on the "posts" table.
|
Setting Default Query Parameters for the browse Action
Problem
You have specified a custom action that you are using as the default "browse" action for your table via the default_browse_action.mytable=myaction directive. However your action requires some additional query parameters to work correctly. You need to add these default parameters somehow.
Solution
Use the default_browse_params.tablename directive to add parameters to the browse action. This directive works similarly to the default_params.tablename directive. E.g. Let’s add a "foo" query parameter by default when the user accesses the "browse" action on the "posts" table.
default_browse_action.posts=myaction
default_browse_params.posts="foo=bar"|
Tip
|
The above example shows the E.g. This would be equivalent to |
Setting a Related Records Tab as the Default Browse Action
Problem
When the user clicks on a record in the "list" view, you want them to see a related record tab instead of the "View" tab by default.
Solution
We can achieve this by way of the default_browse_params.tablename conf.ini directives. For example, suppose we wanted to show the "authors" relationship of the "posts" table by default when a post’s details are shown:
default_browse_params.posts="-relationship=authors"Notice here, that we didn’t actually need to use the default_browse_action parameter to specify that it should use the related_records_list action (which is the action used to display a related list). Xataface infers this by the presence of the "-relationship" directive.
Tables, Views, and Queries
The following chapters pertain tables, views, and queries. It includes tips on how to set up your tables, views, and queries for optimal performance and flexibility.
Accessing an SQL query like a Table
Problem
You want to create a user-specific SQL query and navigate its results as if it were a proper table. You want the results of this table to be different for different users.
Solution
There are a few strategies that you could use for this. You could simply use a MySQL view, and set up a security filter on the table. In some cases, this may not be flexible enough, though. In such cases you can use a dynamic query.
You can create a dynamic query as follows:
-
Add a directory to your application’s "tables" directory named
_tmp_{NAME}where{NAME}is the name of your query. -
Create a
fields.ini.php(or fields.ini) file inside this directory with at least a__sql__directive. This__sql__directive is were you specify the SQL query that should be used for the contents of the table. -
Specify the primary key for the table by adding a
Key=PRIdirective to one of the fields in the fields.ini file. You can inject the user id of the currently logged in user with the{{USER_ID}}string. This will be replaced by the user ID.
For example, let’s add a dynamic query called "my_posts", which is basically just a list of posts that the current user has posted. This provides an easy way for the user to generate a feed of his own posts.
First we’ll create the _tmp_my_posts directory, inside the "tables" directory. Then we’ll add our fileds.ini.php file:
;<?php exit; // To prevent this file from being served
__sql__ = "select * from posts where posted_by='{{USER_ID}}'"

[post_id]
Key=PRI|
Tip
|
You can alternatively create a delegate class for your table by creating a delegate class ( E.g. |
You can access this "table" just as you would, a normal table. Just remember that the full table name is "_tmp_my_posts". E.g. If you go to "index.php?-table=_tmp_my_posts", it will show you these results.
How Dynamic Queries Work
When xataface receives a request for a table whose name starts with "tmp" it begins by performing the __sql__ and loading the results into a temporary table. This operation is very fast because temporary tables are typically stored in RAM, and they are only usable in the current session (i.e. other users cannot see this table).
|
Important
|
Dynamic query tables are ephemeral, so any changes you make to is will disappear at the end of the request. This means that you cannot insert or update records into these tables. |
Deployment and Administration
The following section includes recipes for administration and deployment of your Xataface applications. This includes things like managing development, staging, and production servers, and dealing with versions and upgrades.
Where is my php.ini file?
Problem
You need to change a setting in your php.ini file but you don’t know where it is, or your server has multiple php.ini files and you don’t know which one is the correct one.
Solution
Create a file inside your application directory named "phpinfo.php" with the following contents:
<?php
phpinfo();
Load this page in your web browser and search for "php.ini".
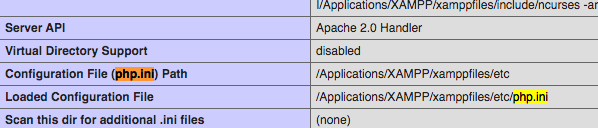
Now open that file and make your changes.
Using Different Config Files on Different Servers
Problem
You want your production server to use different configuration options than your development server. For example, perhaps you want to enable the output cache on the production server, but not on the development server.
Solution
Use the __include__ directive in your conf.ini file to load your server-specific configuration options from a different config file. Use the {host} placeholder to specify a different config file depending on the host name of the current request.
E.g.
;<?php exit;
__include__=hosts/{host}/{host}.conf.ini.php

[_tables]
  table1=My First Table
  table2=My Second Table
hosts/localhost/localhost.conf.ini.php Config file when application is accessed via localhost.;<?php exit;
;; Development Server Config
[_database]
host=localhost
name=mydb
user=root
password=mypass
[_output_cache]
enabled=0 ;; Disable output cache on development serverhosts/example.com/example.com.conf.ini.php Config file when application is accessed via localhost.;<?php exit;
;; Production Server Config
[_database]
host=localhost
name=mydb
user=mydbuser
password=mydbuserpass
[_output_cache]
enabled=1 ;; Enable output cache on production serverApplication Versioning and Synchronization
Problem
You want to deploy the changes in the development version of your app to the production server, including database changes.
Solution
Increment the build number in your app’s version.txt file, and implement corresponding update_xxx() methods in your conf/Installer.php file.
Discussion
One of the more annoying challenges involved with managing production web applications is keeping the development and production versions in sync. Git makes this task trivial for source code and file system changes, but changes to the database schema between versions still need to be handled with care, as these changes fall outside the watch of any version control system.
For example, suppose I am running an application that stores user profile information, and I want to add a column to the “users” table to store the user’s postal code. I add the column to my development database but I don’t want to add it to the production database until I am finished with the rest of my changes.
The old way: Copy & Paste – text files
The old way managing these changes was to make the change in the development database, then copy and paste the SQL query that I used to perform the update into a text file. I would repeat this process for each change that I made. When it came time to move the changes to the production application, I would just execute these statements manually one by one on the production server.
The down-side of this approach is that it didn’t scale very well. It works OK if I only have one production installation and one development server. But what if I have dozens of production servers all running the same application, and perhaps running different versions. It would become cumbersome if not impossible to keep track of all of these changes and manually apply them across all installations.
The new way: Xataface Application Versioning
Xataface allows you to track the version of your application with a text file named version.txt stored in your application’s directory. This file should contain one line like with two numbers separated by a space:
1.0b1 345
This example means that the application version is 1.0b1, and that the build version is 345. The build version must be an integer that is incremented every time there is a change to the source code. It is used by Xataface to figure out whether the file system version matches the database version.
|
Important
|
The build version number is independent of the application version, and should only ever go "up" in value with new releases. |
On every page request, Xataface checks the version.txt file to see what version of application is currently in the file system. It compares this with the version of the database. If the database version is lower, it will execute the necessary queries to update the database to the current version.
The conf/Installer.php file
Xataface looks for a class named conf_Installer located in your application’s "conf/Installer.php" file to find out what it needs to do to update between versions. You can define methods in this class of the form:
function update_##(){}
Where ## is the build number of the update.
Xataface will execute all functions update_XX() to update_YY() in your conf_Installer class automatically if it finds that the database version is XX and the filesystem version is YY. This is where you can place your database updates that need to be performed between versions.
For example, suppose the production server is running build version 345. That means that the version.txt file in your production server might look something like:
0.5.1 345
Now you want to add a postal_code column to the users table in the development version, so you’ll increment the version number on the development server:
0.5.2 346
And add a method to your conf/Installer.php file to perform the database change:
<?php
class conf_Installer {
    function update_346(){
        $sql[] = 'ALTER TABLE `users` ADD `postal_code` VARCHAR(32) AFTER `phone_number`';
        df_q($sql);
       }
    }
}
Then you can just update the source files to the production server using subversion. The first time you run the production app after updating the source files you’ll get a message saying that the application has been updated to version 346.
That’s all it takes. You just keep on adding these methods for each update. Then even if you have an instance that is a couple of versions behind, all you need to do is update to the latest source revisions, and it will automatically update the database to the correct version.
User Interface and Themes
The following sections cover user interface considerations such as themes, UI configuration, and customization.
Responsive UI
Starting in Xataface 3.0, the entire the user interface has been revamped to provide a good mobile experience out of the box. Every aspect of the UI has been reviewed and improved to fit user expectations of a mobile application. Elements that don’t make sense in a mobile interface have been "hidden" and replaced with other more suitable elements.
Here are a few snapshots of the new look:
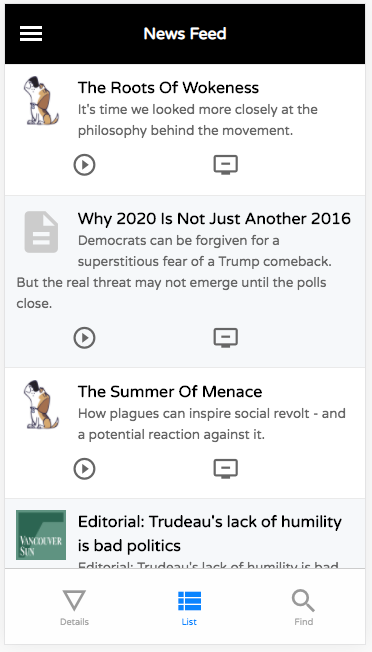
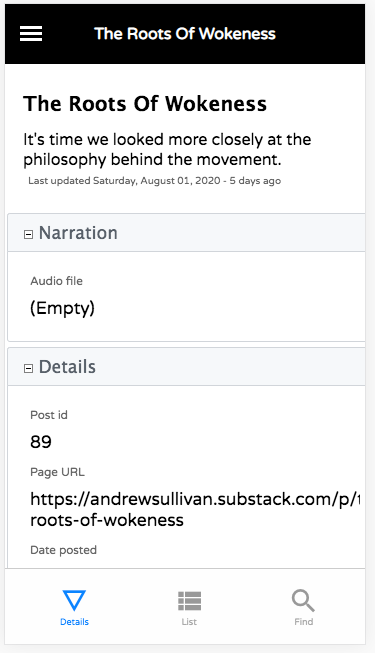
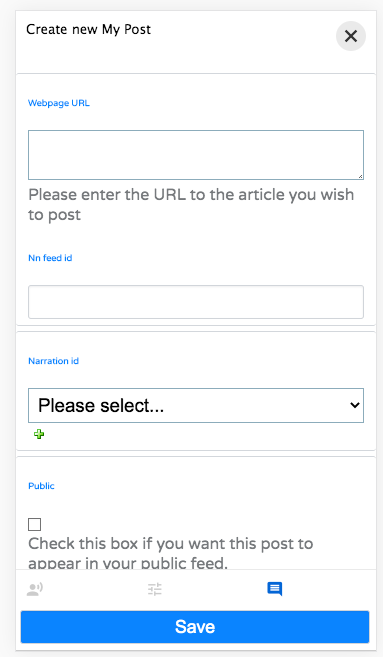

You’ll notice quite a few differences from the desktop theme:
-
Instead of a table with columns, the "list" view renders similar to the view you would expect in a mobile news, mail, or social media app. Each row includes a title, description, icon, and set of actions that can be performed.
-
The familiar "Details", "List", and "Find" tabs are still there, but have been moved to the bottom of the screen and have been restyled to look more like the tabs in native mobile apps.
-
The navigation menu (to select the table), and personal tools menu ("logout", "profile", etc..) are now contained in hamburger slide-out menu; a common pattern in mobile apps.
-
Table actions (e.g. "New Record", "Delete", etc..) have been moved into a FAB (floating action button) in the lower right that hovers over the screen. This is also a common element in mobile apps.
-
Forms are laid out in a single column, and the "Save" button has been moved to a fixed position at the bottom of the screen to streamline usability.
Switching Between Mobile And Desktop Theme
The theme is fully responsive, meaning that it will automatically render the appropriate UI based on the size of the window. Currently the threshold occurs as a window width of 768 pixels. If the window is wider than that, it will render the desktop UI. Narrower, and it will render the mobile theme.
When in "mobile" mode, the body tag will include the "small" CSS class. When in "desktop" mode, it will include the "large" CSS class. This will allow you to define CSS styles that target mobile or desktop separately. E.g.
<h1 class="mystyle">My heading</h1> as blue on mobile and green on desktop./**
* red style for h1 tags. Not used at all because it is overridden
* by following two rules on mobile and desktop.
*/
h1.mystyle {
color:red;
}
/**
* Blue style applied on mobile only.
*/
body.small h1.mystyle {
color:blue;
}
/**
* Green style applied on desktop only.
*/
body.large h1.mystyle {
color:green;
}A Javascript event is fired both when entering and exiting mobile mode. You can use these events in your Javascript code to be notified when transitioning between modes. E.g.
xf-mobileenter and xf-mobileexit events are fired when entering and leaving mobile mode respectively.// Event that is fired when the window enters "mobile" mode
window.addEventListener('xf-mobileenter', function() {
// Do stuff required to adjust to the change to mobile mode
});
// Event that is fired when the window exits "mobile" mode
window.addEventListener('xf-mobileexit', function() {
// // Do stuff required to adjust to the change to desktop mode
});For more information about these events, see Javascript Events.
Mobile Header and Footer
The header and footer components of the mobile theme have "fixed" positions.
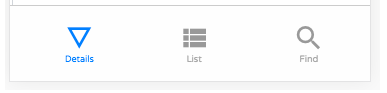
The size of these components may change as it is possible to add and remove contents from these components. It is also possible to hide them in some contexts.
Xataface automatically configures the body padding so that these do not obscure other content on the page. If you are using fixed or absolute positioning, you should be aware of these components. You can use the xf-viewport-changed Javascript event be be notified when the size of the header or footer is changed. For example, the FAB component is designed to hover in the lower right corner of the page, but it shouldn’t overlap the bottom tabs, so it needs to be positioned relative to the "mobile-footer" component. It uses the following code to accomplish this:
xf-viewport-changed event to reposition itself when the mobile footer or header is changed.function updatePosition() {
var zoom = document.querySelector('.zoom');
if (zoom) {
var footer = document.querySelector('.mobile-footer');
if (footer) {
zoom.style.bottom = (footer.offsetHeight + 10) + "px";
}
}
}
window.addEventListener('xf-viewport-changed', updatePosition);Hiding the Header and Footer
You can hide the mobile-header and/or mobile-footer components by adding "no-mobile-header" and "no-mobile-footer" CSS classes to the body tag respectively.
document.body.classList.add('no-mobile-header');document.body.classList.add('no-mobile-footer');|
Tip
|
You can use the |
|
Note
|
Certain Xataface actions hide the header, footer, and FAB by default. Some examples include the login, edit, and new record forms. |
Adding Content to the Footer
The mobile footer is a handy place to add content that you want to display in a fixed position at the bottom of the screen. The following snippet shows how to add a component to the top/beginning of the mobile footer.
var mobileFooter = document.querySelector('.mobile-footer');
jQuery(mobileFooter).prepend(myElement);Table Tabs
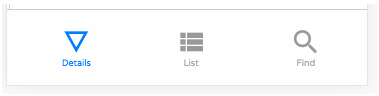
The table tabs (i.e. "Details", "List", and "Find") are rendered in the mobile footer by default. These are taken from the same actions as the table tabs in the desktop UI. You can add/remove options to this menu by adding actions to the "table_tabs" category.
|
Tip
|
For best results, make sure that the action includes a materialIcon. See Using Material Icons for more details on material icons.
|
Like the header and footer, you can hide the table tabs in mobile using the "no-table-tabs" CSS class on the "body" tag.
For example, the "edit" action includes the following snippet to remove the header, fab, and table tabs.
$app->addBodyCSSClass('no-table-tabs');
$app->addBodyCSSClass('no-mobile-header');
$app->addBodyCSSClass('no-fab');FAB (Floating Action Button)

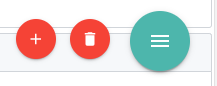
The table actions menu is rendered using a floating action button. You can hide this by adding the "no-fab" CSS class to the body tag.
To add options to the FAB, simply add actions to the table_actions_menu category, and make sure they have a materialIcon directive. See Using Material Icons for more about material icons.
|
Tip
|
Actions in the |
Customizing the List View
The rows of the list view use different mark-up in mobile than in desktop. Both versions are rendered in HTML, but only one of them is visible at any given time.
There are 4 core content elements of a row in the mobile theme:
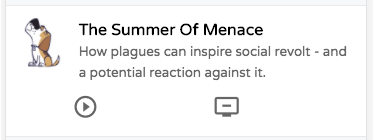
- Logo
-
 A logo or icon that is rendered on the left side. You can customize this image by setting a field of your data base as the "logo". The logo field should contain the URL to an image. You can use a container field for this, a regular field, or a calculated field. E.g.Logo field defined in fields.ini file.
[mylogofield] logo=1 - Title
-

The title field. There are many ways to define the title field. Xataface uses some heuristics to guess the field, but you can configure this explicitly using the
getTitle()delegate method or thetitlefields.ini property. - Description
-

The description field. There are many ways to define the description field. As with "title", Xataface uses some heuristics to guess the most appropriate field, but you can configure this explicitly using the
getDescription()delegate method or thedescriptionfields.ini property. - Record Actions
-

Actions from the "list_row_actions" category are rendered in the south of the row. For best results, the action should include the "materialIcon" directive. See Using Material Icons for more details about material icons.
Useful CSS Classes In Mobile List View
- mobile-listing-row
-
The
<div>tag wrapping the row. This tag will also include thexf-record-idattribute whose value is the record ID of the record. This element is the analog of the<tr>tag of the desktop interface. - mobile-row-content
-
Inner
<div>tag containing the row content. - mobile-logo
-
<div>tag wrapping the logo. - mobile-title
-
<div>tag wrapping the record title. - mobile-description
-
<div>tag wrapping the record description.
Infinite Scroll
You’ll notice that the mobile list view doesn’t include any paging buttons (e.g. "Previous" or "Next"). This is because it uses infinite scrolling. When the user scrolls to the bottom of the list, it will automatically load the next 30 records and append them to the end of the list seamlessly.
Appendix 1: Configuration Directives
The following chapters serve as reference to show all of the various configuration directives available in Xataface apps.
Conf.ini Directives
Overview
The conf.ini file is where most of the application-level configuration information is stored for a Xataface application. It contains information such as:
-
database connection information
-
which tables should appear in the tables menu.
-
preference settings
-
authentication settings
-
which add-on modules are to be used
-
output caching settings
-
history/undo settings
-
other misc settings.
|
Tip
|
This section documents some of the built-in configuration directives that Xataface supports, however, this file is extensible so you can add your own configuration directives as well (which you access in your PHP and Action definitions). |
Sections
Every conf.ini file must contain at least the following sections:
- _database
-
Contains database connection info.
Example_databasesection[_database] name=spokenpage user=root password=password host=localhost driver=mysqliTipIt is recommended to place the [database]section in a separate file namedconf.db.ini.phpand include it in the__includes__directive to make your app more portable. - _tables
-
Contains a list of tables that are to be included in the navigation menu of the application.
Example_tablessection[_tables] people=People publications=Publications
The following optional sections may also be included:
- alt_logos
-
Specifies alternative images that can be used for the site logo depending on media queries (i.e. to show different images for different devices) and browser support (e.g. to provide fall-back images for browsers that don’t support an image format). See Responsive Logo Image
Used in conjuction with [confini-site_logo]
Since 3.0
- _allowed_tables
-
Specifies tables that should be explicitly allowed to override disallowed tables listed or matched in the _disallowed_tables section. Since 0.7
- _auth
-
Contains information about authentication. Since 0.6
- _disallowed_tables
-
A list of tables or patterns that match tables that should be blocked from being accessed directly through the application. By default any table beginning with an underscore, 'dataface_', or ending in '__history' are blocked. This prevents unintended access to some of the automatically created tables in Xataface. Since 0.7
- _feed
-
Configuration options for RSS feeds that are generated by the application. Since 1.0
- _history
-
Settings pertaining to the history feature (e.g. whether it has been enabled). Since 0.7
- _index
-
Settings for the full site search indexing. Since 1.0
- _modules
-
A list of modules that are enabled for this application. Since 1.0
- _output_cache
-
Output cache settings. Using output caching can dramatically improve performance for busier sites. Since 0.8
- _themes
-
A list of the themes that are to be applied to the application. Since 0.8
- default_tables
-
Allows you to set a default table on a per-action basis. Keys are action names, values are table names. E.g. If you wanted the
my_profileaction to use the users table by default, then you would have:[default_tables] my_profile=usersSince 3.0
- table_labels
-
A list that defines friendly labels for displaying table names. Similar to the
[_tables]section, but these tables do not appear in the application’s navigation menu by default. This is also the only method to display friendly table names in the search index results as of Xataface 2.1 or prior. (See Editing Search Results >> How Do I change table names). Also see the label global directive in the fields.ini_file. Since always.
Stand-alone Attributes
Stand-alone attributes for an INI file must appear at the beginning of the INI file (before any of the sections). The conf.ini may contain the following stand-alone attributes.
- cache_queries
-
Enables query caching. Enabling this feature can yield drastic performance improvements especially on busy sites with large databases.
Accepted Values: boolean (0 or 1)
Since 1.2
- cache_queries_log
-
Enables logging of query caching to the file /tmp/querylog.log so that you can tell whether your queries are being cached, and which ones are being cached.
Accepted Values boolean (0 or 1)
Since 1.2
- default_action
-
The default action to be performed if it is not explicitly specified in the query (e.g. 'list', 'find', 'edit').
Accepted Values string. Name of action.
Default Value 'list'.
Since 0.6
- debug
-
If this is set to 1, then the application will run in debug mode which displays the available slots and blocks on the screen, along with some other debug information.
Accepted Values 0 or 1
Default Value 0
Since 0.6
- default_browse_action
-
The default action to perform in the details tab. E.g. When you click on the "details" tab there are a number of sub-tabs including 'view', 'edit', etc… . The default value for this directive is 'view'. If you want to go directly to the edit form when clicking on a record in list view, you would set default_browse_action to 'edit'. string
Since 0.6
- default_language
-
The default language to use. This is the 2-digit ISO language code. If this value is not specified it defaults to the first language listed in the [languages] section. string (2-digit ISO language code)
Since 0.6
- default_limit
-
The default limit (i.e. the number of records to show per page) if none is explicitly specified in the query.
Accepted Values positive integer. E.g. 100
Default Value 30
Since 0.6
- default_table
-
The default table to show if none is specified by the query.
Default Value: The first table listed in the
[_tables]section.Since 0.6
- disable_session_ip_check
-
Default behaviour automatically tracks the IP address of the user when they log in. If a request is made for a session from a different IP then the session is automatically destroyed and the user is logged out.
Accepted Values boolean (0 or 1)
Since 1.3rc4
- site_logo
-
Overrides the image file that is used for the site logo. See Changing the Site Logo Image.
See also [conf-ini-alt_logos]
Since 3.0
- title
-
A title for the application (appears in the browser title bar).
Since 0.6
- __include__
-
A comma-delimited list of configuration files that you wish to include.
This list can be used to separate your configuration into multiple files, or to provide different configurations for different host environments. It is common, for example, to factor your database connection information into a separate file named "conf.db.ini.php" which is not kept in version control to make the application more portable.
Example: Placing database configuration in separate file
conf.ini.php file;<?php exit; __include__=conf.db.ini.php [_tables] table1=My First Table table2=My Second Tableconf.db.ini.php file;<?php exit; [_database] host=localhost name=mydb user=mydbuser password=dbpass
NoteFor security it is recommended to add the ".php" extension to all of your INI files to prevent the web server from publishing them. The first line, then is always ;<?php exit;as this will be ignored when parsing the file as an INI file, and it will cause execution to exit when parsing as a PHP file.Placeholder Variables
Since version 3.0, you can use placeholder variables in your __include__ directive which allow you to specify a different path based on the environment. The following placeholders are supported:
{host}-
Will be replaced by the HTTP host name of the request. E.g. if the app is being accessed at
http://example.com, then{host}placeholders will be replaced with "example.com". {port}-
Will be replaced by the HTTP port for the request.
Example conf.ini.php using placeholders;<?php exit; __include__=conf.db.ini.php, hosts/{host}/{host}.conf.ini.phpIn the above example, if the app is accessed at example.com, then it would include the conf file located at
hosts/example.com/example.com.conf.ini.php, but if it is accessed atlocalhost, then it would load the config file athosts/localhost/localhost.conf.ini.php.Optional Includes
TLDR: Add
?to the end of a file path to make it an optional include. E.g.__include__=hosts/{host}/{host}.conf.ini.php?By default, if an include fails (because the included file doesn’t exist), then an exception will be thrown when the app is loaded. In some cases you may want the include to be "optional" so that it just fails to load silently if the file can’t be found. You can add
?to the end of a file path to make it optional. - use_manifest
-
Boolean value (0 or 1) indicating whether the app should use a manifest to keep track of all of its files. This may improve performance in some cases as it may prevent file system calls to check if a file exists. When using this option, if you add or remove any files from the app, you’ll need to increment the application version in the version.txt file to force the app to regenerate the manifest.
Since 3.0
Fields.ini Directives
Overview
The fields.ini file is a configuration file which is associated with a single table of a database application. It provides metadata about the table’s fields to help Xataface dictate how they should be included in the application. This includes metadata such as
-
Widget type - To specify the type of widget that should be used to edit content in the field (e.g. text, select, checkbox).
-
Label - The labels that can be used in column headers and on forms.
-
Help text - for forms to inform the user how data should be entered.
-
Field Groupings
-
widget:atts - To use javascripts in event handlers
-
and more
Although a table doesn’t need to have an associated fields.ini file in order for the application to work, each table can have one; and it is always located in the "tables" directory. For example, the fields.ini file for the "people" table would be located at tables/people/fields.ini file.
|
Tip
|
All ini files can also contain the ".php" file extension. E.g. "fields.ini.php". Using a .php extension can be helpful for security as it allows you to easily prevent the contents of the INI file from being served by the web server by adding the following to the first line of the file: If you do not use the ".php" extension, ensure that your .htaccess file blocks access to .ini files. A sample .htaccess file is bundled with Xataface here. The contents are: |
Syntax
The fields.ini file uses standard INI syntax (just like the php.ini file), where each section corresponds to a column in the table.
For example, consider a table "people" with columns "first_name", "last_name", and "age". The fields.ini file for the people table could then contain sections for each of its columns as follows:
[first_name]
[last_name]
[age]In this example the sections are empty (i.e. they have no directives, but we could easily add some directives:
[first_name]
widget:description="Please enter your first name"
widget:label="Given Name"
...etc...Here we have told Xataface that the first name field should include some help text (using the widget:description directive) on its edit form.
Example fields.ini file
;; Global directives applied to every field
[__global__]
visibility:list=hidden
[isbn]
widget:label = ISBN
visibility:list=visible
[copyright_year]
widget:label = "Year"
widget:atts:size=4
visibility:list=visible
[categories]
widget:type=checkbox
vocabulary = book_categories
[media]
widget:type=checkbox
vocabulary = book_media
[borrower_id]
widget:type=select
vocabulary=users
[due_date]
widget:description = "The date that the book is due to be returned to the library"
visibility:list=visible
[cover_art_url_small]
visibility:browse=hidden
[cover_art_url_medium]
;visibility:browse=hidden
[cover_art_url_large]
visibility:browse=hidden
visibility:find=hidden
[amazon_description]
widget:label = Description
[amazon_reviews]
[amazon_url]
[amazon_refresh_timestamp]
widget:type=static
[date_created]
timestamp=insert
widget:type = static
[date_modified]
timestamp=update
widget:type=static
[created_by]
widget:type=static
[modified_by]
widget:type=static
[notes]Field Directives
The following directives may be added to a field’s section of the fields.ini file to customize the field’s behavior. Some directives are not applicable to all fields.
- actions
-
Optional actions category for actions which should be rendered next to the field on the edit form. See Adding Actions to Fields for a usage example.
Since 2.0
- ajax_value
-
Make the field dynamically update whenever one or more other fields on the same form is changed. When a change is detected, the field will load new data from a JSON web service specified by the URL in the property. See Auto-Updating a Field When Other Fields are Changed for a usage example.
Since 3.0
- ajax_preview
-
A URL to content that should be displayed just below the field. By default the content is updated whenever the field content is changed, but the
ajax_preview_eventdirective can be used to specify a different event. See Displaying Field Preview using AJAX for example usage.Since 3.0
- ajax_preview_event
-
The event that triggers the
ajax_previewcontent to be updated. Default is "change", but any valid Javascript event name may be used. The event is triggered by the field itself. E.g. set this to "input" to update the content as the user types into the field.Since 3.0
- column:label
-
Specifies a custom label to use in list view for the column. If this is not specified, then the value of
widget:labelwill be used.Since 1.3
- column:legend
-
Adds a small amount of help text to the column header for this field in list view. Default is blank. E.g.
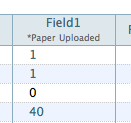
In this photo it shows the text "*Paper Uploaded" set as the
column:legendfor "field 1".Since 1.3
- date_format
-
Specifies how the field should be formatted when displayed. Takes same parameters as PHP strftime function.
Since 2.0
- display
-
Specifies the layout of the field on the edit form. Most fields have an implicit value of "inline" meaning the widget and its label appear on the same line. Textareas and htmlareas have an implicit value of "block" meaning that the label and widget appear in separate rows (label above the widget). You can set this value explicitly also to override the layout of a field.
Since 0.8
- display_format
-
A pattern that can be used to define the display format of the field. This takes the same parameters as the PHP sprintf function.
Since 2.0
- encryption
-
Primarily used with password fields, indicates the type of encryption that should be used to save the field. Supports "md5", "sha1", "encrypt", and "password". Since 0.6
- event.date
-
For use by the Calendar Action. Indicates that the field stores the date of the record when interpreted as an event. Possible values "0" or "1".
Since 1.0
- event.start
-
For use by the Calendar Action. Indicates that the field stores the start time of the record when interpreted as an event. Possible values "0" or "1".
Since 1.0
- event.end
-
For use by the Calendar Action. Indicates that the field stores the end time of the record when interpreted as an event. Possible values "0" or "1".
Since 1.0
- event.location
-
For use by the Calendar Action. Indicates that the field stores the location of a record when interpreted as an event. Possible values "0" or "1".
Since 1.0
- filter
-
Boolean value (0 or 1) indicating whether this field should be filterable? in list view?.
Since 0.8
- filter.multiple
-
Boolean value (0 or 1) that sets a filter select list to allow multiple options to be selected. Currently this only works with the older Xataface 2-style filters (i.e. when the
use_xataface2_result_filterspreference is active).Since 3.1
- filter.type
-
The type of filter to use. Options include "text", "range", "min", "max", and "filter". See Filter Types.
Since 3.0
- filter.label
-
The label to use for the filter. This defaults to the
widget:labelfor the field.Since 3.0
- filter.icon
-
Icon to use in the text field when using the "text" filter type. This should be the name of a material icon. See Using Material Icons for details about material icons in Xataface.
Since 3.0
- filter.min.icon
-
Optional icon to use inside the "min" field for min and range filters. The icon should be a valid material icon name. See Using Material Icons for details about material icons in Xataface.
Figure 55. Examplefilter.max.icon=euro_symbolSince 3.0
- filter.max.icon
-
Same as
filter.min.iconexcept for the "min" field.Since 3.0
- filter.input.type
-
Specify the
typeattribute of the<input>tag used in the "text", "range", "min", and "max" filter types. This will be "text" by default in most fields. It will be date by default for date fields, and datetime-local for datetime fields.Since 3.0
- filter.sort
-
Used for the "filter" filter type. This specifies the column to use for sorting the options in the fitler.
Since 3.0
- filter.placeholder
-
Placeholder text used for the "text" filter type. Placeholder text is only displayed when the field is empty.
Since 3.0
- filter.min.placeholder
-
Placeholder text used the "min" field. Placeholder text is only displayed when the field is empty.
Since 3.0
- filter.max.placeholder
-
Placeholder text used the "max" field. Placeholder text is only displayed when the field is empty.
Since 3.0
- filter.input.*
-
Specify HTML attributes on the
<input>element used in the "text" filter type. E.g.filter.input.maxlength=5Since 3.0
- filter.min.input.*
-
Specify HTML attributes on the
<input>element used in the "min" field. E.g.filter.min.input.maxlength=5Since 3.0
- filter.max.input.*
-
Specify HTML attributes on the
<input>element used in the "max" field. E.g.filter.max.input.maxlength=5Since 3.0
- filter.vocabulary
-
A valuelist that can be used to provide "common" search options. These are displayed before the text or range fields to allow the user to easily select common searches.
Since 3.0
- frozen_description
-
The field description shown when the widget is frozen (i.e. uneditable). If this is not specified, no field description is shown in this case.
Since 1.2
- group
-
The name of the field group that this field belongs to. Fields with the same "group" value will be rendered in the same field group on the form.
Since 0.5
- Key
-
If you are using a View for the table you need to explicitly mark the fields that comprise the primary key. E.g. Key=PRI
Since 0.6
- label_link
-
An optional URL for the field label to link to. This would usually be some "help" page that explains what the field is for. The link will be a link in both the view and edit tabs.
Since 1.1.3
- ignore
-
Boolean value (0 or 1) indicating whether this field should be ignored on the edit form. This is handy if the field is going to be constantly updated in the background (via a cron job perhaps) and you don’t want the edit form to interfere.
Since 1.0
- logo
-
Boolean value (0 or 1) to indicate if this field should be treated as a logo field. Logo fields are displayed in the upper left of the view tab for a record, and are assumed to contain an image. If no logo field is explicitly specified, Xataface will make a best guess as to which field should be used.
Since 0.7
- money_format
-
For fields containing monetary amounts, this specifies the format. Takes same parameters as PHP money_format function.
Since 2.0
- noLinkFromListView
-
Boolean value (0 or 1) to indicate if this field should be linked when in list view (or in a related list). Default value is 0 to indicate that the field IS linked. It is common to use this directive when using a custom xxx__renderCell() method that contains its own links.
Since 1.1
- not_findable
-
A flag to indicate that this field can not be used as part of a query. This is helpful if you want a field to remain completely confidential to prevent people from finding records based on the value of this field. This flag is even necessary if the permissions for the field don’t permit viewing the value of the field.
Since 1.1
- number_format
-
For numeric fields, this indicates the number of decimal places to display when displaying this field. E.g. 2
Since 2.0
- order
-
The order of the field when laid out on forms and lists. Can contain any floating point number or integer (e.g. 0, 10, -10, 235.4)
Since 0.6
- prefs.key
-
The name of a preference to set with the value of this field in the currently logged-in user record. See [preferences-directives] for more information about preferences. See Allowing Users to Choose Their Own Color Scheme for an example using
prefs.key=user_stylesheet.Since 3.0
- relationship
-
Used only with complex fields that involve editing related records (e.g. grid). This is the name of the relationship that the field should be edited.
Since 0.8
- repeat
-
Boolean value (0 or 1) used in conjunction with a select widget to indicate whether to enable a multi-select.
- section
-
The name of the section that this field should belong to in the view tab.
Since 0.7
- secure
-
A boolean flag for use with container fields? to indicate that it should use secure URLs for the file downloads (i.e. it will obey the application permissions). Without this directives, uploaded files are served directly by apache and don’t obey the Xataface permissions defined per record.
Since 1.3
- sortable
-
A boolean flag that indicates whether a column is sortable. This does not affect permissions (i.e. the user can still sort on the column by including it in the
-sortrequest parameter. This only affects whether the column is sortable in the UI. Currently this is only used for the mobile UI. On the desktop UI, all columns visible in list view are sortable.NoteIf no columns in the table define the sortableproperty, then all columns are treated assortable=1. If at least one column in the table hassortabledefined, then the remaining columns are assumed to besortable=0. One way of thinking about this that you need to opt in to this behaviour to use it. Otherwise Xataface will just guess at which columns the usezr should be able to sort on.Since 3.0
- sortable+
-
A boolean flag that enables or disables sorting on this column in ascending order.
Since 3.0
- sortable-
-
A boolean flag that enables or disables sorting on this column in descending order.
- sort.label
-
The label that should be used for sorting on this field.
Since 3.0
- sort+.label
-
The label that should be used for sorting on this field in ascending order.
Since 3.0
- sort-.label
-
The label that should be used for sorting on this field in descending order.
Since 3.0
- struct
-
A boolean (0 or 1) value indicating whether this field is considered a structure. A value of 1 indicates that this field is a structure and should not be truncated under any circumstances. Normally fields are truncated at 255 chars in list view. This is useful if the field contains XML or other structured data so that attempts to truncate it would destroy integrity.
Since 1.1.2
- tab
-
If tabbed forms are enabled, then this specifies the name of the tab that this field belongs to on the edit form.
Since 0.8
- timestamp
-
Indicates when a timestamp should be set in the field (only applicable for date and time fields). Possible values are "insert" and "update"
Since 0.7
- title
-
Boolean value (0 or 1) indicating whether this field should be treated as a title field.
Since 0.7
- transform
-
String defining rules for generating thumbnails for uploaded images. This directive is only used with Container fields.
Syntax
transform=name1 [op1:]w1xh1; ...;nameN [opN:]wNxhN
Where:
-
name1…nameNare names of the thumbnail sizes you wish to resize images to. -
w1…wNare corresponding widths in pixels, -
h1…hNare corresponding heights in pixels, and -
op1…opNare the corresponding operations to perform for resizing. Currently the only operations supported are "fit" and "fill". "fit" will cause the image to be resized to "fit" completely inside the dimensions of the thumbnail size, and "fill" will cause the image to fill the thumbnail space completely, possibly cropping some off edges to make it fit.
Example
transform="itunes300 fill:300x300; itunes1400 fill:1400x1400"Defines two thumbnail types "itunes300" and "itunes1400" with sizes 300x300 pixels and 1400x1400 pixels respectively. This means that images uploaded to this container field will automatically have thumbnails generated in those two sizes. Both of these thumbnail types use the "fill" operation so images will be resized to fill the space, and may have some cropped off the edges.
This directive is commonly used with
thumbnail.ACTIONNAMEdirectives which specify which thumbnail should be used in which action.See Generating Thumbnails for a recipe on how to use this directive.
Since 3.0
-
- transient
-
Boolean value (0 or 1) indicating whether this field is a transient field or not. A transient field is a field that is defined in the fields.ini file but not in the database. Hence the values that are input into this field on the edit form are not saved to the database.
Since 0.8
- Type
-
The data type of the field (note the capital "T" as Xataface is case sensitive). This value is only overridden for container? fields, however its value can be accessed programmatically for any field.
Since 0.5
- userid
-
Marks the field as containing a User ID, which corresponds to the userId of the users table. This is used by caching solutions, such as Scaler Module, to be able to invalidate the cache if only a particular user’s records are modified in a table. See Table Subset Dependencies in the Scaler module readme file for more information.
Since 3.0
- username
-
Marks the field as containing a username, which corresponds to the username of the users table. This is used by caching solutions, such as Scaler Module, to be able to invalidate the cache if only a particular user’s records are modified in a table. See Table Subset Dependencies in the Scaler module readme file for more information.
Since 3.0
- uuid
-
Marks a field as storing a UUID (universal unique identifier). This works similar to the
timestampandownerstampdirectives, in that it will automatically generate a UUID at the time the record is inserted if one is not supplied. It will also apply appropriate defaults to hide this field on the edit form.Since 3.0.1
- validators:VALIDATOR_NAME
-
A prefix for a validation type on the current field. (Replace "VALIDATOR_NAME" with the name of the validator to be used. e.g. required). There are many validators available to be used.
Since 0.5
- validators:VALIDATOR_NAME:message
-
The message the should be displayed if the form fails to validator due to the "VALIDATION_NAME" validation rule.
Since 0.5
- viewgroup
-
The name of the field grouping that this field will belong to in the view tab. If this is not present, then it will be grouped according to the group directive.
Since 1.0
- visibility:browse
-
Indicates whether the field should be visible in browse mode (i.e. in the "view" tab). Possible values are "visible" and "hidden".
Since 0.6
- visibility:csv
-
Indicates whether the field should be included in CSV exports. Possible values are "visible" and "hidden".
Since (1.0 beta 4) 1.0b4
- visibility:find
-
Indicates whether the field should be visible in find mode. Possible values are "visible" and "hidden" + Since 1.0
- visibility:list
-
Indicates whether the field should be visible in list view. Possible values are "visible" and "hidden". + Since 0.6
- visibility:update
-
Indicates whether the field should be included in update and copy/replace forms. Possible values are "visible" and "hidden".
Since 1.3
- vocabulary
-
The valuelist that should be used as the options to select. This is only applicable for fields that have options to select like a select list or a checkbox group.
Since 0.5
- widget:atts
-
A namespace for attributes that should be added to the HTML widget. This allows you to specify things like javascript events, styles, widget size, etc..
Since 0.5
- widget:columns
-
For checkbox groups, this specifies the number of columns to use for laying out the checkboxes.
Since 1.0
- widget:description
-
Help text to give the user a hint about how to edit the field’s content.
Since 0.1
- widget:editor
-
The type of HTML editor that should be used. This is used only when widget:type is set to htmlarea
Acceptable values include:
-
fckeditor (default)
-
tinymce (version 0.6 or higher)
-
nicedit (version 1.0 or higher)
-
all
-
- widget:editvalues
-
Used with select lists to allow users to add values to the select list. E.g. widget:editvalues=1
Since 0.8
- widget:focus
-
Sets default focus. 0 or 1. (Javascript focus in a form)
Since 0.6
- widget:label
-
The label that should be used for the current field on edit forms, column headings, and other relevant locations.
Since 0.1
- widget:question
-
Text displayed just before the widget. This is almost the same as widget:description except that this text is guaranteed to be displayed before the widget, whereas widget:description may be displayed below or beside the widget.
Since 0.1
- widget:type
-
The type of widget that should be used (e.g. checkbox, select, text, etc..)
Since 0.1
- xml
-
A flag for use with calculated fields (i.e. fields defined in the delegate class via the field__fieldname method) that will include the field in XML output produced by the export xml action. Default is 0, but setting this value to 1 wil cause the field to be included.
Since 1.2.7
Applying Directives to All fields (__global__)
Xataface 1.2.6 includes support for a __global__ section that allows you to specify directives that should be applied to all fields. These directives can be overridden on a field by field basis. The __global__ section can take all the same directives that a normal field section takes.
widget:atts:class Values
The widget:atts:class directive allows you to assign a CSS class to a field’s widget. There are certain CSS classes that have meaning to Xataface and will cause additional functionality to automatically be added to the field. These built-in classes are listed below:
- passwordTwice
-
Applicable only to password fields. If you set
widget:atts:class=passwordTwice, then this will convert the password field into two fields whereby both fields need to match in order for submission to continue on the edit form. This operates as a password verification field.Since 1.3rc2
Global Directives
The following directives can be added to the beginning of the fields.ini file (before any field sections) to customize field groups and the table as a whole.
- __dependencies__
-
A comma-delimited list of tables that this table is dependent upon for caching purposes. E.g. if any table in this list is modified, then the query cache is cleared for queries on this table. See this blog article for more information about query caching.
Since 1.2
- __isa__
-
The name of the parent table of the current table. This directive allows you to have a heirarchical structure amongst the tables in your application.
Since 0.8
- __source_tables__
-
A comma-delimited list of tables that this table/view is derived from. This is used with the query caching feature and is necessary to use this directive if the table is actually a view. If this directive is not set, then any queries involving this view will not use the query cache because Xataface would have no way to discern the update time of the view. See this blog article for more information about query caching.
Since 1.2
- __sql__
-
Defines a custom select query to override the default select query for the current table. (The default select query is generally "select * from tablename").
Since 0.7
- __prefs__
-
Sets preferences for this table and its records. This directive is an array, so it must be enclosed in square brackets, i.e.
[__prefs__], unlike the other global directives listed above.Since 1.0b4
- scaler.trackUsedTables
-
Boolean (0 or 1) indicating whether requests on this table should track the tables used in the request. Used with Scaler Module. See Tracking Used Tables in the Scaler module readme.
Since 3.0
- table.default_sort
-
Sets the default sort column for the table. See Specifying Default Sorting.
Since 3.0
- table.default_sort.RELATIONSHIPNAME
-
Sets the default sort column for the given relationship. E.g.
table.default_sort.posts=date posted desc. See Setting Default Sort for Related Lists.Since 3.0
- table.label
-
Sets the friendly name for this table. This is the equivalent of using the [_tables] section in the conf.ini file, except without imposing the requirement that these tables appear in the application’s primary navigation menu. E.g. label = "Table Name"
- table.title
-
A string SQL select expression that is used to describe the title of records. This is the equivalent of the
titleColumn()function used in Delegate_class_methods. - table.list_template
-
An alternative template to use for rendering the list view of this table. This can either be the path to a template (relative to the template path roots), or some special values including
@grid, which will be expanded toxataface/actions/list/grid.htmlSee Rendering List View as a Grid. - table.listStyle
-
Setting this to "mobile" will cause the list view to use the "mobile" list style in desktop mode also. This will also affect one-to-many relationships to this table - i.e. related lists where this table is the domain table will be rendered with the mobile style, if this is set to "mobile". See Using Mobile List Template on Desktop
- table.row_style
-
Setting this to "external-link" will cause the mobile list view (and related list view) to render rows as links to an external link, similar to how Twitter renders tweets that contains links. See Rendering Row as Link to External URL
- table.depends
-
A comma-delimited list of tables on which this table depends. When using Scaler Module, this helps Xataface determine which tables were used in generating a response for a request, and thereby know when the cache for that page should be invalidated. This directive is usually used for MySQL views or temporary tables Xataface won’t automatically increment their version numbers when their underlying tables are modified.
Since 3.0
Field Groups
The "group" directive allows you to group multiple fields together so that they will be rendered in the same field group on forms. You can also configure these groups as a whole by defining a section named "[fieldgroup:GROUPNAME]" (where GROUPNAME is the name of the field group, corresponding to the group directive values for the fields) in the fields.ini file. This section provides a few basic directives to customize some aspects of the field group:
-
label
-
order
-
description
-
template
-
more…
The most common use of these sections is to customize the label or order of groups, especially when there are multiple field groups in the table. For example, suppose we have a table "people" with fields "first_name", "last_name", "phone", "fax", "email", "address", "city", and "country". Suppose these fields are grouped as follows:
-
"first_name" and "last_name"
-
"phone", "fax", and "email"
-
"address", "city", and "country"
so that the fields.ini file looks like:
[first_name]
group=name
[last_name]
group=name
[phone]
group=contact
[fax]
group=contact
[email]
group=contact
[address]
group=address
[city]
group=address
[country]
group=addressBy default, the "name" group will appear first in the form, followed by "contact" and "address". If we want to place "address" first we could add the following section to our fields.ini file:
- order
-
Specifies the order of the group with respect to other groups on the form. Accepts any numerical value (e.g. 0, 1, -1, 25.43), with lower values appearing first. Default value is 0.
Since 0.6
- hidden
-
A value of "1" causes the field group to be hidden by default. Hidden groups will have a button placed along the bottom of the form which can be used to reveal the field group. If this directive is used, the
materialIcondirective must also be used to provide the icon that is used in this button.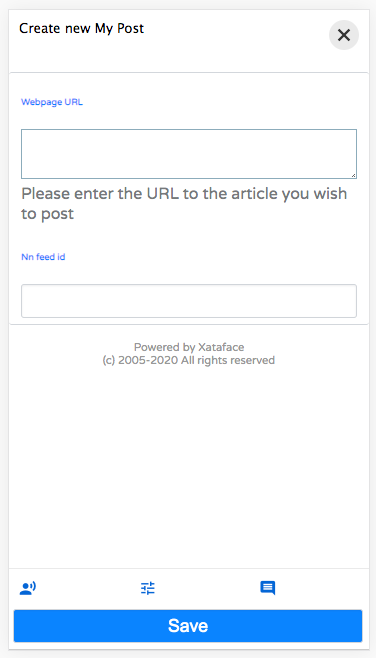 Figure 56. Form with 3 hidden field groups. Users can click on the corresponding buttons at the bottom of the form to reveal a field group.
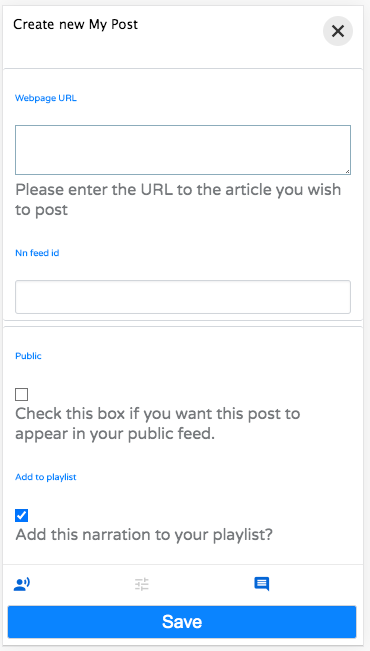 Figure 57. After user clicks on a field group’s button, it will be shown on the form, and the button will become grayed out.
Since 3.0
- label
-
Specifies the label that should be used for the field group.
Since 0.6
- label_link
-
Specifies a URL that the field group label should link to.
Since 1.1.3
- label_prefix
-
Specifies a prefix for the label. This can be useful if the label of the action has been localized using the language files, but you want a prefix (which may include a PHP expression).
Since 3.0
- label_suffix
-
Specifies a suffix for the label. This can be useful if the label of the action has been localized using the language files, but you want a suffix (which may include a PHP expression).
Since 3.0
- materialIcon
-
A material icon to use for the field group’s button when the group is hidden via the
hiddendirective. See Using Material Icons for more information about material icons. Seehiddendirective docs for information about the hidden directive.Since 3.0
- noheader
-
A value of "1" hides the usual collapsible header for the field group so that the fields are just rendered directly on the form.
Since 3.0
- template
-
The path to a custom template that should be used to render the fields of the field group.
Since 1.0
- collapsed
-
Boolean value (0 or 1) indicating whether the field group should be collapsed by default (user can expand it).
Since 1.0
Relationships.ini Directives
Overview
The relationship.ini file is a configuration file which is associated with a single table of a database application. It provides metadata about the table’s relationships to other tables to help Xataface dictate how they should be included in the application.
Field Directives
The following directives may be added to a field’s section of the relationship.ini file to customize the field’s behavior. Some directives are not applicable to all fields.
- sql
-
The SQL query that defines this relationship.
Since: 0.1
- action:visible
-
A boolean value (0 or 1) that indicates whether this relationship should be visible in the record tabs.
Since 0.1
- action:condition
-
An expression that evaluates to a boolean that determines at runtime whether the relationship’s tab should appear in the record tabs.
Since 0.1
- action:permission
-
An array that determines at runtime whether the relationship’s tab should appear in the record tabs for the logged in user.
Also see: Relationship Permissions
Since 0.1
- action:label
-
The label that appears in the relationship tab for this relationship. Default is to use the relationship name.
Since: 0.1
- action:order
-
An integer value that specifies the order of this relationship tab in relation to the other tabs.
Since: 0.1
- action:delegate
-
The name of an alternative action that can be used instead of the standard related records list. One possible value for this would be "related_records_checkboxes" which would provide the user with a checkbox group to select the records that should be part of the relationship rather than the usual related record list.
Since: 1.0
- actions:addexisting
-
Boolean value (0 or 1) indicating whether the action to add existing records should exist in this relationship.
Since: 0.1
- actions:addnew
-
Boolean value (0 or 1) indicating whether the action to add new records should exist in this relationship.
Since: 0.1
- actions:remove
-
Boolean value (0 or 1) indicating whether the action to remove existing records should exist in this relationship.
Since: 0.1
- list:link_to_domain_record
-
Specify that rows in the related list view should like directly to the domain record, rather than the intermediate
view_related_recordaction.Since 3.0
- list:type
-
Optional type of list to use for the related record list. Possible value: "treetable"
Example: Setting
list:type=treetable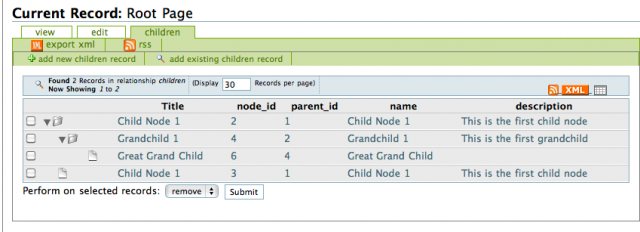
Prerequisites
The TreeTable component needs to be able to figure out the logical children of each record in order to know what to show when a row is expanded. You can use either the
meta:classdirective of the relationships.ini file to specify a relationship as a "children" relationship, or you can implement the getChildren method of the table delegate class to manually define a record’s child elements.Since: 0.8
- meta:class
-
An optional special class to assign to the relationship, e.g. "parent" or "children".
Since 0.8
- metafields:order
-
If the relationship should have a default order this specifies the field that should be used for this sort.
Since: 0.1
- visibility:fieldName
-
If given the value hidden will make that particular fieldName disappear in the relationship. This will only be applied for that particular relationship.
Since: 0.1
- visibility:find
-
If given the value hidden this will cause the related fields to not appear on the find form. Normally each relationship is provided a section of the find form to enable users to find records that contain at least one match in the related records.
Since 1.3rc4
- vocabulary:existing
-
Specifies a valuelist that can be used to provide the set of records that can be added to this relationship. If target table has a single column primary key then the valuelist should use the primary key for the value. If it has a multi-column primary key, then the value should be in the form
key1=value1&key2=value2etc…See also relationshipnamegetAddableValues delegate class method for a programatic solution.
Since: 1.0
Glance Lists
In the view tab, related records are shown by default in the left column. These sections are called glance lists. The field directives below customize how the glance lists are displayed.
- section:visible
-
Boolean value (0 or 1) indicating whether the relationship information should appear as a section.
Since 0.7
- section:condition
-
An expression that evaluates to a boolean that determines at runtime whether the relationship information should appear as a section.
Since 0.7
- section:permission
-
An array that determines at runtime whether the relationship information should appear as a section for the logged in user.
Also see: Relationship Permissions
Since 0.7
- section:class
-
An optional value (main) to specify that this section should be in the main column instead of the left sidebar. Default is
left.Section 0.7
- section:label
-
The label that appears in the header of this related record section. Default is to use the relationship name or action:label if defined as documented above.
Since 0.7
- section:order
-
Integer. The order of this related record section in relation to the other sections. Default is
0.Since 0.7
- section:limit
-
Integer. The number of records to show in this related record section. Default is
5. Since 0.7 - section:sort
-
A comma-delimited list of columns and optionally direction to use in sorting this related record section, similar to an ORDER BY clause in SQL. E.g.
section:sort="some_column asc"
or
section:sort="col1 asc,col2 desc,etc..."
Since 0.7
- section:filter
-
A string SQL clause to be used to filter the results.
Since 0.7
Relationship Permissions
Actions.ini Directives
The actions.ini file stores information about the various action?s that can be performed by your application. An action may be manifested in two ways:
-
As a web page
-
As a menu item
And there is no reason why an action cannot serve in both capacities simultaneously. All menu items and functions that Xataface performs are defined in the Xataface actions.ini file (in the root of the Xataface installation dirctory). You can also create an actions.ini file in your application’s root directory to override existing Xataface actions, or to create your own.
|
Tip
|
This section refers to "actions.ini" file, Xataface supports adding a .php extension to all .ini files to increase security. I.e. Instead of actions.ini, you can name your file actions.ini.php. The benefit of the .php extension is that you can have a line at the beginning of the file: which will be ignored by Xataface’s INI file parser, but will result in the web server not serving the file - so the malicious snoopers can’t access the file directly. |
If you want to modify an existing action instead of overriding it, you can use this syntax:
[browse > browse]
label = BrowseThe > symbol simply means to inherit from the existing browse action. All the attributes are the same, and we just override the label to Browse (originally was Details)
Syntax
As with the fields.ini file and the valuelists.ini file, the actions.ini file uses the simple INI file syntax to define its actions. Each action is defined in its own section, and can have a number of directives to specify the action’s behavior.
Here is a snippet from the Xataface actions.ini file to give you an idea:
;; Show the details of the current record
[browse]
label = Details
category = table_tabs
url = "{$this->url('-action=view')}"
accessKey = "b"
mode = browse
permission = view
order=0
;; Show a list of the records in the current found set
[list]
label = List
category = table_tabs
url = "{$this->url('-action=list')}"
accessKey = "l"
mode = list
template = Dataface_List_View.html
permission = list
order=0.5
;; Show a "Find Record Form"
[find]
label = Find
category = table_tabs
url = "{$this->url('-action=find')}"
accessKey = "f"
mode = find
permission = find
template = Dataface_Find_View.html
order=0.75This snippet shows the definition of the browse, list, and find actions - three of the most central actions in a Xataface application. Notice how each action has its own section (according to INI file syntax?) with a number of directives which specify how the action behaves. For instance, each action has a "category" value of "table_tabs", which tells Xataface to display the actions as part of the table tabs in the user interface.
Directives
- ajax
-
Indicates this this is an ajax action. See Action to Trigger AJAX Request.
- allow_override
-
An optional directive to indicate that this action can be overridden by more specific directives in another ini file. Currently there is only support for a value of "relationships.ini" indicating that the settings can be overridden in the relationships.ini file. In order for this to work, related=1 must also be set.
Since 1.3rc4
- label
-
The label to display if the action is used as a menu item.
- category
-
The name of the action’s category which can be used to group this action together with other similar actions to be used in a menu in the user interface.
- url
-
If the action appears as a menu item, this is the URL that the menu item points to. This may contain PHP expressions inside curly braces.
- onclick
-
A javascript snippet to call when the user clicks on the action. This can be used as an alternative to the
urldirective. See Triggering Javascript Function with Action.Since 2.0
- accessKey
-
The key code to automatically select this action if it is included as a menu item. I.e. ALT+accessKey calls the action.
- materialIcon
-
The name of a material Icon to use for the action menu item. See Using Material Icons
Since 3.0
- mode
-
This indicates which tab of the table tabs (find, details, list, etc…) that this action should appear to be part of when the action is viewed as a web page. If this is left undefined, or it does not match any existing visible action in the table tabs, then no tab will appear to be selected.
- permission
-
The name of a permission required to both see the action as part of a menu and to access the action as a web page.
- visible
-
A boolean value indicating whether the action should be visible as a menu item.
- condition
-
A boolean value or a PHP expression evaluating to a boolean value to indicate whether the action should be visible as a menu item.
- url_condition
-
A PHP expression evaluating to a boolean value to indicate whether the URL directive should be evaluated. This basically checks to make sure that its OK to evaluate the "url" expression, just in case the current state of affairs would cause it to throw a fatal error.
- order
-
A numeric value indicating the order in which the action should be displayed as part of a menu. Low numbers result in higher placement in the menu.
- icon
-
The path to an icon that should be used when the action appears as a menu item. If possible, prefer the
materialIcondirective to this one as they are far mor flexible with respect to styling. - scaler.depends
-
Used by Scaler Module, this is a comma-separate list of table names that are used by the action. This will override the
-tableGET parameter in so far as it is used to invalidate the cache for the request. This is often used in conjunction with the scaler.trackUsedTables directive. - scaler.trackUsedTables
-
Overrides the trackUsedTables setting of the Scaler Module for this action.
- template
-
The path to the template that should be used when the action is displayed as a web page.
- description
-
Mouseover text for the action (when displayed as a menu item).
PHP Expression Context
Notice that the url, condition, and url_condition directives allow you to use a PHP expression for their values. In order for this to be helpful, you should know a little bit about the context and environment in which these expressions will be executed. All expressions are evaluated immediately prior to being rendered, so the same action can be displayed multiple times in the same page, but have very different resulting values for their urls and conditions.
These expressions are all executed within the context of the Dataface_Application::parseString() method, with the following variables loaded in the local symbol table (i.e. you can use the following variables in your expressions).
- $site_url
-
The URL to the current application’s directory (not including "index.php")
- $site_href
-
The URL to the current application including "index.php"
- $dataface_url
-
The URL to the xataface installation directory.
- $table
-
The name of the current table (i.e. the value of the "-table" request parameter"
- $tableObj
-
The
Dataface_Tableobject for the current table. - $query
-
An associative array of the current query variables.
- $app
-
A reference to the current
Dataface_Applicationobject. Alias of$this - $authTool
-
A reference to the
Dataface_AuthenticationToolinstance. - $relationship
-
If the action is being rendered in the context of a related record or a relationship request, this will be the corresponding
Dataface_Relationshipobject. - $resultSet
-
A reference to the
Dataface_QueryToolobject for the current query. - $record
-
A reference to the current
Dataface_Recordobject. - $context
-
An associative array of context variables that are passed to the action from the context in which the action is called.
|
Tip
|
If your action expression contains any fatal errors, you may find yourself in a position where your app won’t load at all (e.g. the white screen of death). The error log may provide no clues because Xataface suppresses warnings and errors when evaluating the PHP expressions. You can debug these issues by adding the |
Action Categories
The category directive of the actions.ini file is used to specify where an action should be displayed in the UI. Xataface includes a number of built-in categories that you can leverage to inject menu items and buttons into various parts of the UI. Some of these are:
Global Menus
- find_actions
-
Actions that are rendered as a drop-down selector in the search field, and allow you to create custom "find" actions.
- personal_tools
-
Actions that are rendered in the personal tools menu. E.g. Login, Logout, Change Password, etc…
- status_bar_right
-
Actions rendered on the right side of the top status bar. Currently this includes only the "Login" action and the "Personal Tools" menu, which loads items from the
personal_toolscategory. - table_tabs
-
Actions added as the root level tabs within a table. E.g.
list,view,find.
Record Details View Menus
- record_actions
-
Actions that can be performed on the current record. This category is used for the overflow menu of the
record_actions_menucategory, which is the Page actions category for theviewaction, so it is rendered as an overflow menu in the upper right in the desktop theme, and in the FAB (floating action button menu) on mobile in the record`details views.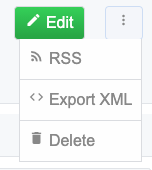 Figure 58. Items in the overflow menu come from
record_actionscategory. - record_actions_menu
-
Actions that can be performed on the current record. This category is the Page actions category for the
viewaction, so it is rendered as an overflow menu in the upper right in the desktop theme, and in the FAB (floating action button menu) on mobile in thedetailsview.See also The
record_actionscategory, which is used for the menu items of the overflow menu. - record_nav_actions
-
Menu in the record view that is displayed just below the record title and description. Useful for providing quick navigation links to related records.
Example: Adding link to parent record
actions.ini file[up_to_podcast] ;Link to the parent "Podcast" record from a podcast episode category=record_nav_actions condition="$record and $record->_table->tablename == 'publisher_podcast_episodes'" url="?-table=publisher_podcasts&publisher_podcast_id={$record->val('publisher_podcast_id')}&-action=view" url_condition="$record and $record->_table->tablename == 'publisher_podcast_episodes'" label="{$record->val('podcast_title')}" label_condition="$record and $record->_table->tablename == 'publisher_podcast_episodes'" materialIcon=arrow_upward [up_to_podcast_episodes] category=record_nav_actions condition="$record and $record->_table->tablename == 'publisher_podcast_episodes'" url="?-table=publisher_podcasts&publisher_podcast_id={$record->val('publisher_podcast_id')}&-action=related_records_list&-relationship=episodes" url_condition="$record and $record->_table->tablename == 'publisher_podcast_episodes'" label="Other Episodes" label_condition="$record and $record->_table->tablename == 'publisher_podcast_episodes'" materialIcon=list order=2Result:
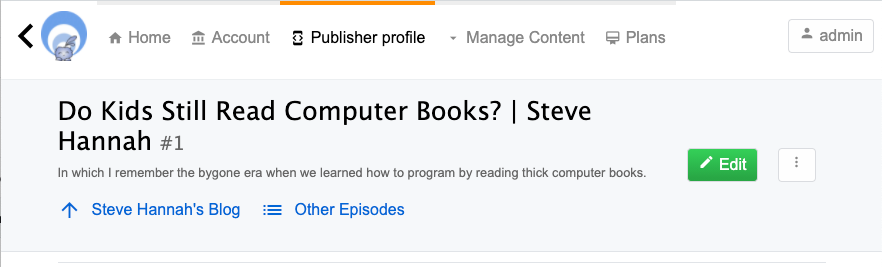 Figure 59. "Steve Hannah’s Blog" and "Other Episodes" links inserted into the record header using the
record_nav_actionscategory.Since 3.0
- record_tabs
-
Tabs in the detail record view. This is where the view tab is rendered, as well as related lists.
List View Menus
- list_settings
-
Actions for managing list settings. E.g. "Sort" and "Filter" options.
- result_list_actions
-
The actions related to a result list.
- selected_result_actions
-
Actions that operate on the currently selected rows in list view.
- summary_actions
-
Actions that operate on a row in the summary list view.
- table_actions
-
Actions that can be performed on the current table. This category is used for the overflow menu of the
table_actions_menucategory, which is the default Page actions category, so it is rendered as an overflow menu in the upper right in the desktop theme, and in the FAB (floating action button menu) on mobile, throughout most of the app - specifically in thelistview.Actions in this category include
rss,export_xml,export_csv,delete_set,copy_set, andupdate_set. These actions are displayed only when in list view. Therecord_actions,edit_record_actions,new_record_actions, andnew_related_record_actionscategoriesTipActions in this category may use the class=featured-actionto take on a "Featured" look. In the default theme featured actions are rendered green with an inner shadow, in contrast to regular action buttons that are rendered white with a gray border.Example: Default Actions in table_actions category
The core Xataface actions.ini file defines several actions in the
table_actionscategory. These actions are shown in the screenshot below: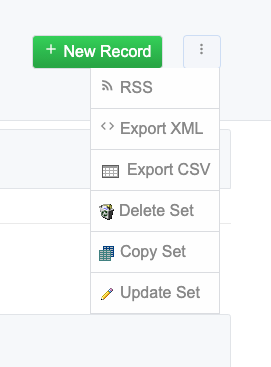 Figure 60. table_actions overflow menu on desktop. Note that the "New Record" button uses the
table_actions_menucategory. The menu items in the overflow menu use thetable_actionscategory.The above screenshot is from a stock install. Notice that the New Record button makes use of the
class=featured-actiondirective to appear as a featured button.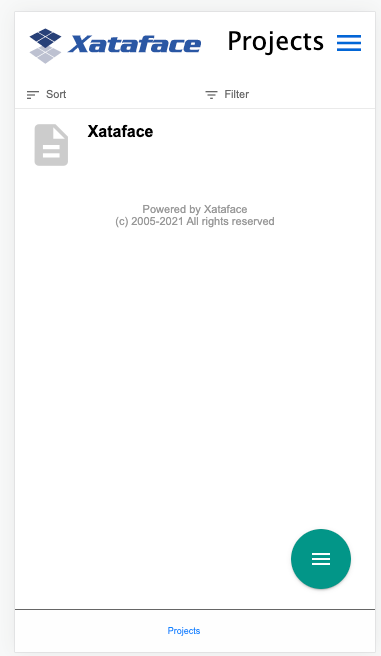 Figure 61. On Mobile, the table actions are included in the FAB (floating action button) in the lower right.
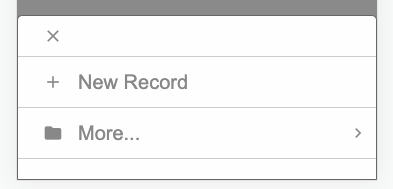 Figure 62. Expanding the FAB reveals the actions in the table_actions category.
 - table_actions_menu
-
Used for the default page actions category. Used in most actions, notably "list". Includes an overflow menu whose menu items come from the
table_actionscategory. Rendered in top right on desktop, and in the FAB (floating action button) on mobile.
Related List Menus
- related_export_actions
-
Actions available on the export related records form.
- related_list_actions
-
Actions that operate on a related list.
- related_list_settings
-
Actions for managing related list settings. E.g. "Sort" and "Filter" options.
- relationship_actions
-
Actions which operate on a particular related list. E.g.
new_related_record. - selected_related_result_actions
-
Actions that operate on the currently selected rows in a related list.
Edit Form Menus
- edit_record_actions_menu
-
The default Page Actions Category for the
editaction. - new_related_record_actions_menu
-
The default Page Actions Category for the
new_related_recordaction.
New Form Menus
- new_record_actions_menu
-
The default Page Actions Category for the
newaction.
View Related record Menus
- view_related_record_actions
-
Default Page Actions Category for the view_related_record action.
Edit Related Record Menus
- existing_related_record_actions_menu
-
The default Page Actions Category for the
add_existing_related_recordaction. Overflow menu items from theedit_related_record_actionscategory. - edit_related_record_actions
-
Actions appearing in the
edit_related_recordaction. By default there is only a "Cancel" action.
Login Menus
- login_actions
-
Actions rendered on the login page. E.g.
forgot_password.
Management Menus
- management_actions
-
Actions that are available in the "Manage" section.
Other Menus
- ajax_actions
-
Actions for saving and loading records over AJAX. These don’t appear in any menu.
- event_actions
-
Actions that operate on an event. These are used in the calendar view.
- history_record_actions
-
Actions related to a history record.
- password_changed_actions
-
Actions that appear after the user has changed their password.
Page Actions Category
Xataface 3.0’s default theme has attempted to consolidate actions into fewer menus that are shown contextually. Typically on any given "page", there are a set of actions that the user can perform on the subject of that page. On desktop these actions are rendered in the upper right in a "more" menu, and on mobile, they are rendered in a FAB menu (floating action button menu).
When in list view, these "page actions" come from the table_actions category. When in the details view for a record, they come from the record_actions category. Some special actions, such as edit and new define their own categories for the actions that should be displayed in this spot: edit_record_actions and new_record_actions respectively.
If you create a custom action, you can specify the category that should be used for the "page menu" via the page_menu_category directive of the actions.ini file.
Example: View Action
The view action uses the record_actions category for its page actions. Its action definition is as follows:
view action definition from the xataface actions.ini file. It uses the page_menu_category directive to specify that the "page actions" should be populated from actions in the record_actions_menu category.[view]
label = View
url = "{$this->url('-action=view&-relationship=')}"
template = Dataface_View_Record.html
permission = view
mode = browse
category = record_tabs
selected_condition = "$query['-action'] == 'view'"
order=-2
page_menu_category=record_actions_menu
rel=siblingAbove is the full action definition, but our interest in this example is the page_menu_category directive, which says that the "page menu" should be populated using actions in the record_actions_menu category.
Creating an Overflow Menu
Generally the "page actions" will display one or two buttons directly, and additional actions will be placed in an overflow menu. If you are creating your own "page actions category", and you want to achieve this kind of grouping, you can achieve it by creating two categories:
-
A category for the top-level items.
-
A category for the overflow menu.
Then create an action in the top level category with subcategory set to the category of the overflow menu.
Example: The View Action
The view action uses the record_actions_menu category for its page actions, and the record_actions category for its overflow menu.
So the view action is defined as follows:
[view]
page_menu_category=record_actions_menuIt then defines the record_actions action in the record_actions_menu category, which will be manifested as the overflow menu button. Defined as follows:
record_actions action creates an overflow button.[record_actions]
label=""
materialIcon="more_vert"
subcategory=record_actions
category="record_actions_menu"The secret sauce of this action is the category directive, which adds this action to the record_actions_menu category, combined with the subcategory directive, which specifies the category that is used for its menu items. It is the subcategory directive that turns this button into a menu.
Finally, there are a few actions that are registered to the overflow menu, by assigning them to the record_actions category. E.g.
E.g. The view_xml action.
[view_xml]
label = Export XML
description = "Export an XML representation of this record"
url = "{$record->getURL('-action=export_xml')}&--single-record-only=1"
url_condition="$record"
permission=view xml
mode=browse
category=record_actions
materialIcon=code
condition="$record"
record_actions_menu menu.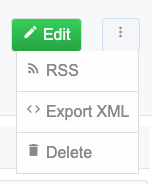
record_actions_menu menu with the overflow menu showing. The actions in the overflow menu come from the record_actions category.On mobile the page actions are shown in the FAB (floating action button) in the lower right.
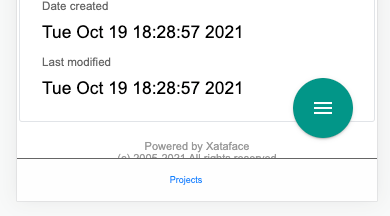
record_actions_menu FAB in the mobile theme.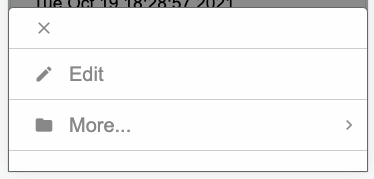
record_actions_menu FAB expanded. The "More…" menu item is where the overflow menu items from the record_actions category are located.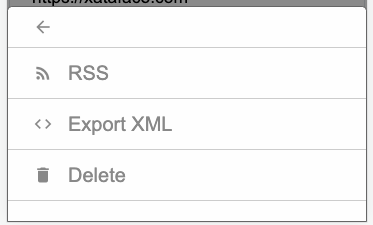
record_actions category (the overflow menu).Preferences Directives
How to Set Preferences
Xataface preferences can be defined in 4 ways:
-
In the
[_prefs]section of the conf.ini file for global static preferences. -
Implementing the
getPreferences()method in the Application Delegate Class -
In the
prefssection of the fields.ini file for a table for static preferences on that table. (Limited to only certain preferences). -
Using the
prefs.keyfields.ini directive on fields of the users table to specify that the value of that field should be used as a preference for the currently logged in user.
[_prefs]
hide_updated=1
hide_posted_by=1function getPreferences(){
return array('hide_update'=>1, 'hide_posted_by'=>1);
}Available Preferences
| Preference | Description | Default | Version |
|---|---|---|---|
show_result_stats |
Show the result statistics (e.g. found x of y records in table z) |
1 |
0.6 |
show_jump_menu |
Show he drop-down menu that allows you to "jump" to any record in the found set. |
1 |
0.6 |
show_result_controller |
Show Next, previous, page number .. links… |
1 |
0.6 |
show_table_tabs |
Show Details, List, Find, etc… tabs. |
1 |
0.6 |
show_actions_menu |
Show New record, Show all, delete, etc.. |
1 |
0.6 |
show_logo |
Show logo at top of app |
1 |
0.6 |
show_tables_menu |
Show the tabs to select a table. |
1 |
0.6 |
show_search |
Show search field in upper right. |
1 |
0.6 |
show_record_actions |
Show actions related to particular record |
1 |
0.6 |
show_bread_crumbs |
Show bread crumbs at top of page to show where you are. |
1 |
0.6 |
show_record_tabs |
View, Edit, Translate, History, etc… |
1 |
0.6 |
show_record_tree |
Show tree to navigate the relationships of this record. |
1 |
0.6 |
list_view_scroll_horizontal |
Whether to scroll list horizontal if it exceeds page width |
1 |
0.6 |
list_view_scroll_vertical |
Whether to scroll list vertical if it exceeds page height. |
1 |
0.6 |
hide_posted_by |
Whether to hide the posted by text in glance lists (e.g. in the view tab, the related records are shown in the left column. This hides the posted by text next to each related record. |
0 |
1.0b4 |
hide_updated |
Whether to hide the updated text in the glance lists (e.g. in the view tab, the related records are shown in the left column. This hides the updated text next to each related record. |
0 |
1.0b4 |
SummaryList_logo_width |
The width of the logo to be used as the preview image in summary lists. |
null |
0.7 |
SummaryList_hideSort |
Hides the sort control for a summary list (the box that allows users to sort by column). |
0 |
0.7 |
hide_user_status |
Hides the user’s status (e.g. "You are logged in as …" |
0 |
0.7 |
hide_personal_tools |
Hides the personal tool links in upper right. This includes likes such as "Control Panel" and "My Profile" |
0 |
0.7 |
hide_resultlist_controller |
Hides the controller for a result list (E.g. next/back/results per page etc…). |
0 |
0.7 |
hide_related_sections |
Hides the sections of the view tab that show the related records. These are the sortable section boxes. Not the related tabs. |
0 |
1.3 |
hide_record_search |
Hides the record search form that appears in the view tab. Not to be confused with the find tab. |
0 |
1.3 |
show_resultlist_controller_only_when_needed |
Sets the resultlist controller (e.g. back/next/results per page/etc…) to only show up if paging is required (i.e. if there are more records than can be shown on one page (according to the '-limit' parameter). |
0 |
1.0 |
hide_record_view_logo |
Hides the logo for a record that appears in the upper left of the view tab for each record. |
0 |
0.7 |
horizontal_tables_menu |
Whether to force the tables menu to appear as tabs along the top of the page (alternative is as a menu on the left). If there are 10 or fewer allowed tables, then the default is 1, otherwise the default is set to 0. |
1 |
0.6 |
hide_result_filters |
In list view, setting this value to 1 will cause the column filters to be hidden (the select lists to filter the results). |
0 |
0.7 |
show_filter_counts |
A value of 0 will hide the result filter counts. |
1 |
3.0 |
disable_select_rows |
A value of 1 causes the checkboxes in each row of the list view to be hidden. |
0 |
0.7 |
result_list_use_geturl |
Use the getURL() method to link to records in the list view rather than the default (which uses the -cursor parameter). |
0 |
0.7 |
disable_ajax_record_details |
Whether to disable the ajax record details (the '+' sign beside each record in list view that expands to show the record details. |
1 |
0.7 |
use_old_resultlist_controller |
As of Xataface 1.1, a new style result list controller is used that resembles facebook. It is more slimmed down and is easier to manage. If you prefer the old controller, set this preference to 1. |
0 |
1.1 |
user_stylesheet |
The name of a CSS file that should be used to define custom styles for the current user request. Xataface will look for a stylesheet by this name inside the app’s |
None |
3.0 |
mobile_app_menu_position |
Specifies the position of the "app menu" in the mobile theme. Supported values are "ne" (for northeast) and "se" for south east. |
"ne" |
3.0 |
mobile_app_menu_sheet_position |
For the mobile theme, this specifies the value that is supplied to the "sheet" in which the app menu opens. If the "mobile_app_menu_position" is "ne", then this will default to "right". Otherwise it defaults to "fill" |
Depends |
3.0 |
Inverse Preferences
The following preferences perform the inverse of some of the options above. When these options are set to 1, their respective option is set to 0.
| Name | Inverse |
|---|---|
hide_nav_menu |
show_tables_menu |
hide_view_tabs |
show_table_tabs |
hide_result_controller |
show_result_controller |
hide_table_result_stats |
show_result_stats |
hide_search |
show_search |
Permissions.ini Directives
The permissions.ini file stores custom permissions and roles that can be used by an application. It is an optional file that should be placed in the application root directory (i.e. the same directory where your conf.ini, and index.php files are located).
The permissions.ini file allows you to define two things:
-
Permissions
-
Roles (i.e. sets of permissions).
Permissions and roles are used throughout Xataface to limit access to actions, records, fields, and relationships. For example, each action in your application can specify a permission that is necessary to perform the action. Your delegate classes may include getPermissions() methods to define what permissions a user gets when interacting with different records. This file (permissions.ini) simply defines the permissions that can be used by your application. It doesn’t actually assign those permissions. Assigning permissions is the job of the getPermissions() (or getRoles()) method.
Defining Permissions
Permissions are defined by standalone properties in the beginning of the permissions.ini file. For example, if you were desiging a proof-reading application, you might need permissions for "submit_for_proof", or "approve_text" to correspond with the submitting a document to be proof-read, and approving a document’s proof. In this case we would have the following at the beginning of our permissions.ini file:
submit_for_proof = Submit a document to be proofread approve_text = "Approve this document's proof"
The left side of the equals sign is the name of the permission. The right side contains a human readable description of the permission and what it is for.
Limiting Access to Actions based on Permissions
At this point these permissions don’t do anything. In order to be useful we need reference these permissions from an action or a section. For example, let’s create an action called "submit_for_proof" which displays a form for a user to submit a document record to be proofread.
Our actions.ini file entry might look something like:
[submit_for_proof]
url="{$this->url('-action=submit_for_proof')}"
label="Submit document for proof"
category=record_actions
permission=submit_for_proof
template=submit_for_proof.html
And for completeness, since this make-believe action specifies th "submit_for_proof.html" template, we’ll create the "submit_for_proof.html" template in the templates directory:
<html><body>You have permission to perform this action.</body></html>Defining Who Get’s Which Permissions
Finally, in order to benefit from permissions, your application has to decide that it is going to use permissions (unless you define a getPermissions() method, users are granted ALL permissions by default. Hence if you try to access our submit_for_proof action, we’ll see it without any problem. Regardless of who we are. So let’s create a simple, but restrictive getPermissions() method in our application delegate class:
<?php
class conf_ApplicationDelegate {
function getPermissions(&$record){
return Dataface_PermissionsTool::READ_ONLY();
}
}Now if we try to access our submit_for_proof action it will give us a "Permission Denied" message, because we are only granted READ ONLY permissions (which is a role that includes the view permission and some others - but not our custom "submit_for_proof" permission.
Now we’ll make a small modification to our getPermissions() method to provide us with our submit_for_proof permission:
<?php
class conf_ApplicationDelegate {
function getPermissions(&$record){
$perms = Dataface_PermissionsTool::READ_ONLY();
$perms['submit_for_proof'] = 1;
return $perms;
}
}Now if we try to access our submit_for_proof action, it will show us our template with no error messages (hopefully).
Roles
Roles are sets of permissions. They are defined in the permissions.ini file as sections with lists of included permissions. It might be handy to create roles such as EDITOR or MANAGER which contain sets of permissions that are meant to be assigned to users of those types. For example an EDITOR may have the view and edit permissions, but not the delete permission. A MANAGER might have the view, edit, and delete permissions. You can define these two roles in the permissions.ini file as follows:
[EDITOR] view=1 edit=1 [MANAGER] view=1 edit=1 delete=1
Then we could assign these roles to users using the Dataface_PermissionsTool::getRolePermissions() method:
function getPermissions(&$record){
$user =& Dataface_AuthenticationTool::getInstance()->getLoggedInUser();
if ( $user and $user->val('role') == 'EDITOR' ){
return Dataface_PermissionsTool::getRolePermissions('EDITOR');
} else if ( $user and $user->val('role') == 'MANAGER' ){
return Dataface_PermissionsTool::getRolePermissions('MANAGER');
}
return Dataface_PermissionsTool::READ_ONLY();
}Or equivalently we could use the getRoles() method of our delegate class instead of getPermissions():
function getRoles(&$record){
$user =& Dataface_AuthenticationTool::getInstance()->getLoggedInUser();
if ( $user and $user->val('role') == 'EDITOR' ){
return 'EDITOR';
} else if ( $user and $user->val('role') == 'MANAGER' ){
return 'MANAGER'
}
return 'READ ONLY';
}Xataface Core Permissions & Roles
Xataface is distributed with its own permissions.ini file that defines some core permissions and roles. You can look at this permissions.ini file (located in the xataface directory) to see what the format should look like. Any settings you place in your application’s permissions.ini file will augment or override settings in Xataface’s file.
Core Permissions
- view
-
Permission to view a record or field. This permission is required to access the view tab, and several other details tabs.
Since 0.6
- list
-
Permission to access the list tab.
Since 0.6
- calendar
-
Permission to access the calendar tab.
Since 0.6
- edit
-
Permission to edit a record or field. This also gives access to the edit tab.
Since 0.6
- new
-
Permission to edit a record or field for the purpose of creating a new record. This permission is required to access the new record form.
Since 0.6
select_rows Permission to select rows in list view to perform actions on them.
+ Since 0.6
- post
-
Permission to post a record using HTTP POST
Since 0.6
- copy
-
Permission to copy a record.
Since 0.6
- update_set
-
Permission to perform an update on a result set (i.e. access the update set action).
Since 0.8
- add new related record
-
Permission to add a new record to a relationship. See Relationship Permissions
Since 0.6
- add existing related record
-
Permission to add an existing record to a relationship. See Relationship Permissions
Since 0.6
- view related records
-
Permission to view the records in a relationship. See Relationship Permissions
Since 1.0
- delete
-
Permission to delete a record.
Since 0.6
- delete found
-
Permission to access the delete found set action (to delete multiple records at a time). Since 0.6
- show all
-
Permission to access show all records action.
Since 0.6
- remove related record
-
Permission to remove a record from a relationship. See Relationship Permissions
Since 0.6
- delete related record
-
Permission to delete a record in a relationship. This is stronger than the remove related record permission in that it allows the user to delete the record from the database.
See Also Relationship permissions
Since 0.6
- find
-
Permission to perform the find action.
Since 0.6
- import
-
Permission to perform the import action (to import records into the database).
Since 0.6
- export_csv
-
Permission to perform the Export CSV action (to export the result set in comma-separated-value format).
Since 0.6
- export_xml
-
Permission to perform the Export XML action (to export the result set as XML).
Since 0.8
- translate
-
Permission to translate a record into another language. This permission provides access to the "translate" tab.
Since 0.8
- history
-
Permission to view history information for a record (e.g. the history tab). This requires that history be enabled.
Since 0.8
- edit_history
-
Permission to edit history information such as undo/redo support for a record.
Since 0.8
- navigate
-
Permission to navigate through records of a table.
Since 0.6
- reorder_related_records
-
Permission to reorder the records of a relationship (this is different than just sorting). It sets a default order for the records. Requires the metafields:order directive to be set for the relationship.
Since 0.6
- ajax_save
-
Permission to save a record through AJAX.
Since 0.8
- ajax_load
-
Permission to load a record through AJAX.
Since 0.8
- ajax_form
-
Permission to access the inline editing ajax form for a record.
Since 0.8
- find_list
-
Permission to search current table.
Since 0.6
- find_multi_table
-
Permission to perform a site-wide search.
Since 0.8
- register
-
Permission to register for an account.
Since 0.8
- xml_view
-
Permission to view a result set as xml.
Since 0.8
- view_xml
-
View the XML for an individual record.
Since 0.8
- manage_output_cache
-
Management permission to clear the output cache.
Since 0.8
- manage_migrate
-
Permission to access the migration tool to migrate between versions.
Since 0.8
- manage
-
Permission to access the management control panel.
Since 0.8
- manage_build_index
-
Permission to rebuild the search index.
Since 0.8
- expandable
-
Whether the record can be expanded in the left nav menu N/A
Core Roles
- READ ONLY
-
Permissions:
view,list,calendar,view xml,show all,find,navigate,ajax_load,find_list,find_multi_table,rss,export_csv,export_xml, andexport_jsonSince 0.6
- EDIT
-
Permissions: All permissions in
READ ONLY, andedit,add new related record,add existing related record,add new record,remove related record,reorder_related_records,import,translate,new,ajax_save,ajax_form,history,edit_history,copy,update_set, andselect_rowsSince 0.6
- DELETE
-
Permissions: All permissions in
EDIT, anddeleteanddelete found.Since 0.6
- OWNER
-
Permissions: All permissions in
DELETEexceptnavigate,new, anddelete found.Since 0.6
- REVIEWER
-
Permissions: All permissions in
READ ONLY, andeditandtranslate.Since 0.6
- USER
-
Permissions: All permissions in
READ ONLY, andadd new related record.Since 0.6
- ADMIN
-
Permissions: All permissions in
DELETEandxml_viewSince 0.6
- MANAGER
-
Permissions: All permissions in
ADMINandmanage,manage_output_cache,manage_migrate,manage_build_index, andinstall.Since 0.6
Extending and Overriding Roles
The cleanest and easiest way to define a new role is to extend an existing role. Xataface allows you to extend roles via the extends keyword. For example, if you wanted to create a role TEST ROLE that contained all of the same permissions as the READ ONLY role, you could define it as follows in your application’s permissions.ini file:
[TEST ROLE extends READ ONLY]
If we wanted it to contain the same permissions as READ ONLY but to also allow the edit permission we would define it as:
[TEST ROLE extends READ ONLY] edit=1
If we wanted to disallow the list permission, we would do something like:
[TEST ROLE extends READ ONLY] edit=1 list=0
Overriding Existing Roles
You can also redefine existing roles:
[READ ONLY extends READ ONLY] my_permission=1
This is handy if you have added your own custom permissions that you feel should be included in a core role.
RSS Configuration Directives
This section describes the configuration directives and delegate methods that can be used to configure RSS feeds. See RSS Feeds for an introduction to Xataface’s RSS feed support.
| Name | Description | Version |
|---|---|---|
For RSS Feeds, overrides the defaults and returns an associative array with feed elements for a particular record |
1.0 |
|
For RSS feeds, overrides the default feed for a query, returning an array of feed items. |
1.0 |
|
|
Overrides the default feed source parameter for an RSS feed. |
1.0 |
|
Overrides the default generated RSS description for a record. |
1.0 |
|
Overrides the default feed for a subsearch within a record. This works identically to the getFeed method except that it takes 2 parameters: one for the current record, and a second parameter for the query. |
1.2.3 |
|
Returns the name of the field that contains an "enclosure" which can be used for podcasting. |
3.0 |
getFeed() Delegate Method
Synopsis
The getFeed() method of a table delegate class or application delegate class returns an associative array of parameters to configure the RSS feed for a particular table . An RSS feed consists of the following components:
-
title- The title of the RSS feed as it should appear in the subscribers' feed list. -
description- Describes the RSS feed. -
link- A link to the RSS feed -
syndicationURL- The URL to this RSS feed’s site.
Parameters
-
array$query- The HTTP query. Contains information like the current table, current action, and search parameters. This allows you to customize your RSS feed depending on the user’s query parameters. -
Return Value
The
getFeed()method returns an associative array with the components of the RSS feed. This array does not need to contain all possible keys, or even any keys. Any keys that are omitted will simply use default values in the RSS feed. The array may contain the following keys:Name Description Version titleThe title for the RSS feed. If this omitted, it will try to use the title directive of the
[_feed]section of the conf.ini file. Failing that, it will try to generate an appropriate title for the feed depending on the current query.1.0
descriptionA Description for this RSS feed. If this is omitted, it will try to use the description directive of the [_feed] section of the conf.ini file.
1.0
linkA link to the source page of the RSS feed. If this is omitted, it will try to use the link directive of the [_feed] section of the conf.ini file.
1.0
syndicationURLA link to the source page of the RSS feed. If this is omitted, it will try to use the syndicationURL directive of the [_feed] section of the conf.ini file.
1.0
Example
function getFeed(&$query){
return array(
'title' => "RSS feed for the ".$query['-table']." table.",
'description' => "News and updates for automobiles",
'link' => df_absolute_url(DATAFACE_SITE_HREF),
'syndicationURL' => df_absolute_url(DATAFACE_SITE_HREF)
);
}|
Note
|
RSS feeds will work perfectly well without defining this method. This just allows you to customize one or more parameters of the RSS feed. |
getFeedItem() Delegate Method
Synopsis
The getFeedItem() method of a table delegate class returns an associative array of parameters for a record as it should appear as part of an RSS feed. An RSS feed item consists of the following components:
-
title- The title of the record as it appears in the RSS feed. -
description- The description of the record for the RSS feed. This is really the body of the RSS feed item. -
link- The linkback URL if users want to know more about the record. -
date- The date that the record was posted/modified. -
author- The name of the person who posted this record. -
source- URL to the site where record originated from.
Parameters
-
Dataface_Record&$record- The record that is being represented in an RSS feed.
Return Value
The getFeedItem() method returns an associative array with the components of the RSS feed. This array does not need to contain all possible keys, or even any keys. Any keys that are omitted will simply use default values in the RSS feed. The array may contain the following keys:
| Name | Description | Version |
|---|---|---|
|
The record title as it appears in RSS feeds. If this is omitted, the RSS feed will simply use the output of Dataface_Record’s getTitle() method. |
1.0 |
|
The record description. This is used in the main body of the RSS feed. If this is omitted, the RSS feed will use an HTML table that shows all of the field data in the record. This value can also be overridden using the getRSSDescription? method of the delegate class. |
1.0 |
|
The URL to this record. If this is omitted it just points to the view tab for this record. However you can direct it anywhere you like. When the user clicks on the "More Info" link in his RSS reader it will direct him to this link. |
1.0 |
|
The date that this record was posted or last modified. This is the date that an RSS reader will use to decide if it has already loaded the record yet. If this is omitted it will try the Dataface_Record’s getLastModified() method to obtain the last modified date of the record. Failing that, it will use Dataface_Record’s getCreated() method to try to obtain the creation date of the record. This date should be a unix timestamp. |
1.0 |
|
The name of the user who posted this record. If this is omitted, then it will try to use |
1.0 |
|
The source URL where the feed is to have originated. If none is specified, then it will use the value of the source parameter in the [_feed] section of the conf.ini file. Failing that, it will simply use the URL to the application. Note that you can alternatively define this value using the |
1.0 |
|
An associative array with keys |
3.0 |
Example
function getFeedItem(&$record){
return array(
'title' => "News Item: ".$record->getTitle(),
'description' => $record->display('News Body'),
'link' => $record->getPublicLink(),
'date' => strtotime($record->val('last_modified')),
'author' => $record->val('posted_by'),
'source' => 'http://www.example.com',
'enclosure' => array(
'url' => 'http://www.example.com/path/to/mypodcast.mp3',
'length' => 123456, // in bytes
'type' => 'audio/mp3'
)
);
}|
Note
|
RSS feeds will work perfectly well without defining this method. This just allows you to customize one or more parameters of the RSS feed. |
Thumbnail Handling
Overview
Xataface 3.0 includes automatic thumbnail generation for Container fields. See the Generating Thumbnails recipe for an example of how to use this feature. You can also refer to the Fields.ini Directives section to see the syntax of the transform and thumbnail.ACTIONAME directives.
This section describes the PHP and HTTP APIs for Xataface’s thumbnail feature.
How it works
If you add the transform directive to your container field, Xataface will automatically generate thumbnails for images that are uploaded to that field, at the time that they are uploaded.
e.g.
transform="itunes300 fill:300x300; itunes1400 fill:1400x1400"The first thumbnail (in this case itunes300) will be displayed by default whenever displaying this field’s image. You can configure a specific thumbnail to be used for a given action using the thumbnail.ACTIONNAME directive. E.g. If you wanted to use the "itunes1400" thumbnail for the "list" action you would add:
thumbnail.list=itunes1400When using Dataface_Record::display($fieldname) and Dataface_Record::htmlValue($fieldname) it will respect these directives. E.g. If you call $record→display('myimage') it will return the URL for the "itunes300" thumbnail when called inside a request for most actions, but it will return the URL for the "itunes1400" thumbnail when called inside a request for the "list" action.
If you look at the resulting URL generated by the display() method, you’ll see something like:
index.php?-action=getBlob&…&-thumb=itunes300
It is the "-thumb" query parameter at the end that specifies the thumbnail. If you remove that parameter, it will just return the full-sized image.
PHP API
The Dataface_Record and Datafae_Table classes include a few methods for dealing with thumbnails. Some of these methods include:
- `Dataface_Record::thumbnail($fieldname, $thumbnailType) : String `
-
Returns the URL for a thumbnail of the given type of thumbnail.
Example:
Getting thumbnail of type itunes1400 for the "logo" field in the record.$imageUrl = $record->thumbnail('logo', 'itunes1400'); echo $imageUrl;Output:
Output shows that the "-thumb" GET parameter is set to "itunes1400", which is caused by the 2nd parameter of the abovethumbnail()call.http://example.com/index.php?-action=getBlob&...&-thumb=itunes1400 Dataface_Record::getThumbnailForAction($fieldname, $actionName) : String-
Returns the URL for the thumbnail that should be used for the specified action name. This is configured via the
thumbnail.$actionNamedirective in the fields.ini file.Example:
fields.ini file definition for the logo field.[logo] Type=container transform="itunes300 fill:300x300; itunes1400 fill:1400x1400" thumbnail.list=itunes1400PHP code getting URL for the "logo" field in three different ways.echo $record->display('logo') ."\n"; echo $record->getThumbnailForAction('logo', 'list')."\n"; echo $record->getThumbnailForAction('logo', 'view');Output when request was for the "list" action.http://example.com/index.php?-action=getBlob&...&-thumb=itunes1400 (1) http://example.com/index.php?-action=getBlob&...&-thumb=itunes1400 (2) http://example.com/index.php?-action=getBlob&...&-thumb=itunes300 (3)-
display()returns URL with-thumb=itunes1400because of the "thumbnail.list=itunes1400" in the fields.ini file, and because the current request is for the "list" action. -
getThumbnailForAction('logo', 'list')returns "itunes1400" because of the "thumbnail.list" directive in the fields.ini file. -
getThumbnailForAction('logo', 'view')returns "itunes300" because there is no explicit "thumbnail.view" directive in the fields.ini file so it defaults to the first thumbnail type defined in the "transform" directive.
Output when request is for the "view" action.http://example.com/index.php?-action=getBlob&...&-thumb=itunes300 (1) http://example.com/index.php?-action=getBlob&...&-thumb=itunes1400 http://example.com/index.php?-action=getBlob&...&-thumb=itunes300-
Notice that the output of
display()is different when it is executed as part of the "view" action. In this case it adds the "-thumb=300" GET parameter because that is the effective thumbnail type for this action - nothumbnail.viewdirective is defined, so it falls back to the first thumbnail type defined in thetransformdirective.
-
Dataface_Record::getThumbnailTypeForAction($fieldname, $actionName) : String-
Returns the thumbnail type for the given action. If there is an explicit directive for
thumbnail.$actionNamein the fields.ini file, then its value will be used. Otherwise it will return the first thumbnail type defined in thetransformdirective.Example:
fields.ini file definition for the logo field.[logo] Type=container transform="itunes300 fill:300x300; itunes1400 fill:1400x1400" thumbnail.list=itunes1400Sample PHP codeecho $record->getThumbnailTypeForAction('logo', 'list')."\n"; echo $record->getThumbnailForTypeAction('logo', 'view');Sample Outputitunes1400 (1) itunes300 (2)-
When
$actionNameis 'list' it outputs "itunes1400" because of thethumbnail.list=itunes1400directive in the fields.ini file. -
When
$actionNameis 'view' it outputs "itunes300" because there is nothumbnail.viewdirective defined in the fields.ini file so it falls back to the first thumbnail type defined in thetransformdirective.
-
Dataface_Record::hasThumbnail($fieldname, $thumbName) : boolean-
Checks if a record has a thumbnail of the given type for the specified field. If the
transformdirective defines a thumbnail of the given$thumbNamebut the current record doesn’t actually have a thumbnail stored of that type, then this will returnfalse. It only returns true if the record actually has a thumbnail of this type that can be displayed. E.g. if the field is empty (has no image), then this also returnsfalse.Example:
if ($record->hasThumbnail('logo', 'itunes1400')) { // The record has a thumbnail of itunes1400 type. $thumbUrl = $record->thumbnail('logo', 'itunes1400'); // .. } Dataface_Record::getThumbnailTypes($fieldname) : string[]-
Returns a list of the thumbnails that are currently available for this record. This only includes thumbnail types that actually exist. It isn’t sufficient for them to be listed in the
transformdirective.Example:
PHP Source$types = $record->getThumbnailTypes('logo'); print_r($types);Outputarray( 0 => itunes300, 1 => itunes1400 )
Appendix 2: Delegate Class Methods
Table Delegate Class
Relationships Methods
getChildren()
The getChildren() method can be implemented in a table’s delegate class to specify the logical "child" records of a given record which can be used when creating hierarchical applications. This method will effectively override the output of the Dataface_Record::getChildren() method for records of this table.
- Signature
-
function getChildren( Dataface_Record $record) : Dataface_Record[] - Parameters
-
-
$record- TheDataface_Recordthat is the subject of the query
-
- Returns
-
This method should return an array of
Dataface_Recordobjects that are considered to be children of the subject record.
Examples
function getChildren($record){
return df_get_records('webpages', [
'parent_id'=>'='.$record->val('webpage_id')
]);
}See Also getParent()
getParent()
A Delegate class method to return the logical parent of a given record.
relationshipname__getAddableValues()
Returns array of addable values when adding existing records to relationships.
Appendix 3: Javascript Environment
Xataface defines a small set of Javascript events to notify subscribers of lifecycle events.
Javascript Components
Xataface includes a set of Javascript components that can be reused in many different contexts. This section lists some of theme.
TODO: Add documentation on javascript components
window.xataface
The window.xataface object includes a number of utility classes and functions. Some functions are always available. Others require you to explicitly to load a script in order for them to be available.
Properties
- viewport
-
The current display viewport dimensions. If the mobile footer and header are visible, then this viewport will be the bounds not covered by the header or footer. Properties include
top,left,right,bottom,width, andheight.Example Using viewport to position an elementvar viewport = xataface.viewport; if (viewport) { // Position the settings wrapper 10 pixels above the footer settingsWrapper.style.bottom = (viewport.bottom + 10) + 'px'; }
xataface.ActionSheet

A component for displaying menu in a Sheet. ActionSheets can be displayed from the bottom, left, top, or right positions, and they transition in over top of the existing page content.
Since 3.0
Bootstrapping
xf_script('xataface/components/ActionSheet.js');require//require <xataface/components/ActionSheet.js>Initialization Options
Use new ActionSheet(options) to create a new sheet. The following options are allowed:
- modelEl
-
HTMLElementof a<ul>tag that defines the menu options to appear in this sheet. See Structure of themodelEl<ul>tag.. - position
-
The position where the sheet should be displayed.
top,left,right,bottom. - parent
-
Optional
ActionSheetthat is the parent of thisActionSheet. If this property is provided then the sheet will have a "back" button to navigate back to the parent instead of a "close" button.
Alternative Intialization Options
The ActionSheet constructor can also be called simply with single String or HTMLElement argument. In the String case, the string will be interpreted as the query selector to the <ul> tag to use for the modelEl property. In the HTMLElement case, it will be used as the modelEl property itself.
Properties
- parent
-
Reference to the parent
ActionSheetinstance, if one was provided in the constructor.
Methods
- show(initialHeight)
-
Show the sheet. Takes optional
intparameter initialHeight specifying the starting height of the ActionSheet. This is used internally when showing a submenu so that the transition to and from the child menu is smooth. - close(all)
-
Close the sheeet. Takes optional
booleanargument all which, if true, will close all parent sheets as well. Default behaviour is to navigate back to the parent if the sheet has a parent.
Usage Example
//require <xataface/components/ActionSheet.js>
(function() {
var ActionSheet = window.xataface.ActionSheet;
/**
* Function to install the FAB button.
* This will be called after the page is finished loading.
* See DOMContentLoaded event listener registration below.
*/
function installFab() {
// Convenience reference to jQuery
var $ = jQuery;
// Add a click handler to the zoom button.
$('#zoomBtn').click(function() {
// Get the page actions <ul> tag that
// was rendered elsewhere on the page. This is a standard
// menu that is used in the Desktop theme that includes
// all of the actions that are relevant to the current page.
// The menu is hidden in the mobile theme, but we'll use
// it as the model for the FAB button here so that its
// actions can still be used in mobile.
var pageActionsUl = $('div.page-actions > nav > ul').first();
if (pageActionsUl.length > 0) {
var menu = new ActionSheet(pageActionsUl.get(0));
menu.show();
}
});
// The "zoom" section has a `display:none` style directive
// in the HTML template so that it isn't displayed before
// we've had a chance to set it up.
// Remove that style directive now that it should be all set up.
$('.zoom').css('display', '');
}
// Some code omitted here for clarity
window.addEventListener('DOMContentLoaded', installFab);
})();That example references some HTML tags that are defined in the Dataface_Main_Template.html template. Let’s look at those here.
div.page-actions > nav > ul-
This is a reference to the page actions. They are rendered in the HTML template as follows:
<div class='page-actions'> {block name="before_menus"} {define_slot name="menus"} {include file="Dataface_TableView_menus.html"} {/define_slot} {block name="after_menus"} </div>And the
Dataface_TableView_menus.htmlrenders a<ul>tag with the menus. #zoomBtnand.zoom-
These are references to the zoom section and button defined in the template as follows:
{define_slot name="fab"} {* The FAB (floating action button), which uses the table_actions_menu category. Exclude actions from the FAB using the #large# tag in the action. Include actions in the FAB by adding materialIcon. If action doesn't have materialIcon, it won't be included in the FAB. *} {script src="xataface/fab.js"} <div class="zoom mobile" style="display:none"> <a class="zoom-fab zoom-btn-large" id="zoomBtn"> <i class="material-icons">menu</i> </a> </div> {/define_slot}
xataface.showInfiniteProgress()
Shows an infinite progress indicator. This is helpful if you are performing an action that takes a few seconds and you want to convey to the user that the app is doing something.
Use xataface.hideInfiniteProgress() to hide the progress indicator when you are done with it.
Example
xataface.showInfiniteProgress();
var onTaskComplete = function() {
xataface.hideInfiniteProgress();
}
// Call a long-running task which takes a callback function which
// will be called when it completes
doSomeLongRunningTask(onComplete);Parameters
Both showInfiniteProgress and xataface.hideInfiniteProgress() take an optional argument that is a DOM element inside which the progress indicator should be placed. If this is omitted, the progress indicator is added to the document body and is displayed in the center of the screen.
Returns
The progress indicator’s DOM element.
Since 3.0
xataface.hideInfiniteProgress()
Hides an infinite progress indicator that has been previously shown using xataface.showInfiniteProgress().
Since 3.0
xataface.InfiniteScroll
A component that supports infinite scrolling. This is used by default in the mobile theme’s list view.
Since 3.0
Bootstrapping
xf_script('xataface/components/InfiniteScroll.js');require//require <xataface/components/InfiniteScroll.js>Properties
- scrollEl
-
HTMLElement to which the scroll listener should be added. Defaults to
<body> - parentEl
-
HTMLElement that should have elements added to it. Defaults to the
.mobile-listingdiv, which is the result list in mobile view. - action
-
The Xataface action to use for fetching new rows.
- pageSize
-
The number of records to load each time. Default is 30.
Methods
- loadMore()
-
Loads the next page of results. If either no rows are loaded, or there is a problem loading rows (due to a network error), the InfiniteScroll’s
reachedEndflag is set, which will prevent it from attempting to load any more records.
Usage Example
new xataface.InfiniteScroll({
scrollEl : $('body').get(0),
parentEl : $('.mobile-listing').get(0)
});xataface.RecordBrowser
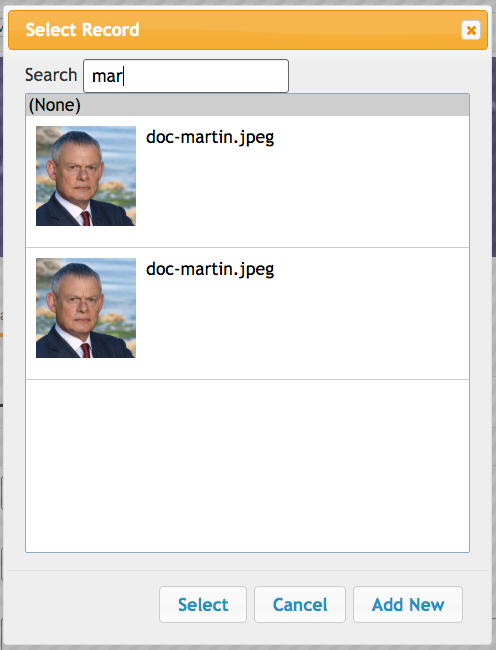
A component for selecting a record from the database. This is used by the lookup widget for selecting records, but can be used directly via its Javascript API.
Since 1.0
Bootstrapping
xf_script('RecordBrowser/RecordBrowser.js)');require//require <RecordBrowser/RecordBrowser.js>Initialization Options
Use new RecordBrowser(options) to create a new dialog, and display it with the display() method. The options are:
- table
-
The name of the table from which to select records.
- value
-
The name of the column to use for the value in the select list. Set this value to
__id__to use the record ID. Default, if left blank: If primary key of table is a single column then it will use the primary key column. If the table has a compound primary key, then it uses__id__as the default.You can use the optional
display:prefix for the value to use the result ofDataface_Record::display()for the field rather than simplyDataface_Record::val(). E.g.new xataface.RecordBrowser({ value : 'display:file' //... }); - text
-
The name of the column to use for the text/label in the select list. Set this value to
__title__to use the record title. This is the default, if left blank. - image
-
Optional column containing an image. If you set this value, then each row in the select list will also display an image.
- imageWidth
-
Optional image width in pixels.
- imageHeight
-
Optional image height in pixels.
- filters
-
Dictionary if filters to add to the AJAX requests. You can use Xataface’s URL conventions here.
- callback
-
Callback function that is called when the user selects a record from the record browser. It will receive an Object with key/value pairs of the selected records, where the "keys" are the values and the values are the text.
- editParams
-
Dictionary of GET parameters to pass to the edit form for editing records in the record browser.
- newParams
-
Dictionary of GET parameters to pass to the new record form for adding new records.
- allowAddNew
-
boolean value indicating whether the record browser supports adding new records. Default is
true. If true, then an "Add New" button is included in the dialog. When the user clicks on it, it will open a New Record Form inside aRecordDialogcomponent.
Methods
- display()
-
Displays the dialog.
Usage Example
uploadCoverArt() which can be triggered to allow the user to select records from the nn_media table.//require <jquery.packed.js>
//require <RecordBrowser/RecordBrowser.js>
(function() {
var $ = jQuery;
window.uploadCoverArt = function(button) {
// Callback function that will be called with the user
// selects a record.
function callback(data) {
// the data will contain something like:
// {'admin.php?-action=getBlob&...&-thumb=itunes300' : 'doc-martin.jpeg'}
// Find the parent div with the "field" class.
var fieldDiv = $(button).parents('.field');
// Find the text input in this field.
var textInput = fieldDiv.find('input[type=text]');
for (var url in data) {
// We put this in a for loop, but really
// data should only contain one value.
textInput.val(url);
}
}
// Create a new record browser.
new xataface.RecordBrowser({
// Browse only records in the nn_media table
table : 'nn_media',
// The "file" column contains an image for the record.
// use that in the browser.
image : 'file',
// The value column (which we are interested in) is the
// file column. We use the `display` operation to get the result of
// $record->display('file') instead of just $record->val('file')
value : 'display:file',
// The callback to call when the user selects a record.
callback : callback
}).display();
}
})();|
Note
|
In the above example, we called this uploadCoverArt() by adding onclick=window.uploadCoverArt(this) to an action. See Adding Actions to Fields for more details on this specific example.
|
xataface.Sheet
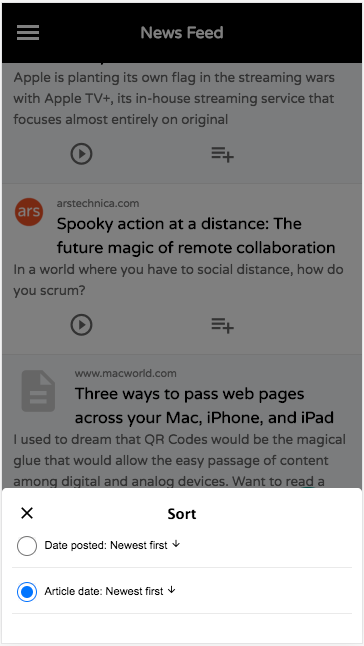
A component for displaying content in a Sheet. Sheets can be displayed from the bottom, left, top, or right positions, and they transition in over top of the existing page content.
Since 3.0
Bootstrapping
xf_script('xataface/components/Sheet.js');require//require <xataface/components/Sheet.js>Initialization Options
Use new Sheet(options) to create a new sheet. The following options are allowed:
- position
-
The position where the sheet should be displayed.
top,left,right,bottom. - url
-
The URL to load in the sheet. String
Properties
- installed
-
A read-only property indicating whether the sheet is currently installed in the document.
- position
-
The position where the sheet should be displayed in the window. One of 'top', 'bottom', 'left', 'right', or 'fill'.
Methods
- load(url:string)
-
Load the given URL inside the Sheet. This will be loaded inside an iframe.
- show()
-
Show the sheet.
- close()
-
Close the sheeet
Usage Example
//require <xataface/actions/Sheet.js>
// ...
function openSortDialog() {
var qStr = window.location.search;
if (qStr.indexOf('-action=') !== -1) {
qStr = qStr.replace(/-action=[^&]*/, '-action=mobile_sort_dialog');
} else {
qStr += '&-action=mobile_sort_dialog';
}
var sheet = new xataface.Sheet({
url : qStr
});
sheet.show();
}|
Tip
|
A simple way to open a link inside a sheet is to add the All positions supported by the |
Javascript Events
- xf-mobileenter
-
Triggered on the
windowobject when transitioning from "desktop" mode to "mobile" mode. See Responsive UI for more information about mobile mode.window.addEventListener('xf-mobileenter', function() { // Entering mobile mode }); - xf-mobileexit
-
Triggered on the
windowobject when transitioning from "mobile" mode to "desktop" mode. See Responsive UI for more information about mobile mode.window.addEventListener('xf-mobileexit', function() { // Exiting mobile mode }); - xf-viewport-changed
-
Triggered in mobile mode when the viewport area is changed. The viewport is considered the area below the mobile-header and mobile-footer blocks, which are positioned "fixed" at the top and bottom of the screen respectively. This event will allow you to reposition components whose position should depend on the size of the view port.
One example use of this event is the FAB button that needs to be positioned in the bottom-right corner of the viewport. The following Javascript code will reposition the FAB whenever the viewport size is changed.
function updatePosition() {
    var zoom = document.querySelector('.zoom');

    if (zoom) {
        var footer = document.querySelector('.mobile-footer');
        if (footer) {
            zoom.style.bottom = (footer.offsetHeight + 10) + "px";
        }
    }
}
window.addEventListener('xf-viewport-changed', updatePosition);
Appendix 4: URL Conventions
Xataface adheres to a few simple URL conventions for all of its actions. When you understand how Xataface URLs work you begin to get far more out of your applications. By specifying the appropriate query parameters to can jump directly to any point in your application, or produce a specific result set.
For example, the URL index.php?-table=people will take you to the people table (and since the default action for a Xataface application is list, it will take you to the list view.
You could be more explicit by specifying the action in the URL directly:
index.php?-table=people&-action=list
This would take you to the same screen. From this example, you see that you can specify such things as the table and action via GET parameters. Xataface accepts many more GET parameters also, as you’ll see in the next section.
Available GET Parameters
- -action
-
Specifies the action to perform. E.g. browse, list, find, edit, new, … etc.. Default value is "list".
Since 0.1
- -table
-
The name of the table to use as the context table. Defaults to the first table in the
[_tables]section of your conf.ini file.Since 0.1
- -skip
-
Skip a certain number of results in the current found set to display. E.g. If there are 100 records in the table and you want to start browsing from the 30th record, you would set
-skip=29.TipNot to be confused with the -cursorparameter which is used to specify which record to view in the "details" tab.Default value: 0
Since 0.1
- -limit
-
The maximum number of records in the found set to display. Default value: 30
Since 0.1
- -cursor
-
The index of the record in the current found set that is treated as the "current" record. This is used in the details tab to identify which record to act on. E.g. which record to view or edit. Default value is 0
Since 0.1
- -sort
-
A comma-delimited list of columns to sort the result set on. Optionally specify descending or descending by adding " asc" or " desc" to the column. E.g.
-sort=first_name+asc,height+desc. If no sort is specified, it will not sort the results.Since 0.1
- -relationship
-
If we are browsing related records, this specifies the name of the relationship.
Since 0.1
- -related:start
-
If we are browsing related records, this is the first record in the relationship to show. Defaults value: 0
Since 0.1
- -related:limit
-
If we are browsing related records, this is the number of records to show per page. Default value:30
Since 0.1
- -search
-
A keyword search term to filter the found set on. Any row containing any field that matches the query will be returned.
Since 0.1
- --no-query=1
-
A flag to indicate that xataface should not query the database by default. This flag is used in the new record form to prevent the form parameters from being interpreted as query parameters to search in the database. If you set this flag, it likely result in a message saying "No records found". Generally you would only use this in a custom action where you are not relying on Xataface’s default found set.
Since 1.3
There are many other GET parameters that are used in various contexts but the above parameters are available throughout the entire application.
Finding Records using the URL
Notice that all of the GET parameters mentioned in the previous section begin with a hyphen (i.e. '-'). This is a convention Xataface uses to distinguish directives from search queries. All parameters that do not begin with '-' are treated as a query to filter the found set.
For example, first_name=bob used as a GET parameter would cause the found set to be filtered so that only records where the first_name column contains the phrase "bob" are returned. Putting this all together, suppose we wanted to show the list tab for the people table, but only wanted to show the people with first names containing "bob":
index.php?-action=list&-table=people&first_name=bob
Exact, Range, and Pattern Matching
By default, queries on text columns look for partial matches. I.e. if you search for "bob" it will match "bob", "bobby", "rubob", and any other text that contains "bob". If you are only interested in finding records that match exactly "bob", then you can prepend an "=" to the query. E.g. first_name==bob, or the full URL:
index.php?-action=list&-table=people&first_name==bob
This should show the list tab for the people table with only records with first name exactly "bob".
There are a number of modifiers that you can prepend to your query to modify how it is executed. They are as follows:
| Prefix | Usage Example | Description |
|---|---|---|
> |
age=>10 |
Match records greater than search parameter. |
< |
age=<10 |
Match records less than search parameter. |
>= |
age=>=10 |
Match records greater than or equal to the search parameter. |
<= |
age=<=10 |
Match records less than or equal to the search parameter. |
.. |
age=10..20 |
Match records in a given range. |
= |
first_name==bob |
Match records that exactly match the search parameter (if there is no prefix then it will search for partial matches on text/varchar/char fields.). |
~ |
first_name=~a% |
Exact match, but you can include wildcards such as '%' and '?' in your search. |
!= |
first_name=!=bob |
Match records that do NOT match the search parameter. (Same as <>) |
<> |
first_name=<>bob |
Match records that do NOT match the search parameter. (Same as !=) |
Search Examples
Given the following data set:
| first_name | age |
|---|---|
Bob |
10 |
Cindy |
12 |
Julie |
6 |
Jake |
8 |
Kabob |
16 |
Here are some example queries on this data set and their results:
| Query | Matches |
|---|---|
age=>10 |
match records where age is greater than 10. This includes Cindy and Kabob. |
age=<10 |
match records where age is less than 10. This includes Julie and Jake |
age=>=10 |
match records where age is greater or equal to 10. This includes Bob, Cindy, and Kabob. |
age=<=10 |
match records where age is less than or equal to 10. This includes Bob, Julie, and Jake. |
age=8..10 |
match records where age is between 8 and 10. This includes Bob and Jake. |
first_name=bob |
Matches records where first_name contains "bob". This includes Bob and Kabob. |
first_name==bob |
Matches records where first_name is exactly "bob". This includes Bob only. |
first_name=~J% |
Matches records that begin with "J". This includes Jake and Julie |
Matching on Related Records
It is also possible to match records based on their related data (i.e. data that is not physically stored in the record itself, but in related records via a relationship). For example if we want to find authors who have written about a particular topic, we would normally have to first find all of the articles that contain a topic, and then cross-reference that result against the authors table. With Xataface we can perform this query directly from the authors table using something like the following query:
index.php?-table=authors&articles/title=sports
This assumes that the authors table has a relationship named articles that contains all of the articles that an author has written. So the above query returns precisely those authors who have written at least one article whose title field contains the phrase "sports".
Anatomy of a Related Query
%relationship%/%field%=%query%
This matches all records in the current table such that at least one record in its <relationship> relationship matches the query: %field%=%query%.
Using the "OR" Operator
Xataface allows you to search for more than one value at a time using the OR operator. E.g.
first_name=bob+OR+steve
Would match all records with first_name containing "bob" or "steve".
first_name=bob+OR+=steve
Would match all records with first_name containing "bob" or exactly matching "steve"
age=<10+OR+>20
Would match all records with age less than 10 or greater than 20.
Combining Multiple Queries in One Request
Xataface allows you to filter on more than one field at a time. If you combine multiple queries in the same request it has the effect of strengthening the filter, matching only those rows that match both queries. E.g.
age=>10&first_name=bob
would match all records where age is greater than 10 AND that have first_name containing "bob".
Examples of Combined Queries
Given the same data set as the previous set of examples:
| first_name | age |
|---|---|
Bob |
10 |
Cindy |
12 |
Julie |
6 |
Jake |
8 |
Kabob |
16 |
first_name=bob&age=11
would return no matches because there are no records that contain both first_name "bob" and age 11.
However
first_name=bob&age=10
would return only "Bob" and
first_name=bob&age=16
would return only "Kabob".
Special Common Queries
Search For Null or Blank Value
Searching for a null value or a blank value is an exact match for "". Therefore you can simply search for "=". E.g. To find records with a null or blank first_name you would use the query first_name==. Or the full query:
index.php?-table=people&first_name==
Search for Non-blank Value
Searching for a non-blank value is the same as searching for a value greater than "". Therefore you can simply search for ">". E.g. if you wanted to find records with a first_name, you would use the query "first_name=>". Or the full query:
index.php?-table=people&first_name=>
Preserved vs Non-preserved Parameters
As mentioned above any parameters that are prefixed by a hyphen (i.e. "=") are treated as directives rather than search filters. Hence if you want to use your own GET parameters you should always prefix them with a "-" to ensure that Xataface does not attempt to apply it as a search filter. In order to keep a consistent context for users, all browsing within the same table preserves both search queries and directives. Hence if you go to the URL:
index.php?-table=people&-action=list&first_name=bob
It will show you the list tab of the people table with only those records with first_name "bob". Now if you click on the details tab it will preserve your query "first_name". The query will become something like:
index.php?-table=people&-action=details&first_name=bob&…etc… more parameters
(Although the parameters may appear in a different order). This allows you to navigate forward and back to previous and next records and stay within the same found set. It also ensures that if you click on the list tab to return to the list view, it will retain your place in the list.
Note that navigating within the same table it will also preserve your directives. E.g. If you specify the "-limit" directive to show 100 records per page:
index.php?-table=people&-action=list&-limit=100
And then you click on the details tab, it will retain your "-limit" parameter. Of course the "-limit" parameter is not actually used by the details action because it works on only one record at a time (it uses the "-cursor" parameter instead), when you click back on the list tab it will still show you 100 records per page.
Because of this, we call the "-limit" parameter a preserved parameter. It is retained when navigating within the same table. Note: parameters are retained in the HTTP Query string, not in sessions or cookies. This ensures that there are no surprises when you enter a URL to your Xataface application.
Unpreserved Parameters
If you don’t want Xataface to preserve one of your parameters, you should prefix two hyphens to the parameter name. I.e. "--". One example of an unpreserved parameters throughout Xataface applications is the --msg parameter. The value of this parameter will be displayed on the page as an info message to the user. Clearly you don’t want this parameter preserved across requests, as you only want the user to see a message once. E.g.
index.php?--msg=Record+Successfully+saved
Would display the mesage "Record Successfully Saved" at the top of the page. If you click on any link in the application, it will not retain the --msg parameter so you will not see the message on subsequent requests.
This parameter is useful if you want to give feedback to the user about an action that has been carried out.
Summary
| Parameter Type | Prefix | Examples | Description |
|---|---|---|---|
Preserved |
|
|
Parameter value is preserved when user navigates away from the page (within the same table). |
Unpreserved Parameters |
|
|
Parameter is NOT retrained with the user navigates away from the page. |
Appendix: Performance
This section includes documentation for Xataface features related to performance tuning.
Scaler Module
The Scaler Module provides a flexible and robust caching solution that will allow your application to handle much heavier loads than usual. It uses the PHP Memcache extension to cache output in memory.
If you expect your application to receive heavy loads, then you should seriously consider using this module to help the application scale.
See the see the Scaler module README file for more information.
Output Cache
|
Important
|
The Scaler Module provides a superior caching solution to this output cache. See Scaler Module for more information. |
TLDR: Enable the output cache by adding the following to your conf.ini.php file.
[_output_cache]
enabled=1Xataface does quite a bit of heavy lifting on each page request. If your application is getting a lot of traffic that is slowing your server down, you may want to look at enabling the Xataface output cache.
Features
-
Improve speed of application dramatically - especially for seldom updated sites.
-
Supports multiple languages.
-
Supports multiple users (each user has own cache).
-
Provides GZIP compression for improved performance.
How it works?
When you receive a request, Xataface will return a cached version of the page if the page has been accessed before. If the page doesn’t yet exist in the cache it generates the page, saves it to the cache and outputs it to the user transparently. The cache is completely transparent to your users.
FAQ
Where is the cache stored?
Xataface creates a table called __output_cache that stores all of the cached content for your application. This table stores both a GZIPed and regular version of each page. If the user’s browser supports GZIP compression, Xataface will automatically return the GZIP version. This results in further performance improvements.
What if I make changes to the database?
Xataface records which tables were in use when a page is cached. If any of those tables are modified after the page is cached, Xataface will mark that cached page as out of date and regenerate it the next time that it is requested.
What if I make changes to my configuration files and templates?
The output cache will have to be manually cleared if you make any changes to your source files (e.g. PHP, templates, and INI files). Clearing the cache is as easy as deleting or emptying the __output_cache table.
How do I enable the Cache?
Add the following to your conf.ini file:
[_output_cache]
enabled=1How do I disable the Cache?
Simply comment out or remove the [_output_cache] section of your conf.ini file. E.g.
;[_output_cache]
; enabled=1Configuration Options
The following directives can be added to the [_output_cache] section of your conf.ini file to customize how your output cache works.
- lifeTime
-
Number of seconds before cached page is considered out of date.
Since 0.7
- tableName
-
The name of the table to store the cached pages. Default '__output_cache'.
Since 0.7
- ignoredTables
-
A comma-delimited list of tables that don’t affect the output cache (i.e. these tables can be changed without causing the output cache to be refreshed.
Since 0.7
- observedTables
-
A comma-delimited list of tables that should affect the status of the output cache for every page (whether the table is explicitly used by the page or not). This is a useful way to tell Xataface to refresh your cache.
Since 0.7
- exemptActions
-
A comma-delimited list of actions that are exempt from the output cache (and thus should not be cached).
Since 0.7
PHP Opcache
PHP 7 comes with shiny, new, built-in opcache that can drastically improve your performance. All you need to do is enable it in your php.ini file.
Simply activating the opcache on your server should reduce application latency noticeably.
|
Tip
|
You can enable your opcache by opening your php.ini file, and look for the following line: ;zend_extension=opcache.so Uncomment this line and restart your web server. See Where is my php.ini located? if you don’t know where your php.ini file is located. |
Getting More Out of Opcache
When you enable the opcache you will get a performance boost due to PHP being able to cache compiled versions your app’s PHP files in RAM. However, you can crank even more performance out of opcache by instructing Xataface to cache its configuration information in the opcache as well.
Add the following to the beginning of your app’s index.php file in order to enable the opcache for caching Xataface configuration:
define('XF_USE_OPCACHE', function_exists('opcache_reset'));Xataface will look for this XF_USE_OPCACHE constant and, if defined, and true, it will use the opcache to cache its configuration data.
|
Warning
|
If XF_USE_OPCACHE is defined and true, changes that you make to your PHP files, database structure, and configuration files may not be reflected until you clear your cache, or increment your application version in version.txt. **This includes disabling the XF_USE_OPCACHE directive because the PHP file may be cached in the opcache.
|
Refreshing the Opcache
If you make changes to your app’s PHP or INI files, or make changes to the database structure (e.g. adding or removing columns), then you will need to refresh the opcache for the changes to be picked up.
There are two ways to refresh the opcache:
-
Use the
clear_cacheaction. E.g.index.php?-action=clear_cache, when logged in as someone with the "manage" permission. You can also access this action in the "Control Panel". -
Increment the version number in your version.txt file.